| 3/10/10
- After
a rather long break of 12 months, I am finally in a position to continue on
my layout. Our 14th Convention was a great success and all paperwork is
done. Those who are familiar with my layout know, that I lost my best
worker and inspector, Percy on March 23, 2009. So, I have no choice as I
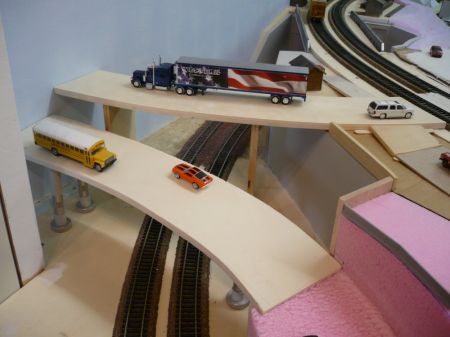
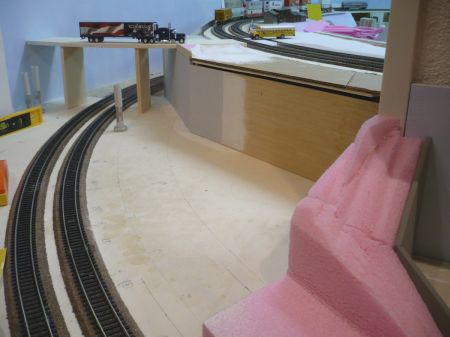
have to work hard all alone without my best friend. Well, that's life. On the left side of Percyville (my desert town got a name) I do have a conflict with my street connections of lower und upper level. The easiest solution would be just a grade crossing of main street to the left. My second idea was to make an off ramp off main street to the upper level. As of having 16 cm height difference, the ramp would be approx. 160 cm long and would cover the buildings (of West Coast Customs and High Desert Cadillac) on the left side of Percyville. So, my next idea would be a seperate, lower bridge over the main tracks with a left curve. Therefore, the ramp can be shorter as we are talking about 9 to 10 cm height. I made several cardboard segments to get an idea how it will be looking. At the end, I took a piece of styrofoam to build the ramp. It does not have the final size at the moment. |
|
 |
 |
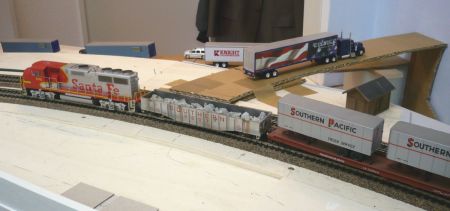
| 3/10/10 Connection from Percyville to the upper level - 606 | This would be a logical street connection - 607 |
 |
 |
| 3/10/10 The ramp would cover the West Coast Customes building - 608 | Even the 2nd building (High Desert Cadillac) would be covered - 609 |
 |
 |
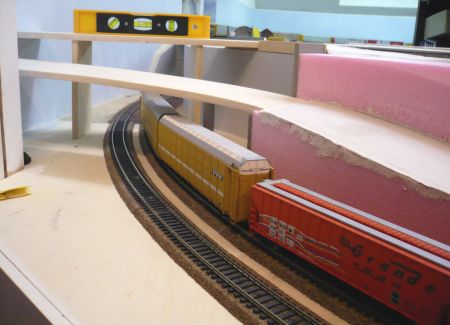
| 3/10/10 With a seperate, lower bridge, the ramp will be shorter - 610 | The visibility of WCC is much better - 611 |
 |
 |
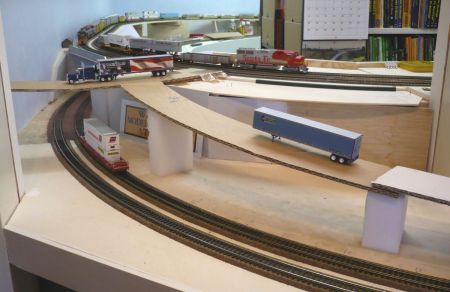
| 3/10/10 As seen from my point of view, the lower bridge is better - 612 | Just imagine that both streets/bridges will meet further to the left - 613 |
 |
 |
| 3/10/10 We will have 3 levels (tracks, and 2 streets) that way - 614 | Of course, there will be no sharp bend between bridge and ramp - 615 |
 |
 |
| 3/10/10 How it might look one day - 616 | As seen from the upper level - 617 |
 |
 |
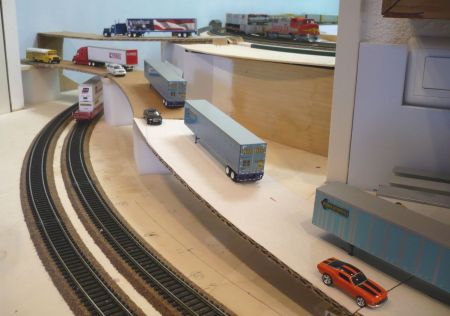
| 3/10/10 Here is another view from above - 618 | These bridges will be unique as both are curved - 619 |
 |
 |
| 3/10/10 I was trying to take photos from different angles - 620 | The upper bridge has a right curve - 621 |
 |
 |
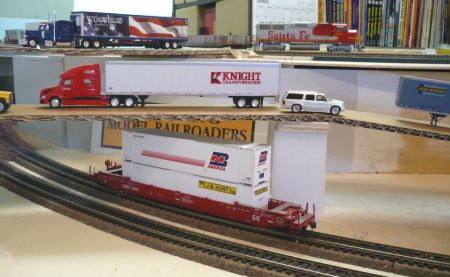
| 3/10/10 Similar to the photo above but further away - 622 | The main tracks will get a grade crossing to the upper bridge - 623 |
 |
 |
| 3/10/10 Next step is a piece of styrofoam - 624 | The styro has to be cut further to the back for clearance - 625 |
 |
 |
| 3/10/10 The styro is still too high and will be cut down - 626 | On top could be a small building (business) - 627 |
| 10/18/10
- After another long break of 7 months, the time has come to continue on
my layout. The main delay was because of our trip to California in May/June
which resulted in more than 3000 photos of Cajon Pass. At the moment
approx. 1000 photos are online - take a look: click
here. I am proceeding with the streets and bridges as you can see on the following 22 photos. |
|
 |
 |
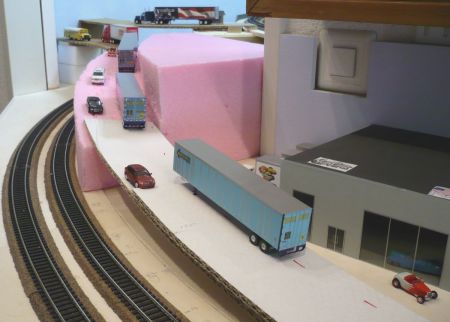
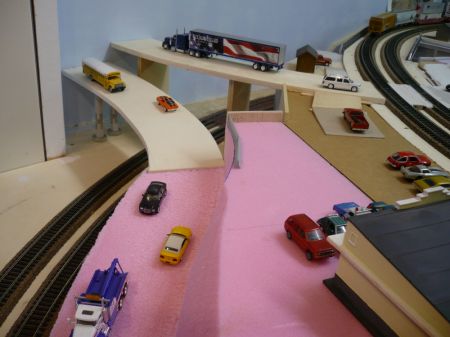
| 10/18/10 "Pink Panther" Styro was used to make the ramp of . . . - 628 | . . . main street. West Coast Customs HQ at right - 629 |
 |
 |
| 10/18/10 Next step will be plaster over the styro - 630 | 10/18/10 A little shop is on top and can be reached from the upper bridge - 631 |
 |
 |
| 10/18/10 The bridges are made out of plywood (10 mm) - 632 | 10/18/10 View from above - 633 |
 |
 |
| 10/18/10 The surface of the wood bridges will be painted gray . . - 634 | . . . and just as is being the road surface - 635 |
 |
 |
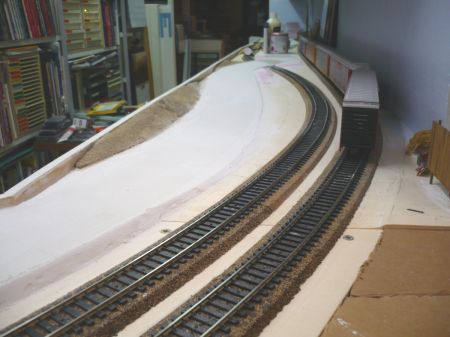
| 10/18/10 View from track level - 636 | 10/18/10 The lower bridge has a grade continued from the ramp - 637 |
 |
 |
| 10/18/10 There will be "concrete" walls to cover the styro - 638 | 10/18/10 Looking toward Percyville - 639 |
 |
 |
| 10/18/10 On this corner, we are having 3 diff. levels - 640 | 10/18/10 After the RR-X-ing, the steet is going in 2 diff. directions - 641 |
 |
 |
| 10/18/10 To cover hight diff., I used wood and card board . . . - 642 | . . . which will be covered with plaster - 643 |
 |
 |
| 10/18/10 On my layout, we do have not only the tracks, but also . . - 644 | . . . lots of streets (roads and highways) - 645 |
 |
 |
| 10/18/10 Still a long way to go until this part will be finished - 646 | 10/18/10 Plaster and paint for the streets and ballast for the tracks - 647 |
 |
 |
| 10/18/10 Of course, the road is continued from the bridge area - 648 | 10/18/10 To get a smooth X-ing, the roadbed has to be elevated - 649 |
| 10/21/10 Street building continues and I am trying to take lots of photos to show step by step how things are done and changing during the construction. For those who do not want to see all these details, just scroll further down! | |
 |
 |
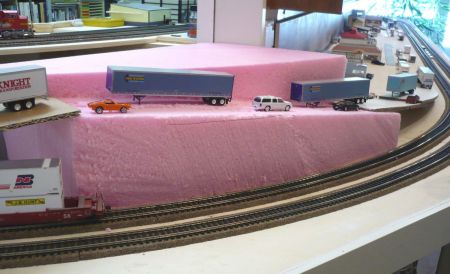
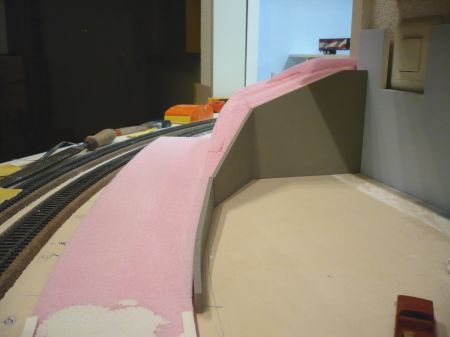
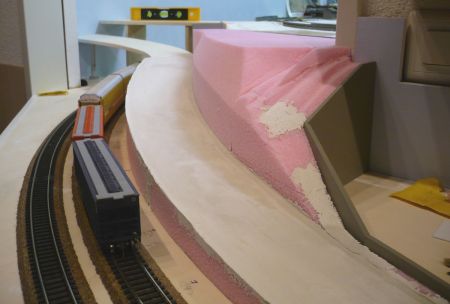
| 10/21/10 The retaining walls for West Coast Customs are in place - 650 | 10/21/10 The pink styro block was removed for final shaping - 651 |
 |
 |
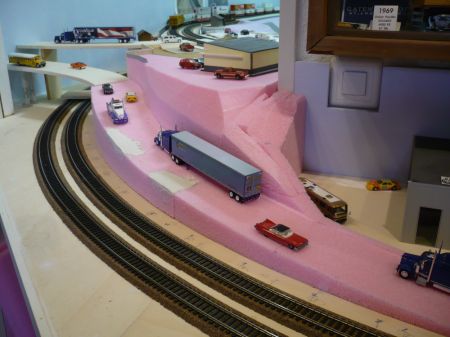
| 10/21/10 How empty this corner is looking w/o the styro unit - 652 | 10/21/10 Here we go - the styro ramp has been glued in place - 653 |
 |
 |
| 10/21/10 The left end of the styro is covered with concrete walls - 654 | 10/21/10 The lower bridge is fitting on the styro ramp - 655 |
 |
 |
| 10/21/10 The lower bridge is having a continues grade of the street - 656 | 10/21/10 Reday for putting plaster - 657 |
 |
 |
| 10/21/10 On the upper street, the first part is covered with plaster - 658 | 10/21/10 Left w/o plaster and right w/plaster applied - 659 |
| 10/22/10 Another day and work continues. I am using the Woodland Scenic (WS) Road System Paving Tape (ST1455) on both sides of the street roadbed. To fill the space between the paving tape I use WS Road System Smooth-it (ST1452). After the first layer has set, I put another thin layoer over it and let it try. Afterwards, the paving tape will be removed and the gap is filled with plaster. The whole street will be sanded to get a smooth surface. | |
 |
 |
| 10/22/10 Here, the upper street is starting toward upper street bridge - 660 | 10/22/10 Paving tape is ready for adding the plaster (at the rear) - 661 |
 |
 |
| 10/22/10 Fresh plaster between the paving tape - 662 | 10/22/10 Second (thin) layer will be applied - 663 |
 |
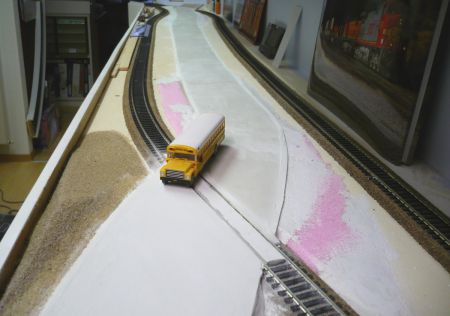 |
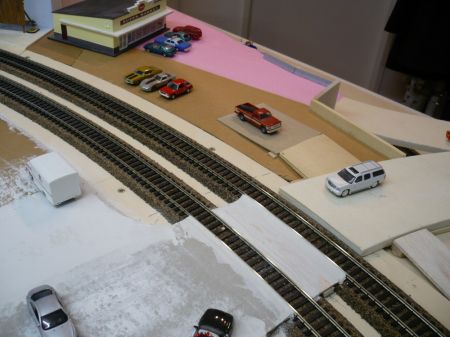
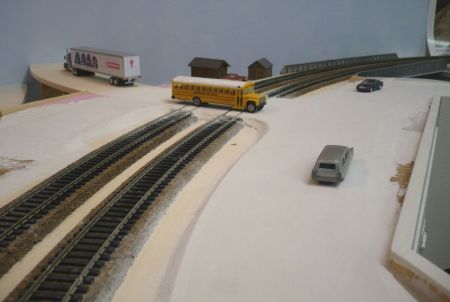
| 10/22/10 School Bus on top of single track RR X-ing - 664 | 10/22/10 Whole new part of the upper street - 665 |
 |
 |
| 10/22/10 The part with the truck has already been sanded - 666 | 10/22/10 Looking toward double track RR X-ing and upper bridge - 667 |
 |
 |
| 10/22/10 The plaster will be level to the lower bridge - 668 | 10/22/10 The whole ramp and main street got the plaster surface - 669 |
 |
 |
| 10/22/10 The grade of the ramp is approx. 10 % - 670 | 10/22/10 The WCC building is currently not in place - 671 |
| 10/26/10 The upper street got plaster all over and was sanded down to get a more or less smooth pavement. Once again, I made too many photos from both sides to show how it looks after every step. But the construction continued downhill to the right and shows the lower level double RR X-ing. | |
 |
 |
| 10/26/10 The whole street section from the beginning . . - 672 | 10/26/10 . . to the double RR-X-ing has been sanded - 673 |
 |
 |
| 10/26/10 Both single track RR X-ings are carefully sanded . . - 674 | 10/26/10 . . down to track level - 675 |
 |
 |
| 10/26/10 Next step will be painting of the street surface - 676 | 10/26/10 diff. views of the upper street - 677 |
 |
 |
| 10/26/10 Actually, this part of the street (incl. tracks) is having a . . - 678 | 10/26/10 . . steady grade of 1,5 % from the beginning to the top - 679 |
 |
 |
| 10/26/10 Double RR X-ing of the upper street - 680 | 10/26/10 Even the upper bridge will be removable for easy access - 681 |
 |
 |
| 10/26/10 Now, the downhill street got also plaster - 682 | 10/26/10 In the distance, Highway 138 goes to the left - 683 |
 |
 |
| 10/26/10 Get a closer look to the intersection of Hwy 138 - 684 | 10/26/10 Cardboard is very helpful to make the different street levels - 685 |
 |
 |
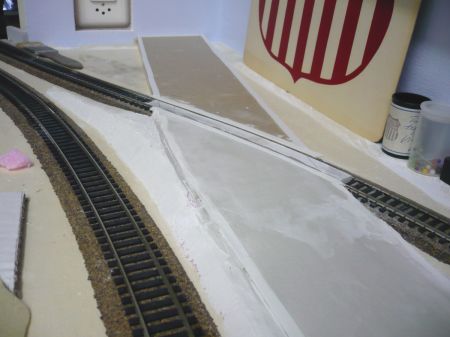
| 10/26/10 In the middle, we are having exact track level for the X-ing - 686 | 10/26/10 To get a smooth transition from ground level to track level . . - 687 |
 |
 |
| 10/26/10 . . I was using diff, layers of cardboard - 688 | 10/26/10 Height difference between ground and track level is 10 mm - 689 |
 |
 |
| 10/26/10 Ready for the paving tape and plaster - 690 | 10/26/10 The grade on this side is approx. 10 % - 691 |
| 10/29/10 Again, lots of photos from the same street but with painted ground surface. Therefore, we can see the street much better. | |
 |
 |
| 10/29/10 Compare this photo with No. 660 and 672 . . - 692 | 10/29/10 . . and this one with No. 662 and 673 . . - 693 |
 |
 |
| 10/29/10 . . how about No. 664 and 674 . . - 694 | 10/29/10 . . check No. 645 and 675 - 695 |
 |
 |
| 10/29/10 It really looks different and gives us an idea . . - 696 | 10/29/10 . . how it will look one day - 697 |
 |
 |
| 10/29/10 Our small super market is back in business - 698 | 10/29/10 The ramp gives easy acces to the super market - 699 |
 |
 |
| 10/29/10 RR bridge, tunnel and downhill street - 700 | 10/29/10 a much more realistic look - 701 |
 |
 |
| 10/29/10 The road is with plaster and already sanded - 702 | 10/29/10 The RR X-ing is finished - 703 |
 |
 |
| 10/29/10 Looking uphill toward super market - 704 | 10/29/10 Hwy 138 will be built at a later date - 705 |
 |
 |
| 10/29/10 Our super market as seen from the outside - 706 | 10/29/10 No retaining walls so far (future project) - 707 |
 |
 |
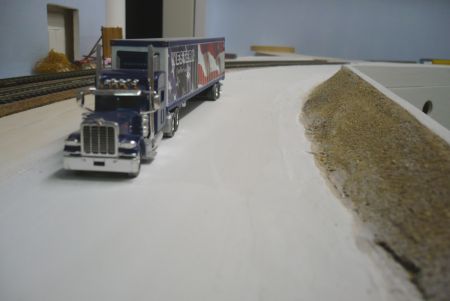
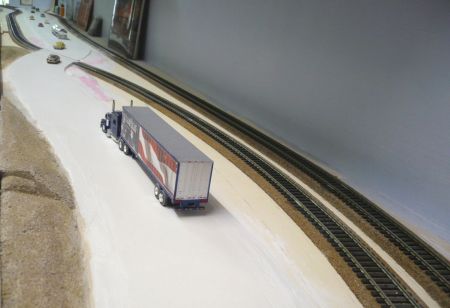
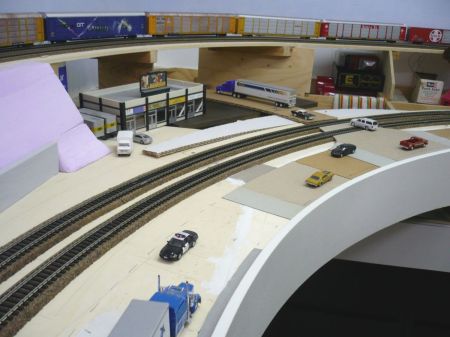
| 10/29/10 Looking toward Peryville - 708 | 10/29/10 We finally got an interesting part with 2 street bridges - 709 |
 |
 |
| 10/29/10 West Coast Customs building back in place - 710 | 10/29/10 There will be railings for protection on top - 711 |
 |
 |
| 10/29/10 Overview with streets and bridges - 712 | 10/29/10 Now, the whole street system makes sense - 713 |
