|
|
TRAINMASTER
BY WERNER MEER US-RAILROAD-SHOP KILCHBERG |
|
|
|
TRAINMASTER
BY WERNER MEER US-RAILROAD-SHOP KILCHBERG |
|
updated: September 21, 2020: Part 7
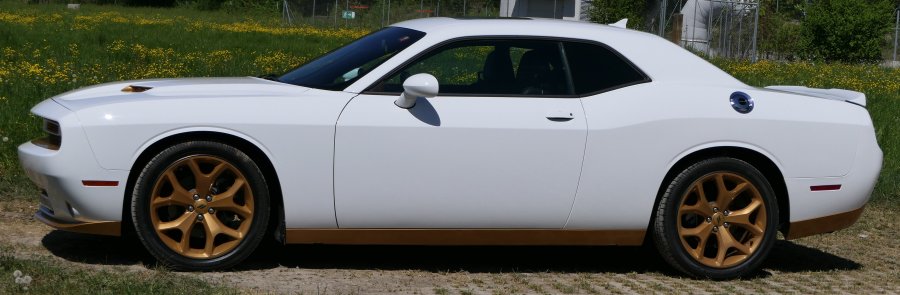
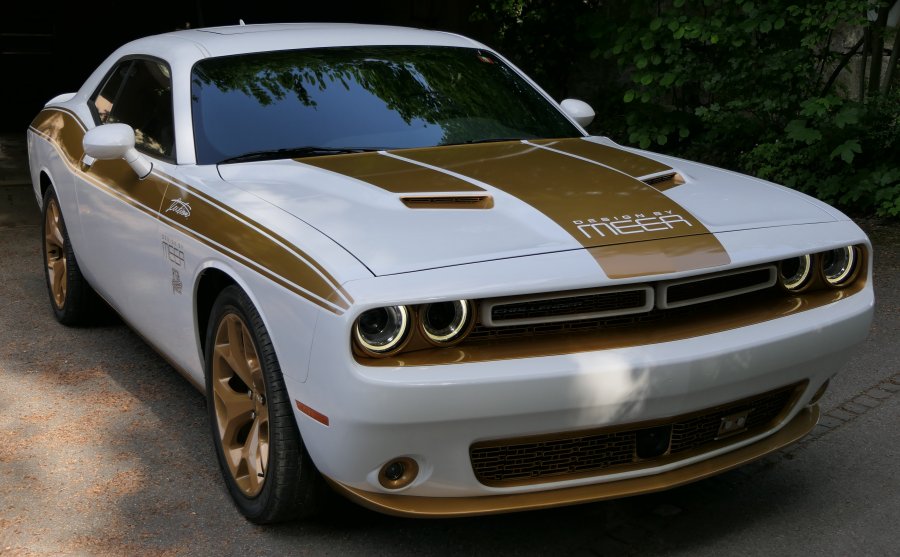
| Dodge Challenger SXT Plus 2018 |
|
|
|
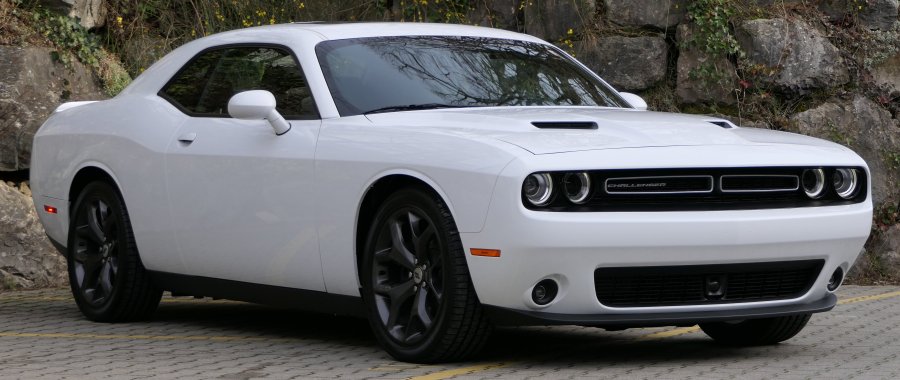
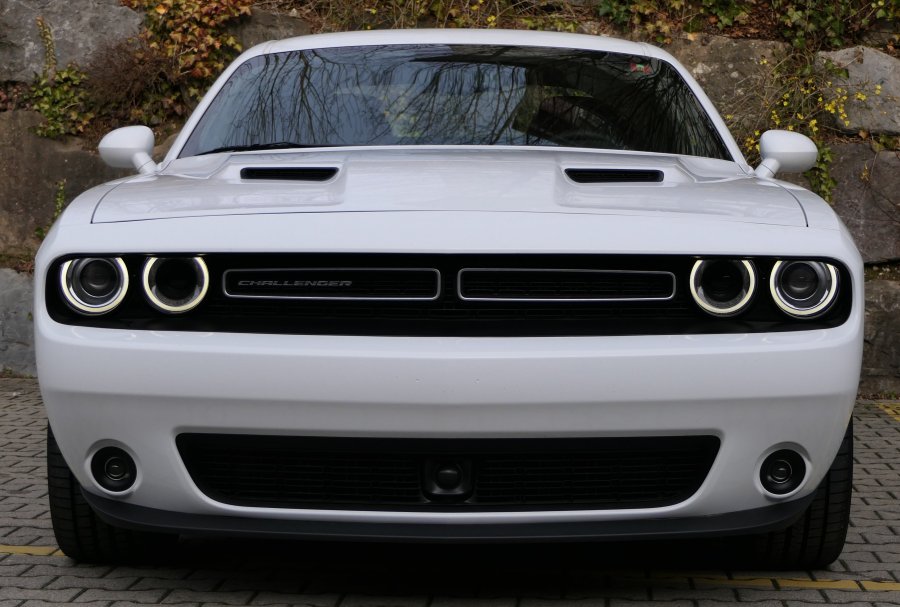
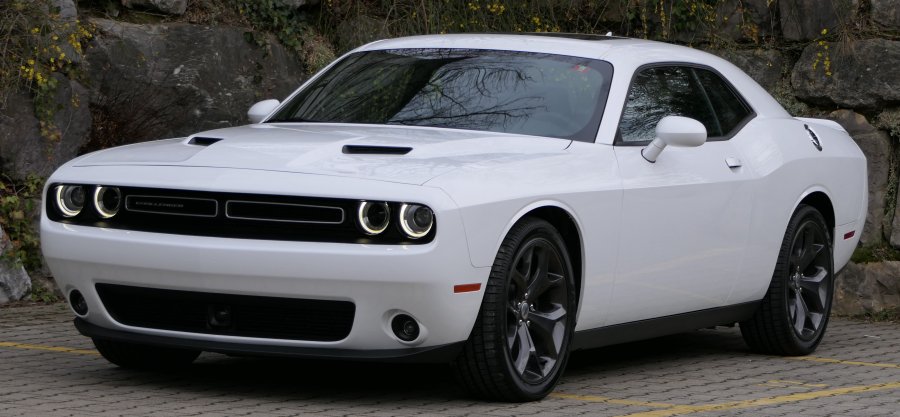
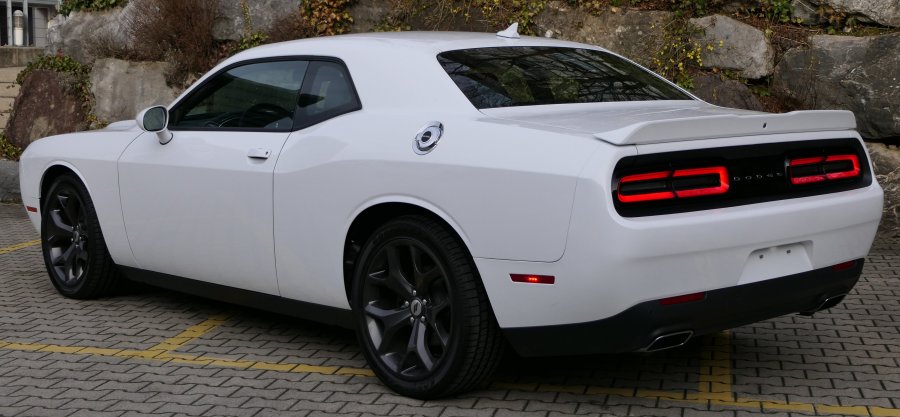
January 28, 2020: Part 1 - New Vehicle as delivered from the factory |
|
March 31, 2020: Part 2 - the making of - golden painted front and rear end and lower parts on both sides |
|
April 22, 2020: Part 3 - Wheels have been powder coated in gold |
|
May 5, 2020: Part 4 - the making of - car wrapping with golden stripes |
|
May 8, 2020: Part 5 - Exterior is finally finished with car wrapping |
|
August 30, 2020: Part 6 - Interior got a beige touch with the help of Katzkin and Hof Sattlerei |
|
September 21, 2020: Part 7 - New Exterior photos taken from above (scroll all the way down) |
Part 1: New Vehicle as delivered from the factory (Exterior)
| "the making of" a 2018 Challenger SXT Plus |
| Here we are going to show how a factory new vehicle will be customized to get a "one of a kind" look. |
 |
 |
 |
 |
 |
 |
 |
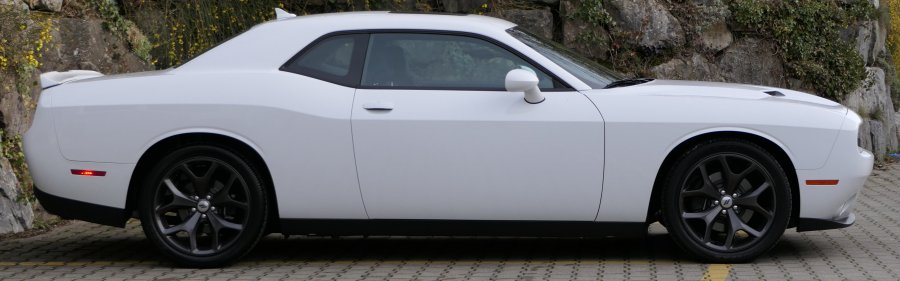 |
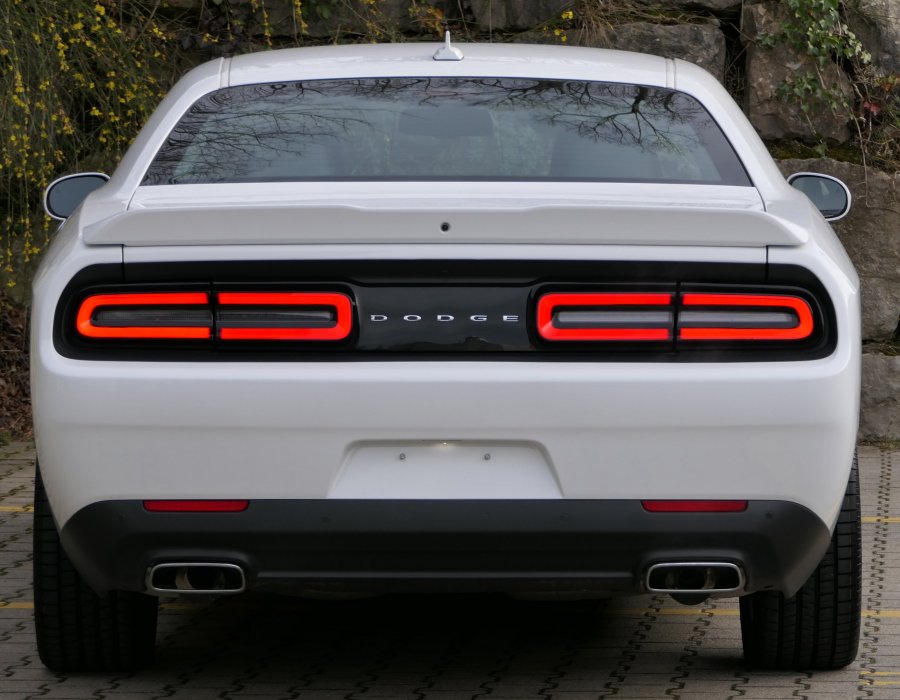
| last photo of factory new vehicle (it will never look like this anymore) |
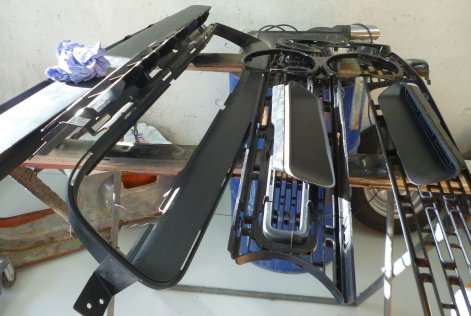
Part 2: the making of golden painted front and rear end and lower parts on both sides
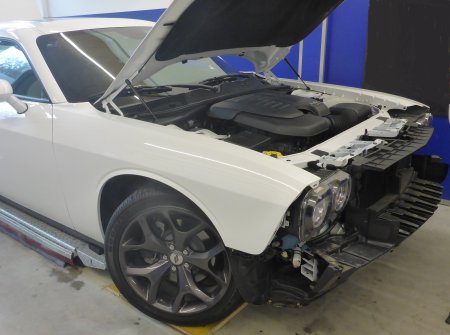
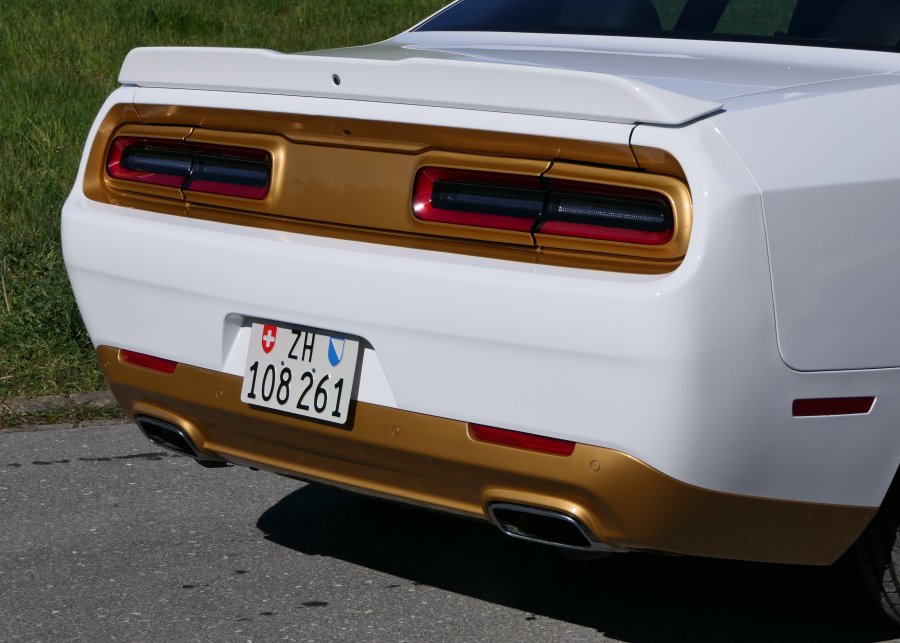
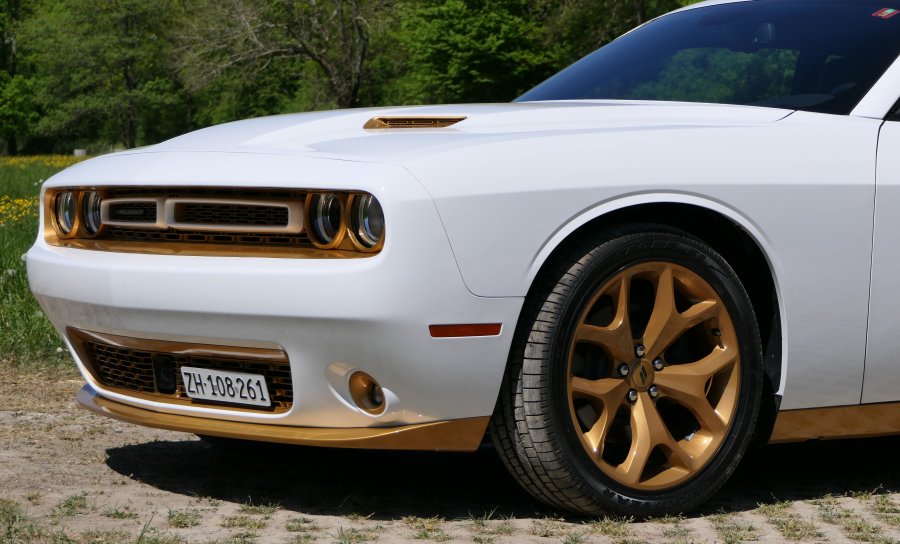
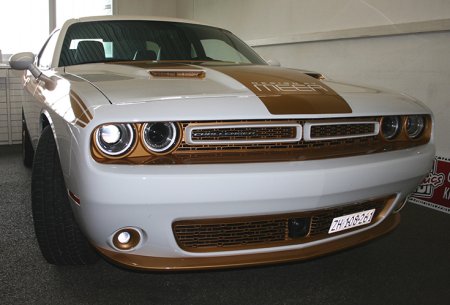
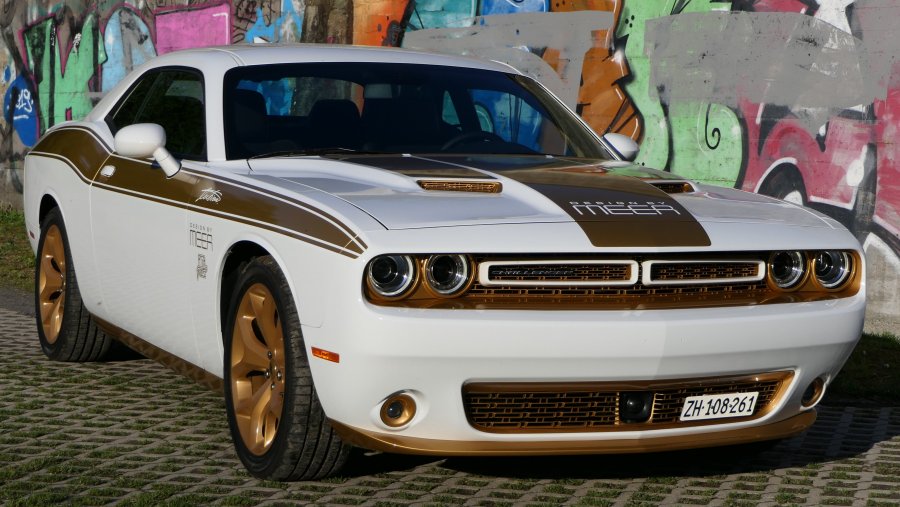
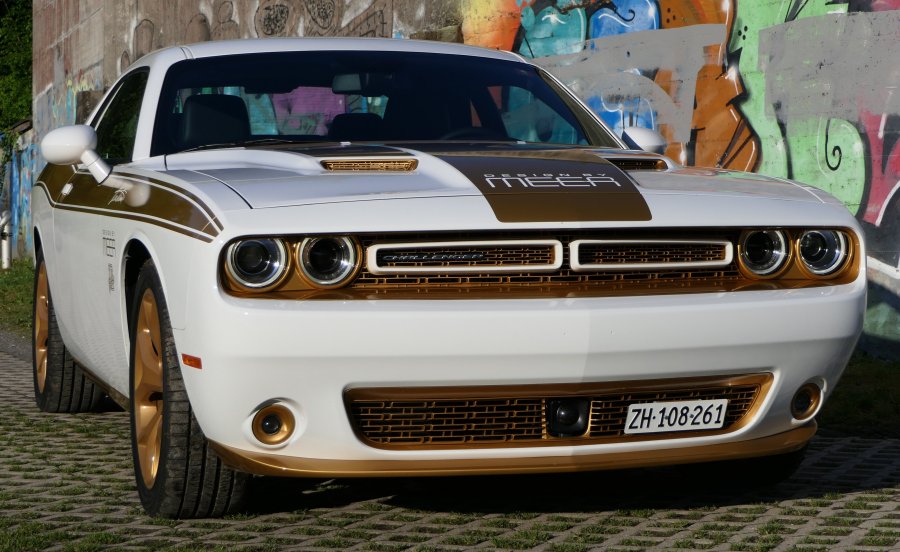
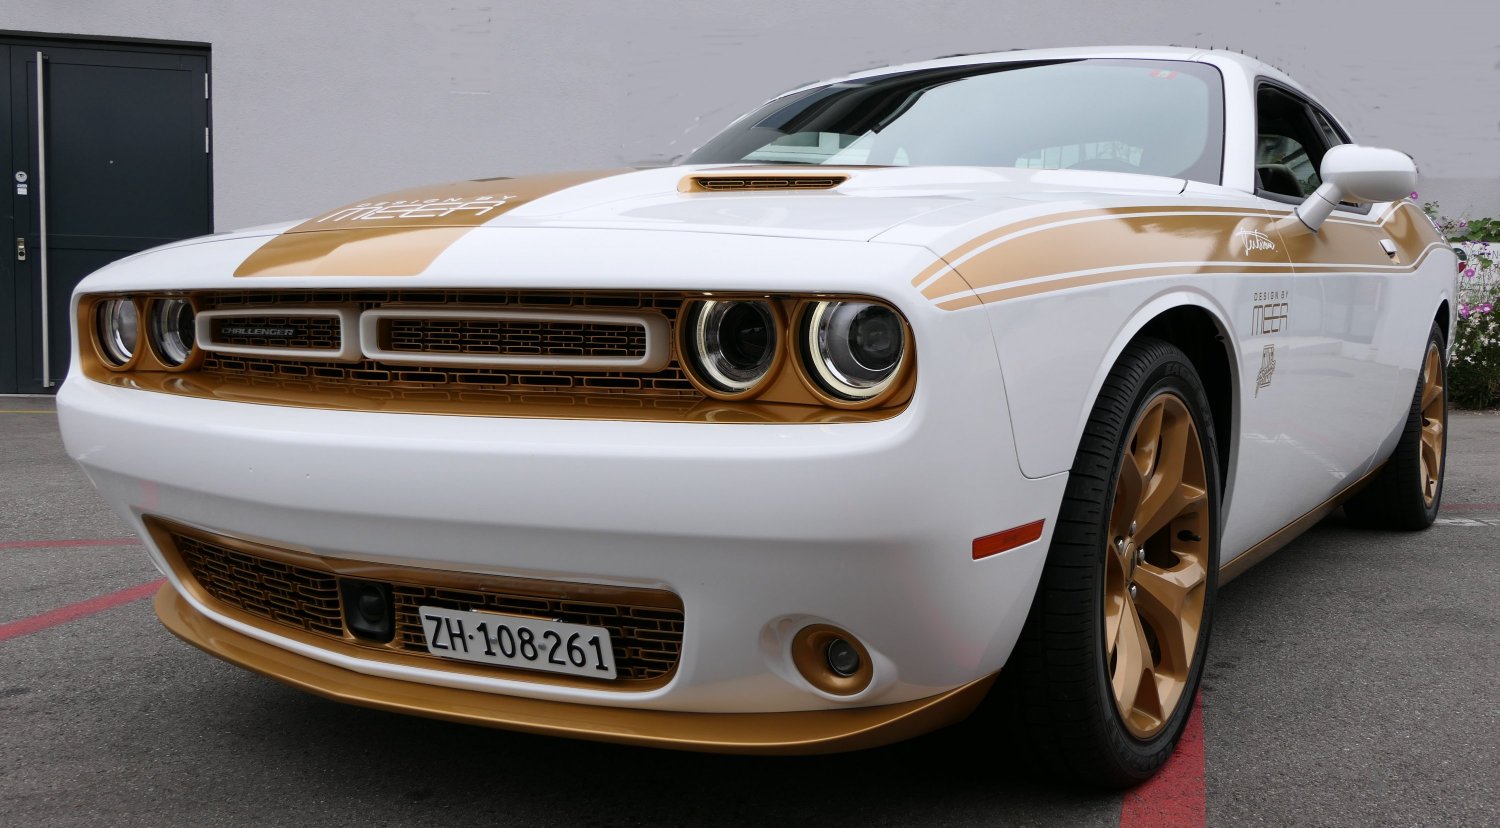
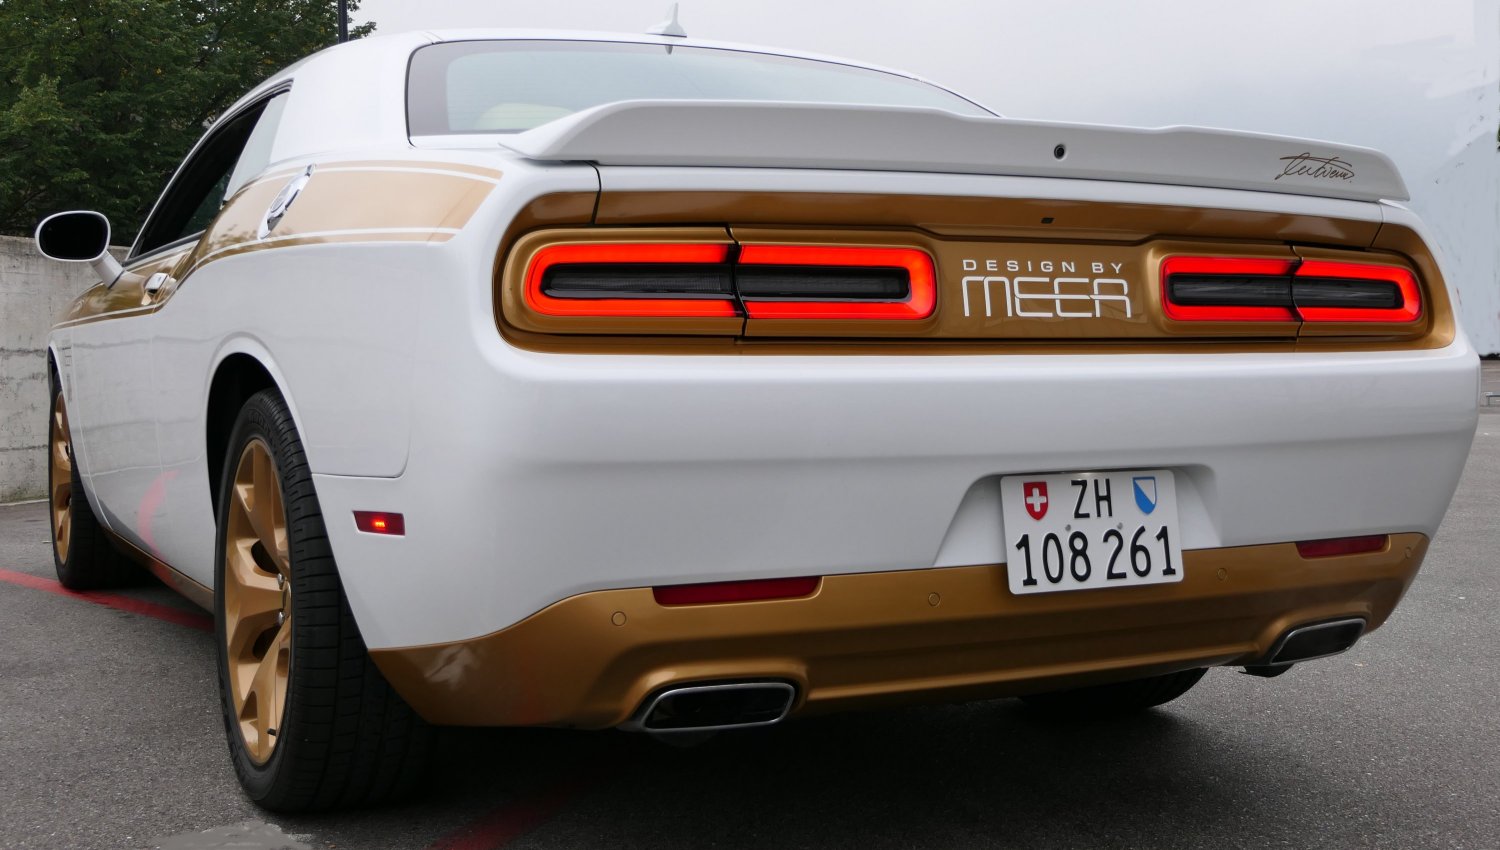
| All black plastic parts will be painted in gold color including both front grills, air intakes on the hood, rear end around taillights, lower rear end, lower parts around the whole vehicle. |
|
disassembling and remounting of former black parts (front
end and rear end) by
Zimmerberg Garage, 8800 Thalwil: www.zimmerberg-garage.ch (photos with a star * are copyright by Zimmerberg Garage) |
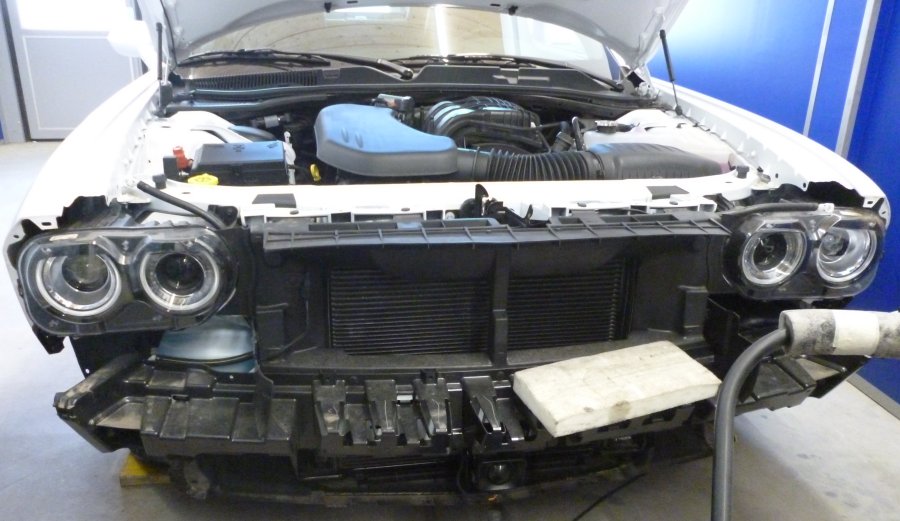 |
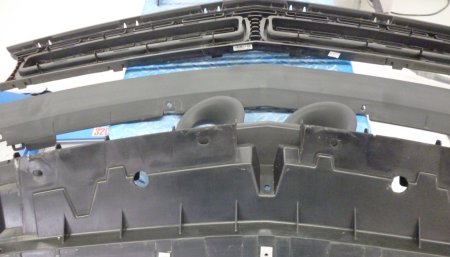
| the whole front end has been removed |
 |
| front end without both grills |
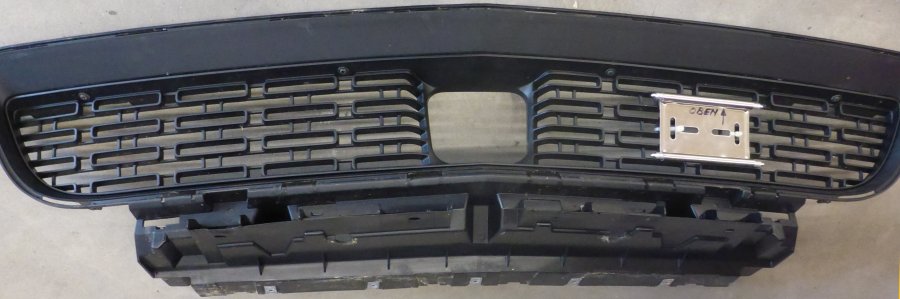 |
| lower grill (which fits in the opening above) * |
 |
| front spoiler and frame for upper grill * |
 |
| front end rear end from a different angle * |
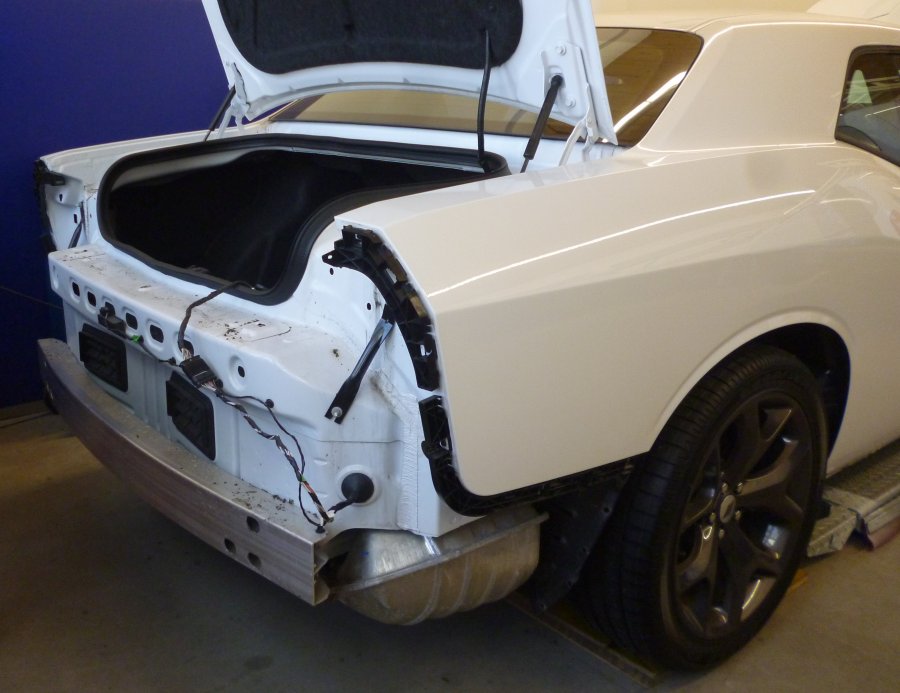 |
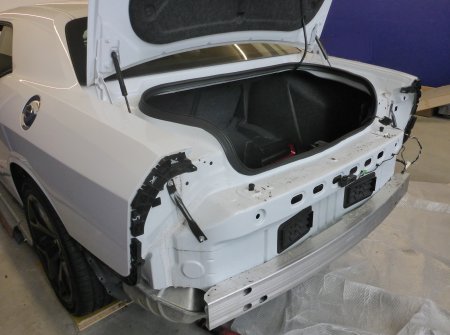
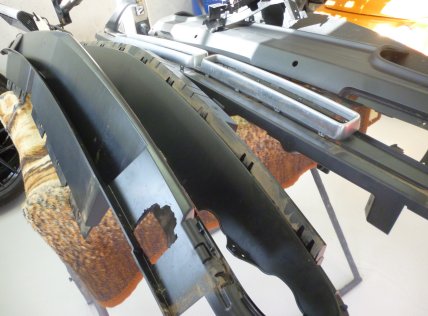
| the whole rear end has been removed |
 |
| rear end without taillights and lower cover |
| gold painting by Autospritzwerk De Filippis, 8802 Kilchberg: https://www.autospritzwerkdefilippis.com/ |
 |
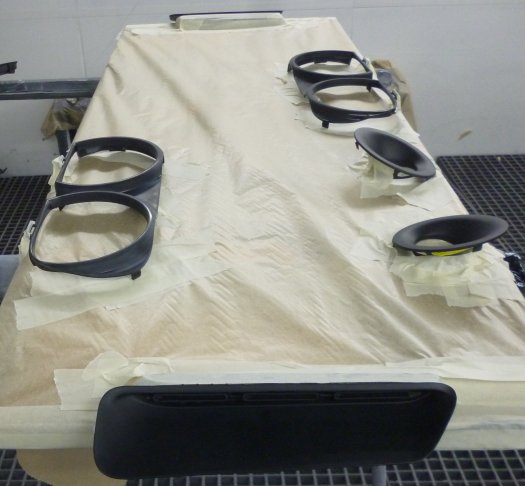
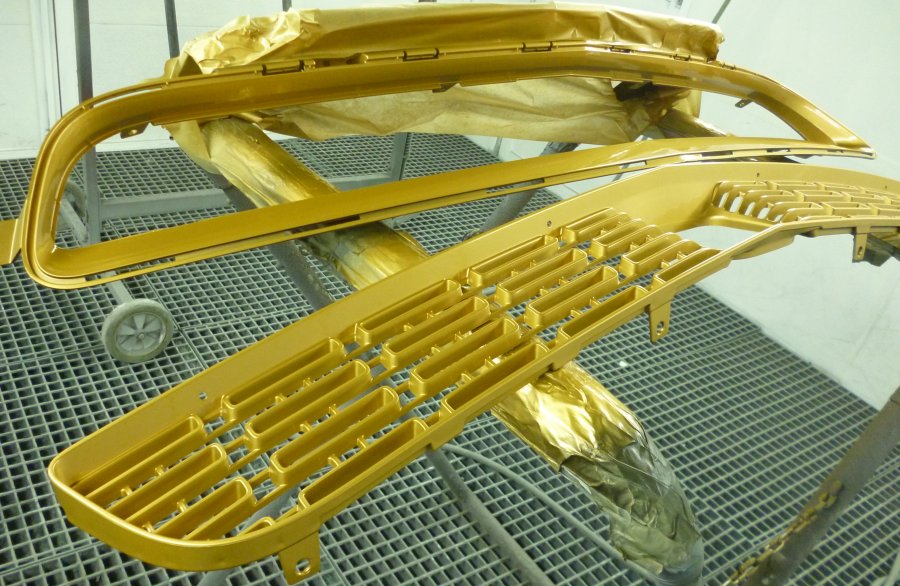
| front end and rear end black plastic parts to be painted in gold color |
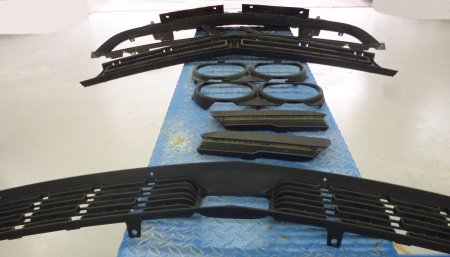 |
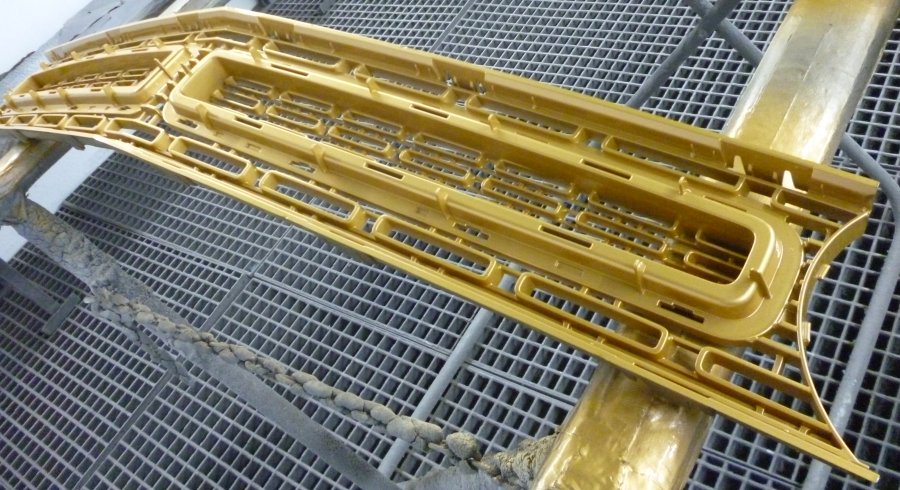
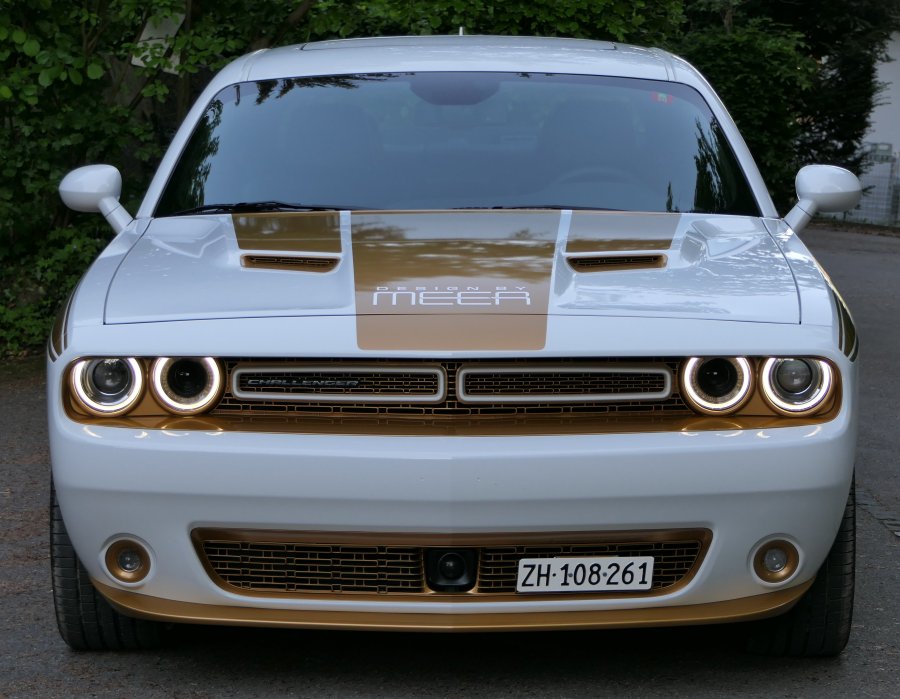
| both front grills, lamp rings, air intakes and upper grill frame will be painted first |
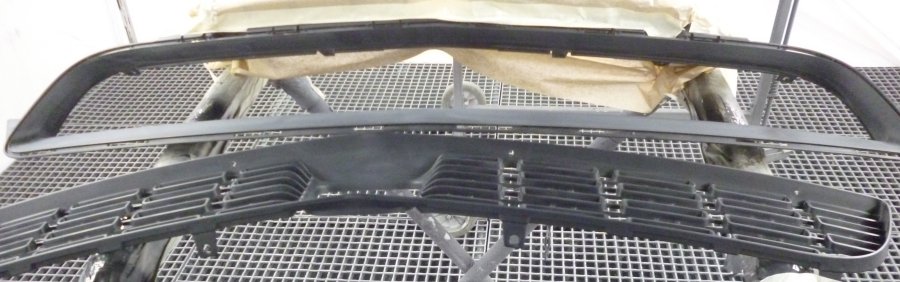 |
| everything ready for the primer |
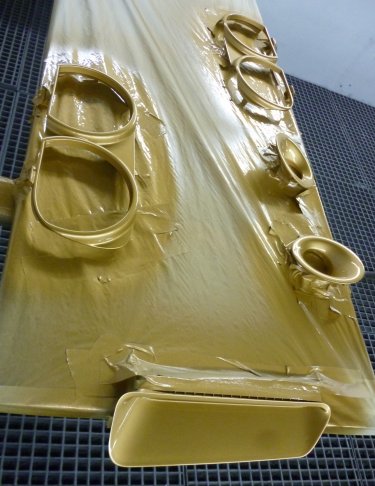 |
| headlight rings, turn signal light rings, air intake - before and after |
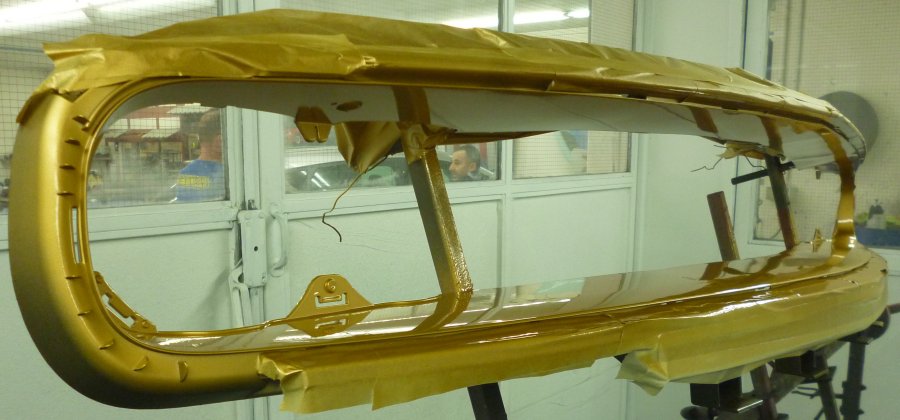 |
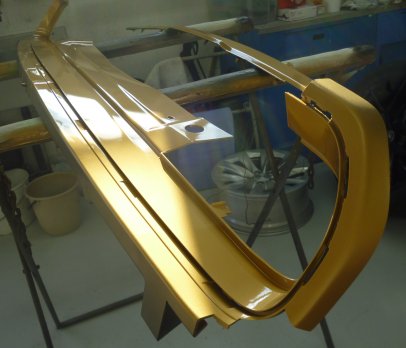
| frame for upper grill w/headlights |
 |
| insert upper grill |
 |
| frame for lower grill and matching grill |
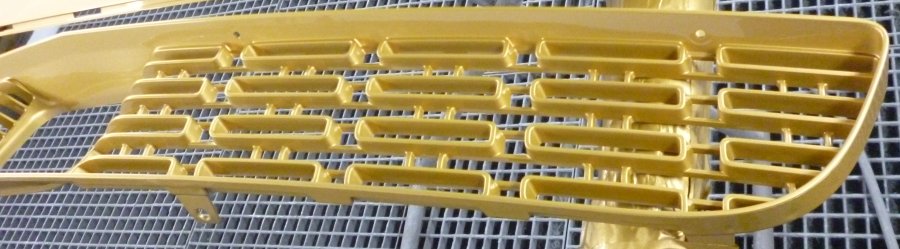 |
| close up lower grill |
 |
| left: frame for taillights / right: motor cover (inside hood) |
 |
| taillights center piece (mounted on trunck cover) - before * |
 |
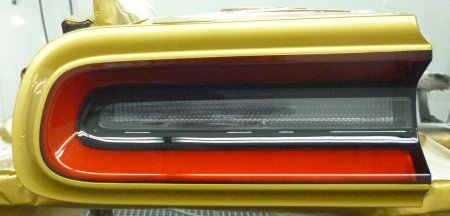
| taillights center piece (mounted on trunck cover) - after |
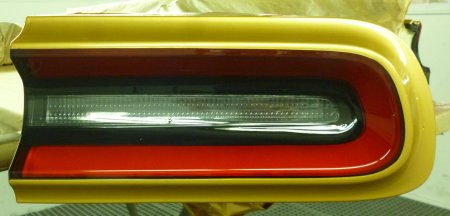 |
| left and right taillight mounted on rear of trunck |
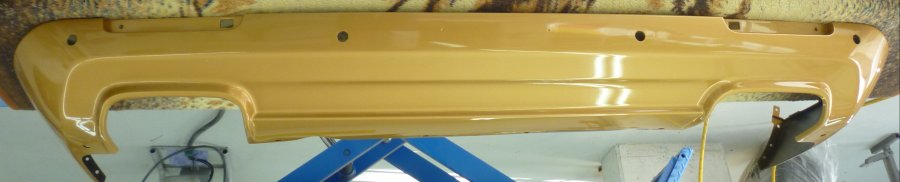 |
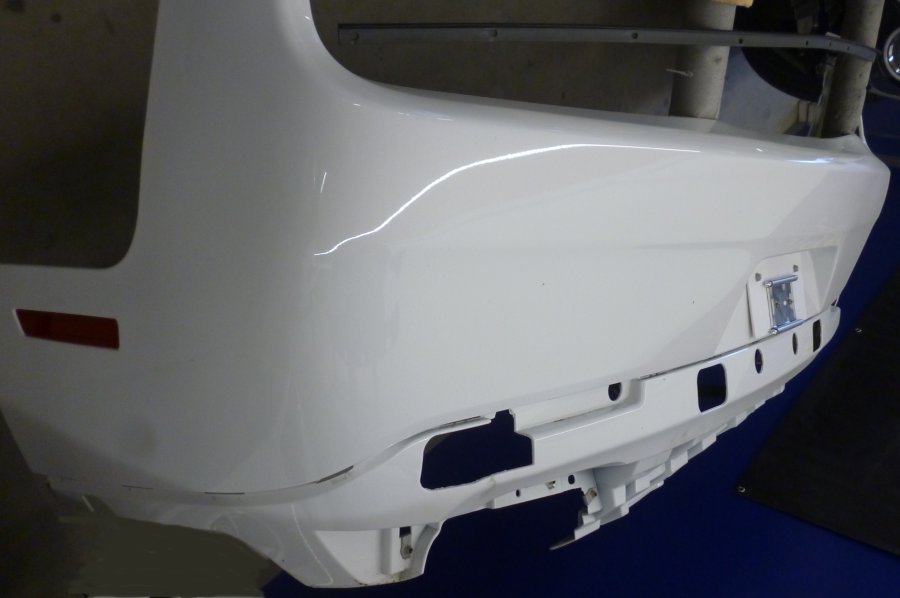
| rear end lower part with openenings for exhaust and round sensors holes |
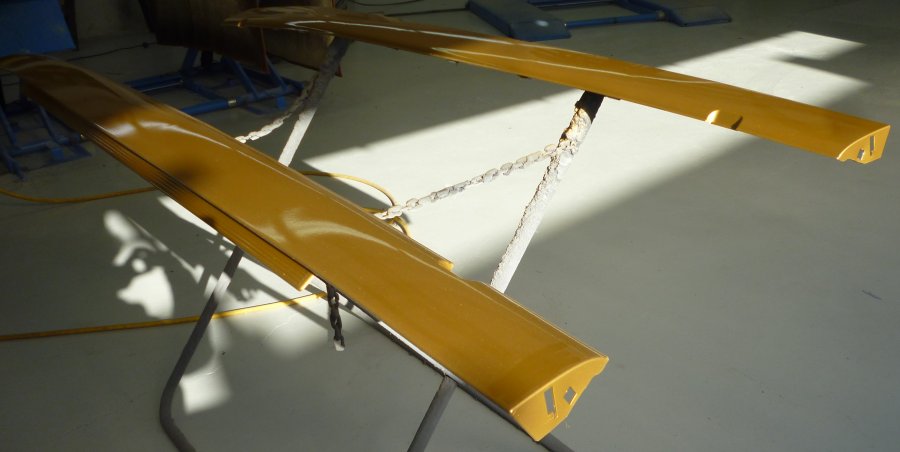 |
| lower side cover (both sides between wheels) |
Part 2A: arrival of vehicle with golden painted parts (March 30, 2020)
|
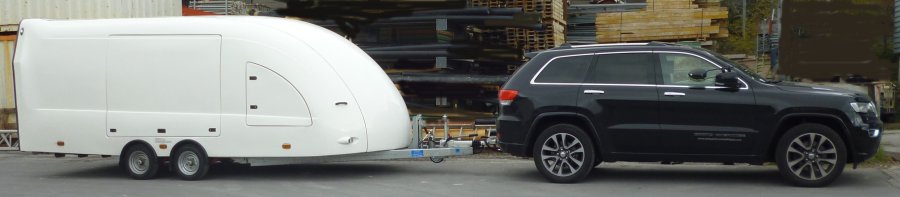
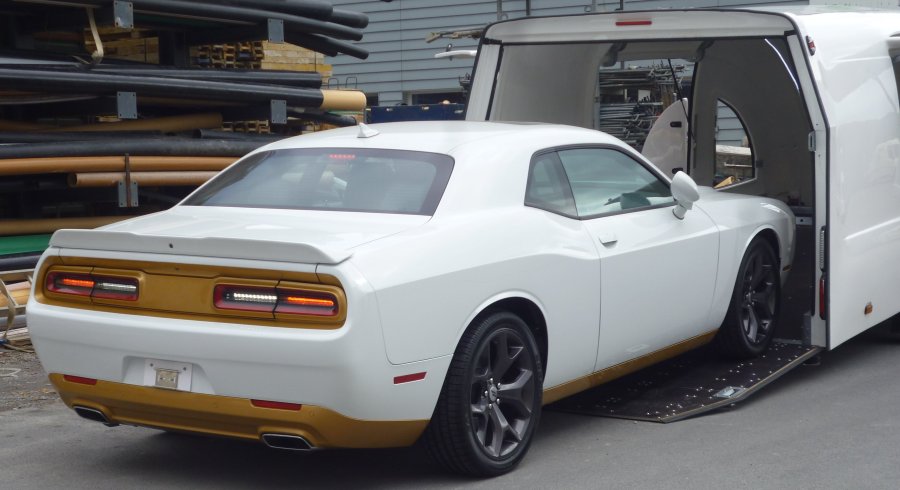
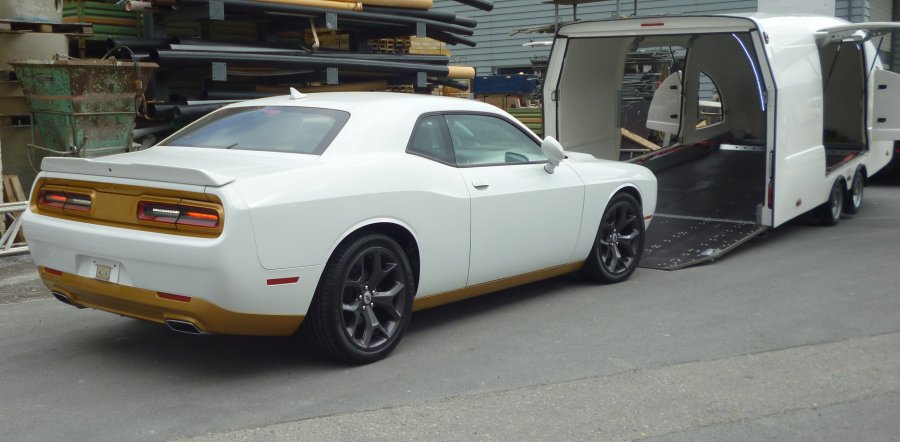
Professional delivery
with Jeep Grand Jerokee and special closed trailer as seen on TV "Overhauling"
Foose Design or Gas Monkey Garage. But as we are in Switzerland, our first
class painter De Filippis is offering these services. (for your care transportion needs click here: https://www.autospritzwerkdefilippis.com/ ) |
 |
 |
 |
| this is the "mystery" trailer with the big surprise inside !! |
 |
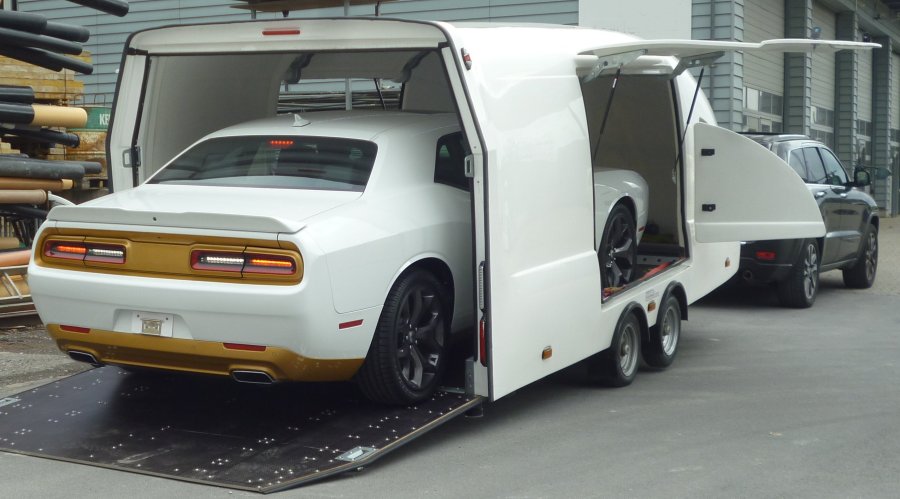
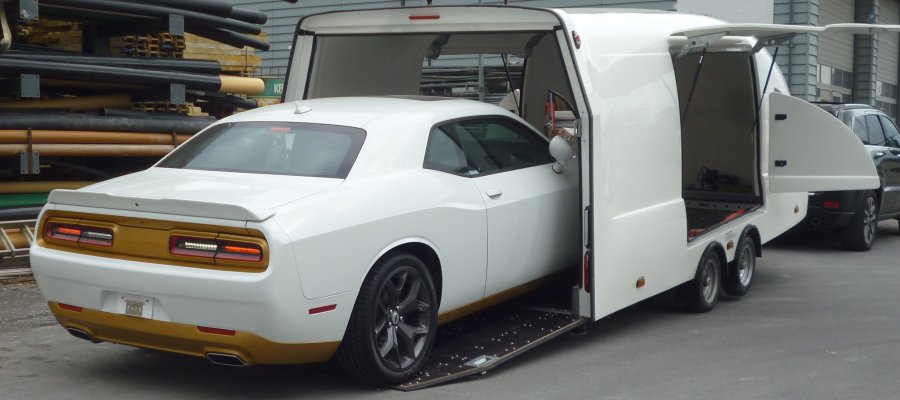
| trailer with open wing side door (right side) |
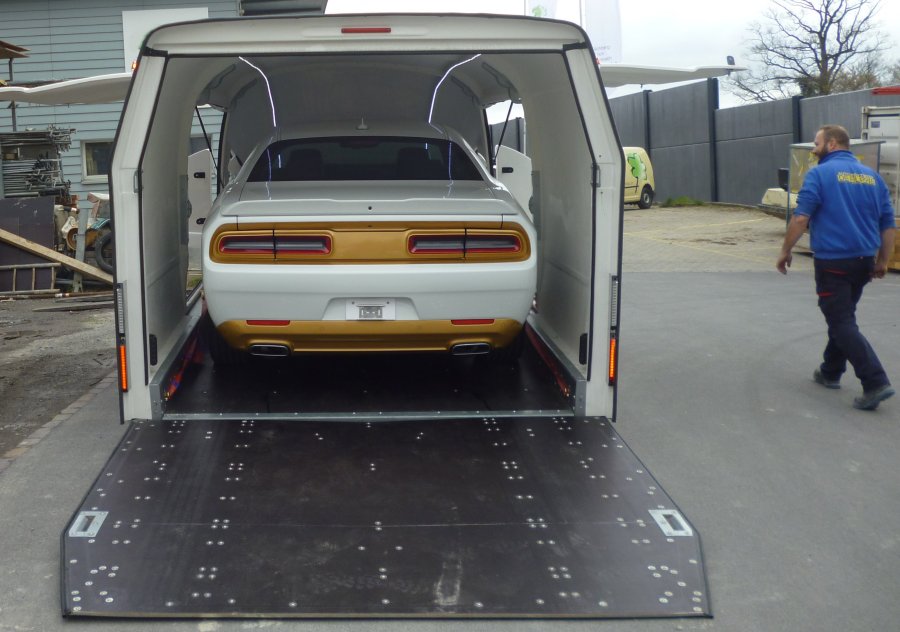 |
| trailer with open wing side doors (both sides) and rear door (tail gate) which is also a ramp. (Marco De Filippis) |
 |
 |
 |
 |
 |
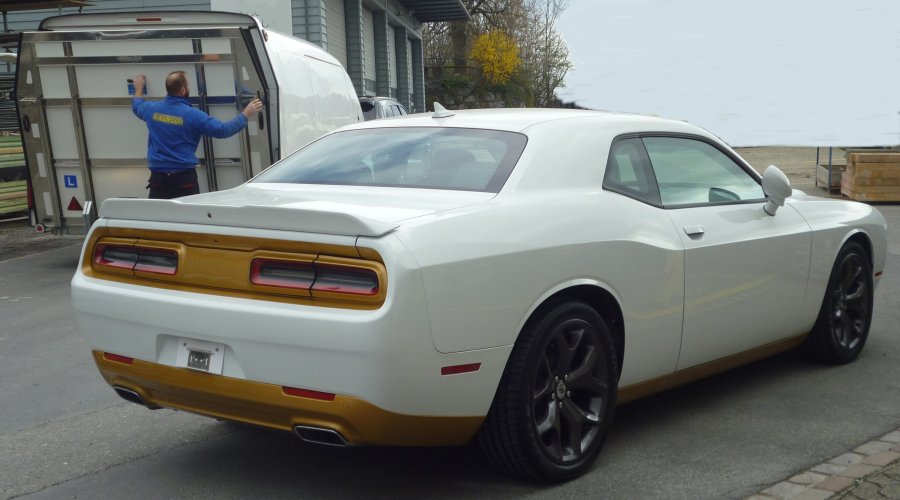 |
| Marco De Filippis just closed all doors and the trailer tail gate (ready for the next car transportation). |
 |
 |
 |
 |
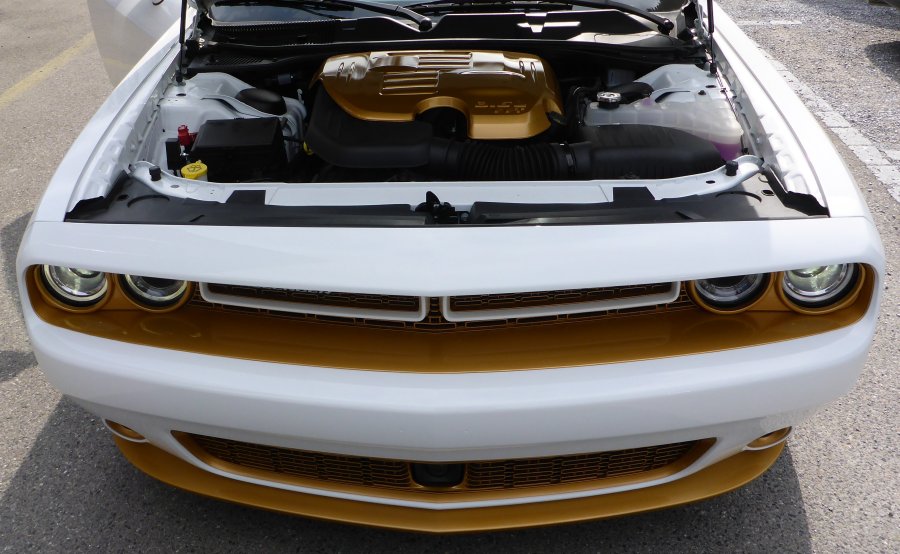 |
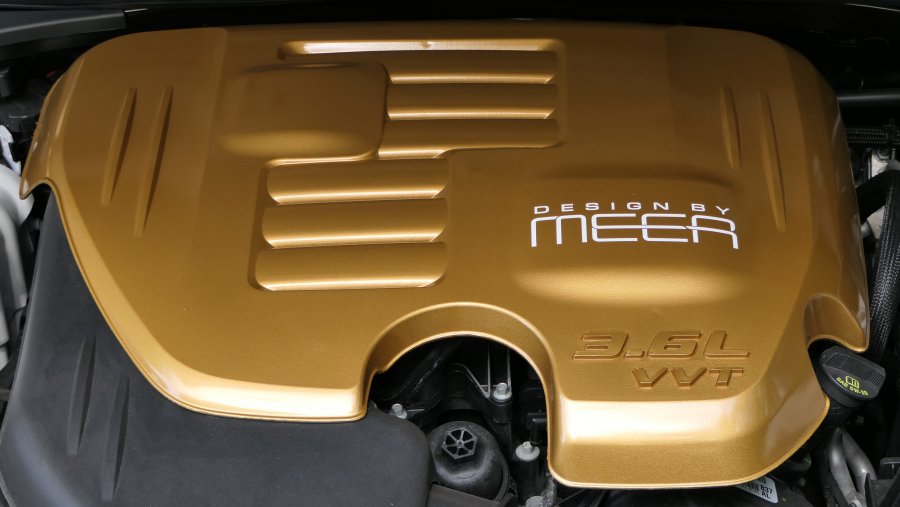
| under the hood there is a golden motor cover * |
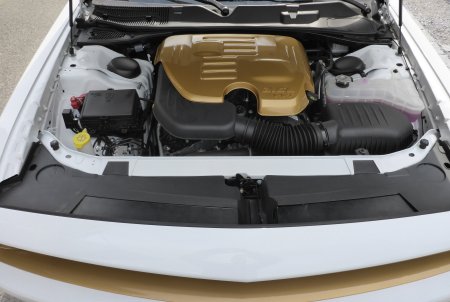
 |
| too bad we cannot drive with an open hood (how about a plexiglass hood?) * |
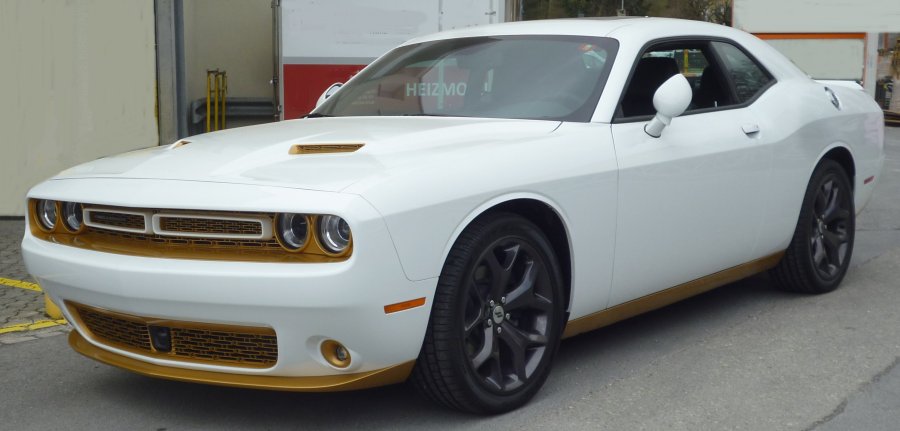
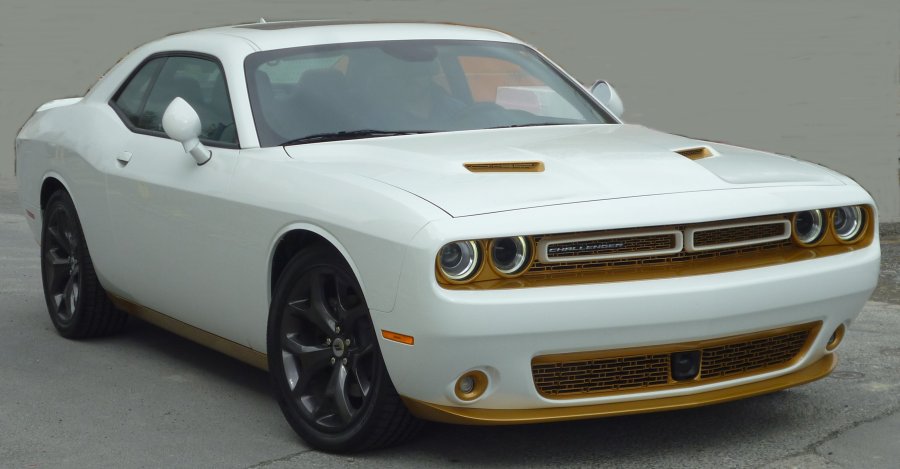
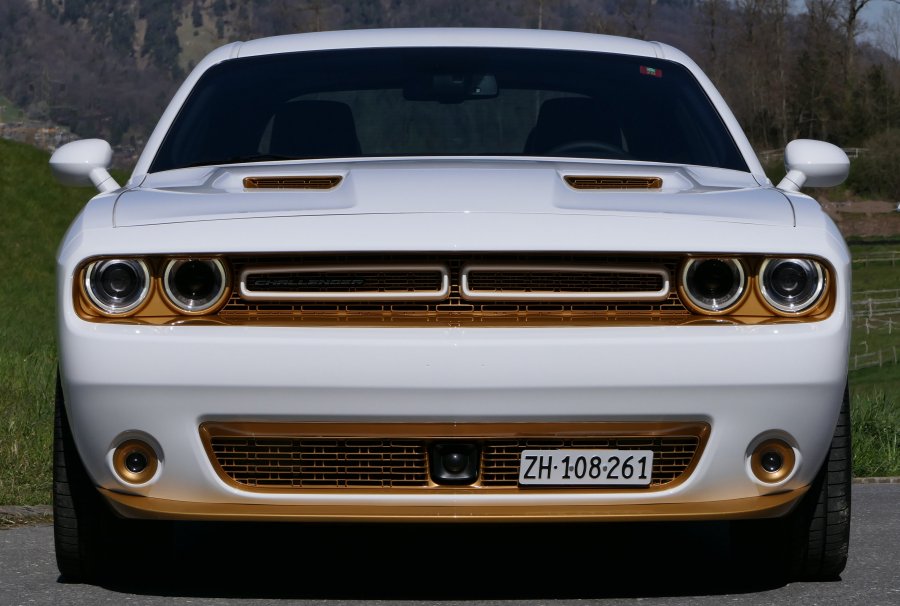
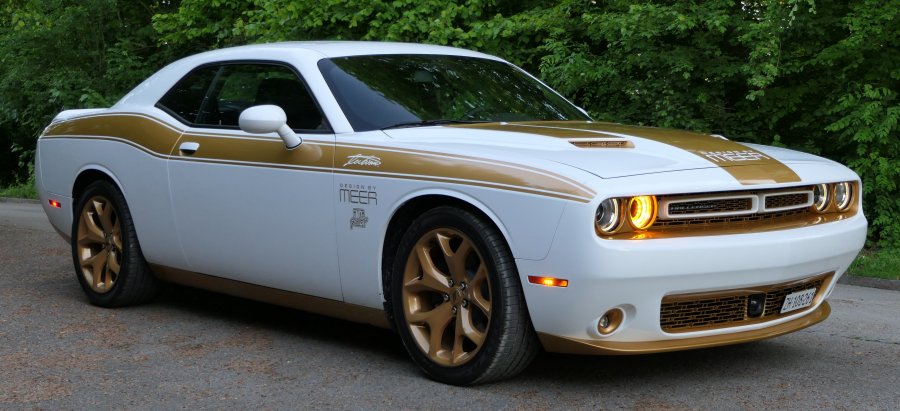
Part 2B: How the vehicle is looking now (March 31, 2020)
|
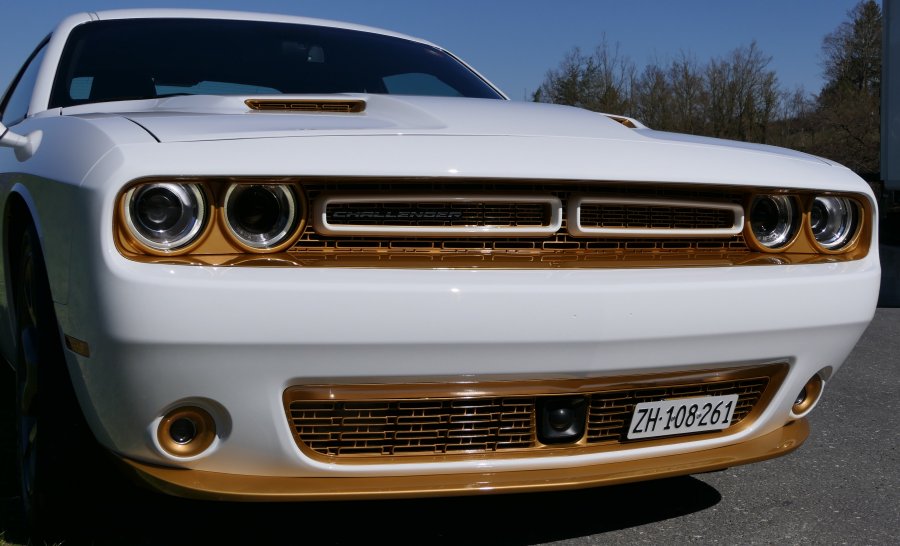
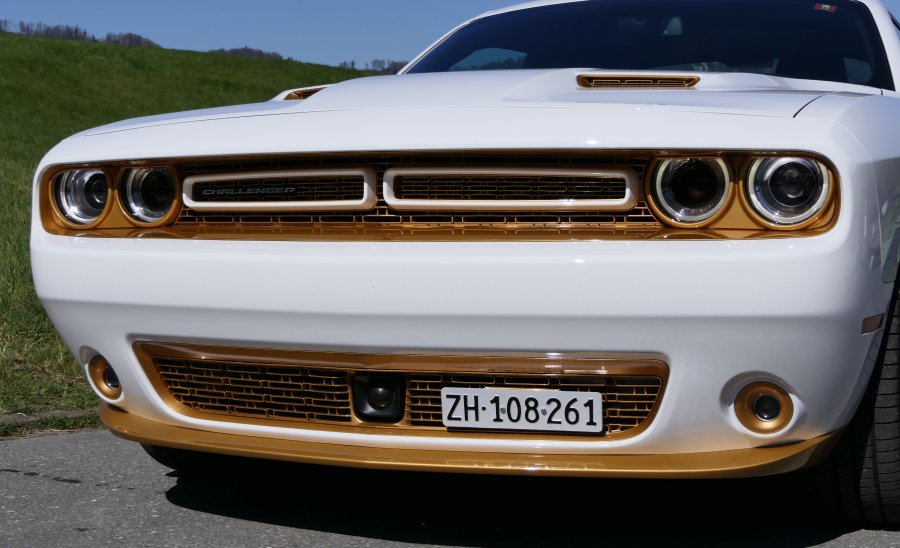
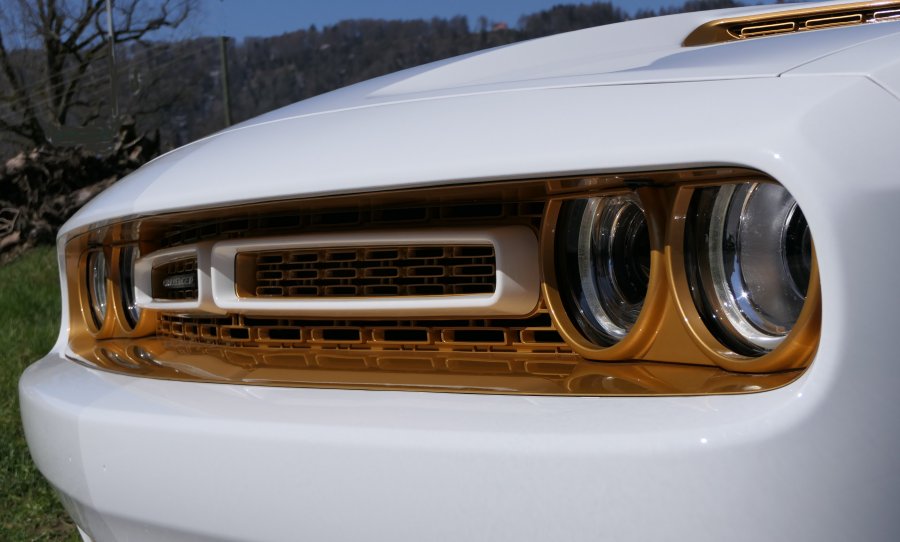
On March 31, I made a new photo shooting with natural
background outdoors (Because of the bright sunlight, the gold metalic looks different almost like bronze) |
 |
 |
 |
 |
 |
 |
 |
 |
 |
 |
 |
 |
 |
 |
| gold painting by Autospritzwerk De Filippis, 8802 Kilchberg: https://www.autospritzwerkdefilippis.com/ |
| disassembling and remounting of former black parts by Zimmerberg Garage, 8800 Thalwil: www.zimmerberg-garage.ch |
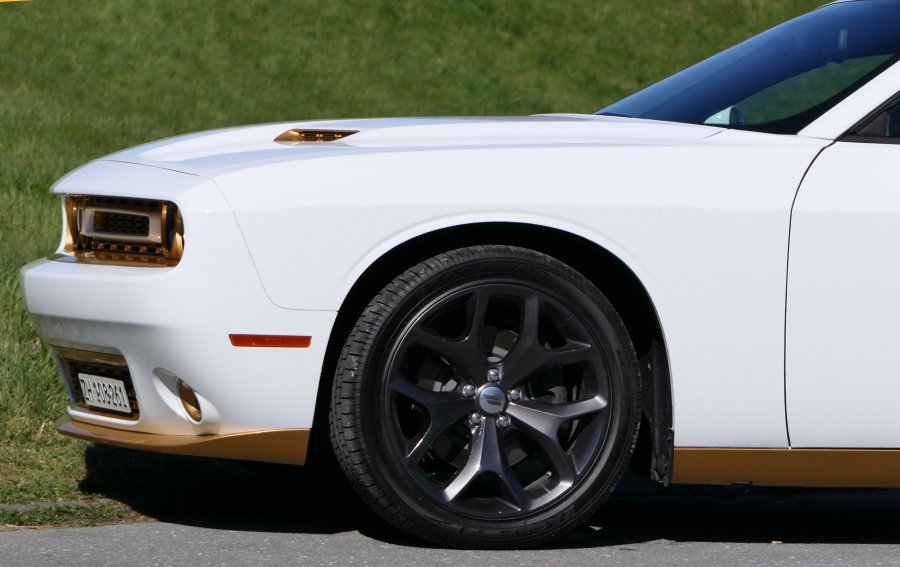
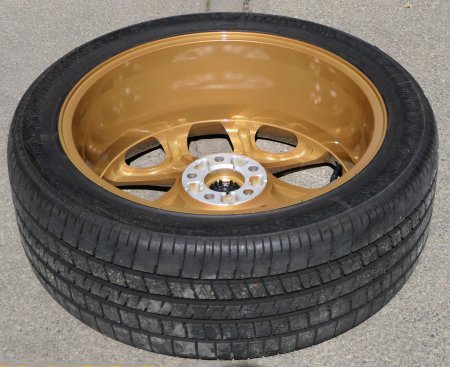
Part 3: Wheels have been powder coated in gold (April 22, 2020)
 |
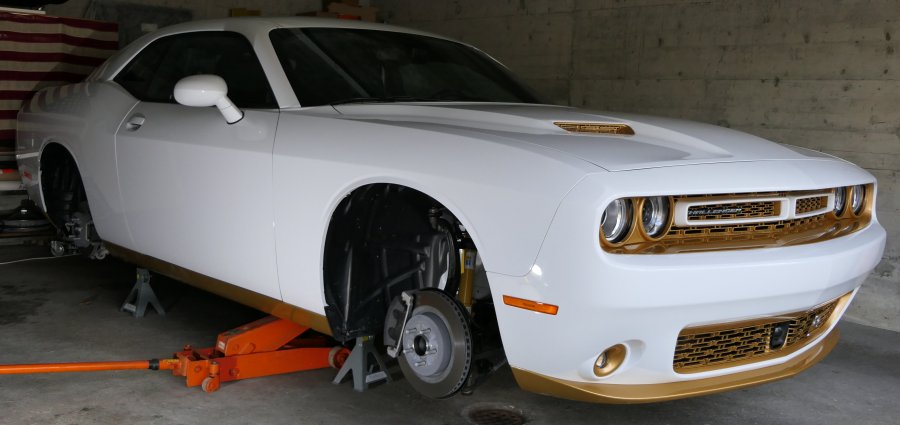
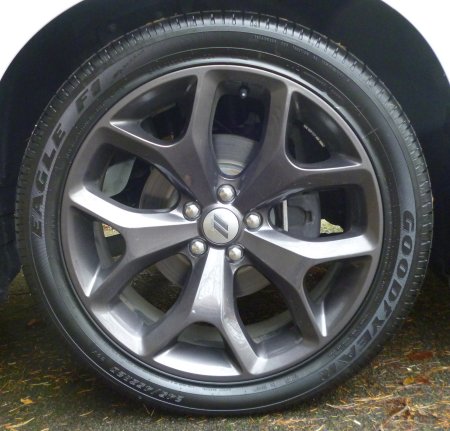
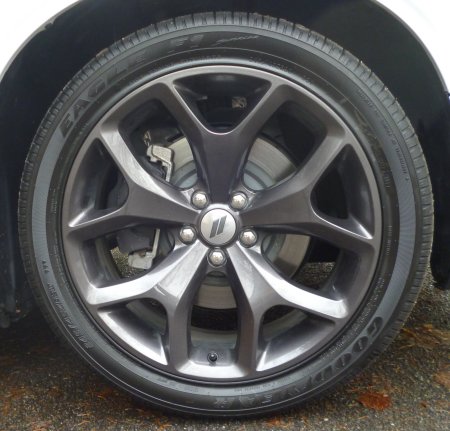
| Now, the vehicle is in storage inside a garage and all 4 wheels have been removed and went to the specialist. |
 |
 |
 |
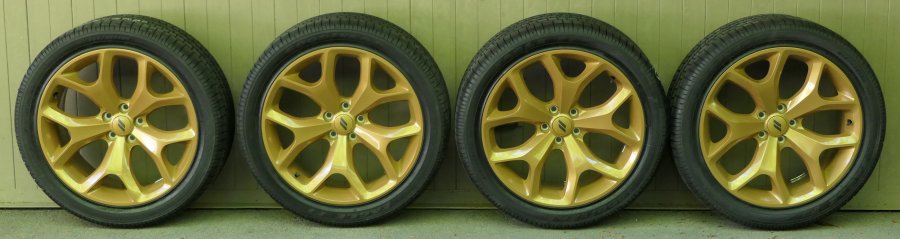
| powder coating in gold of the wheels by Panthera Shop - Felgenprofi, 8181 Höri: www.felgenprofi.ch |
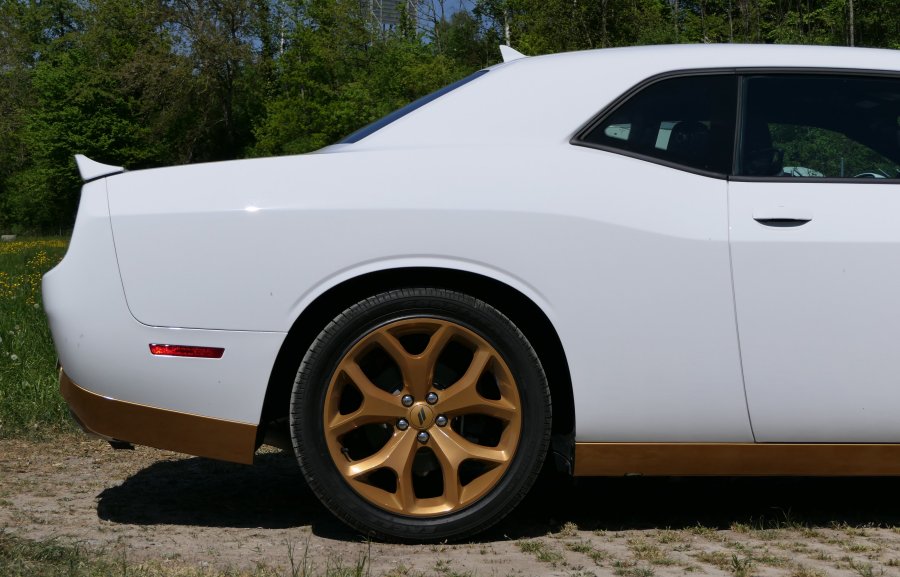
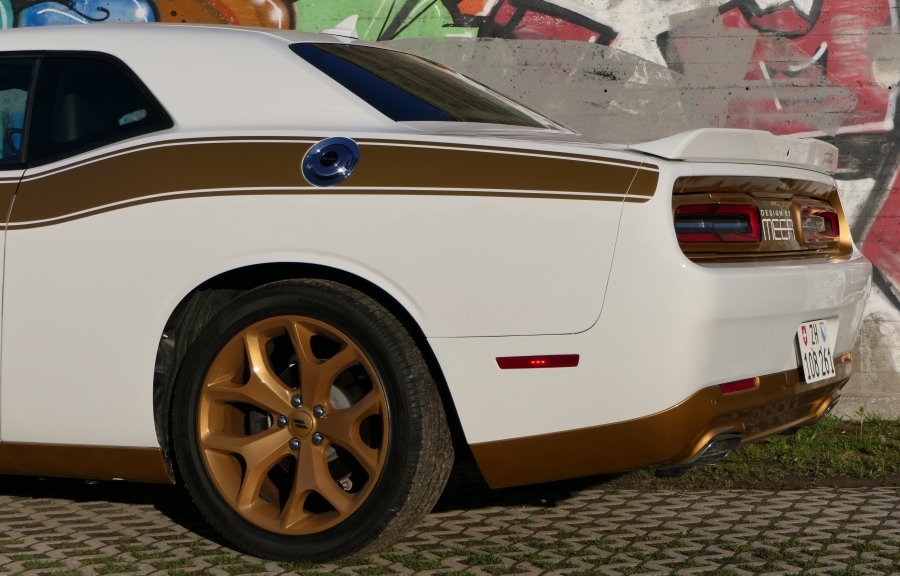
| New 4/22/20: After 3 weeks, the golden wheels have been finished and they look outstanding. Andy Kurz made a fantastic job and the wheels got a perfect matching golden design to the painted body parts of this vehicle. |
 |
|
sometimes, the digital camera is doing his own thing
if in automatic mode. Therefore, the color is not correct (green touch) |
 |
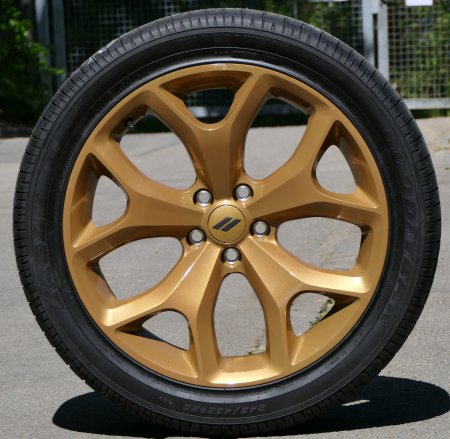
| the wheels are ready to be mounted |

 |
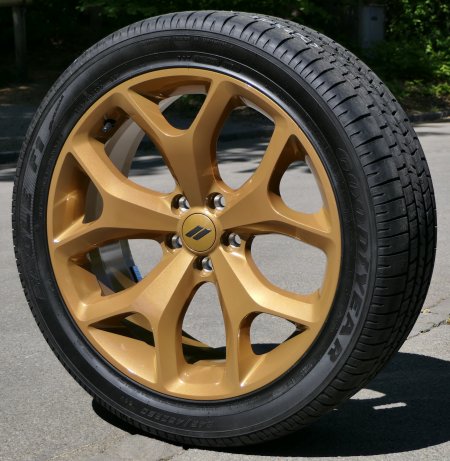
| this is the real golden color taken at the bright sunlight |
 |
 |
 |
 |
 |
 |
 |
 |
 |
 |
 |
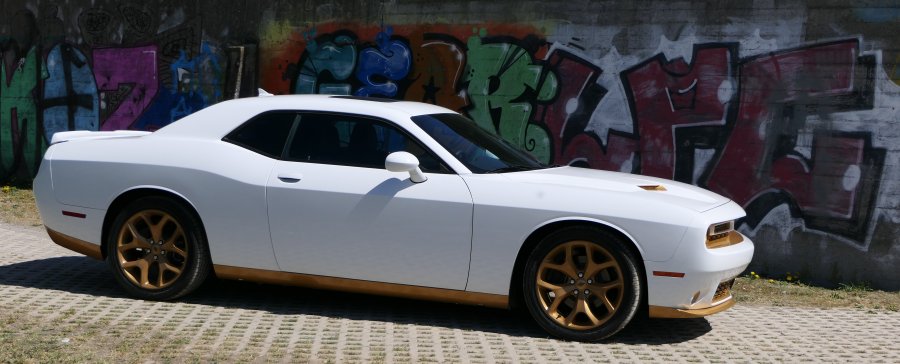 |
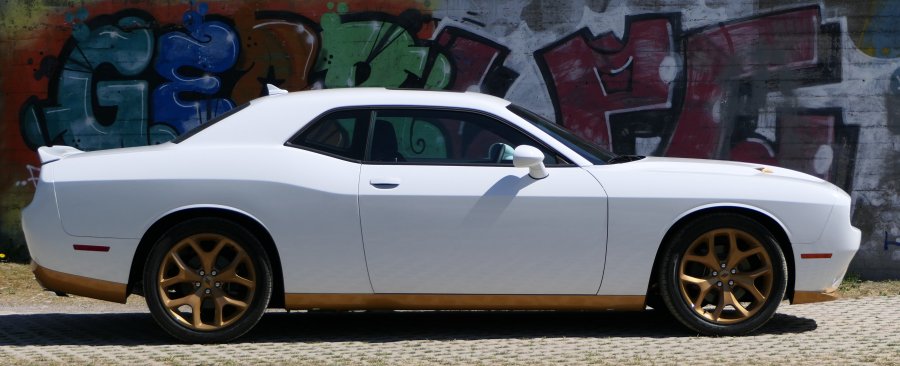
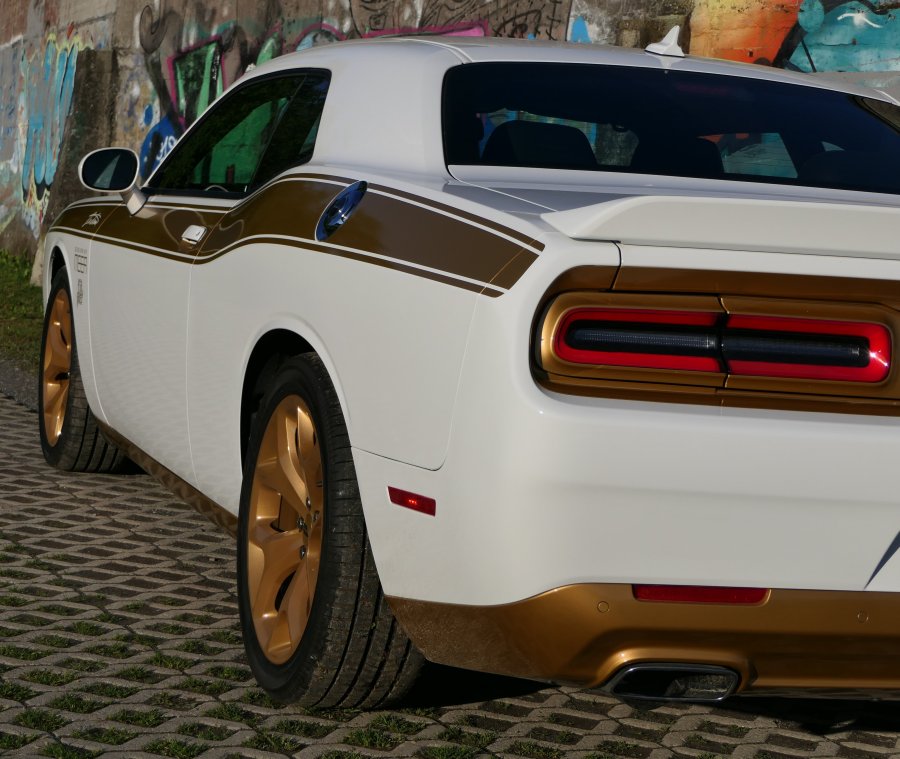
| just found a nice Graffiti wall as a special background |
Part 4: the making of - car wrapping with golden stripes (May 5, 2020)
 |
 |
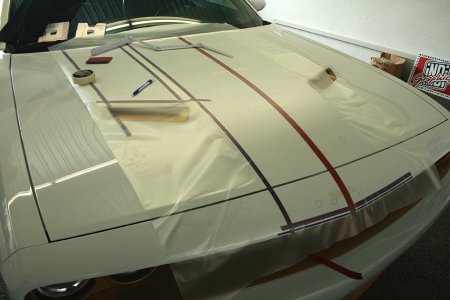
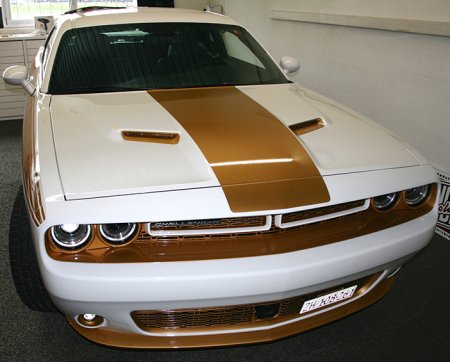
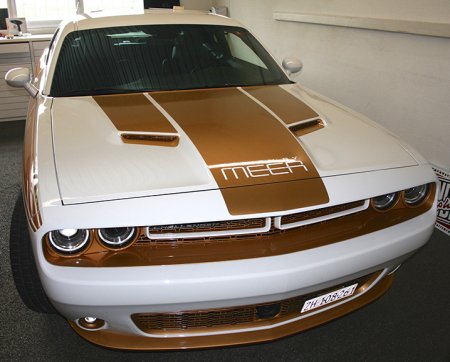
| two possible versions of hood decoration. I finally decided to choose 3 golden stripes as seen on the left side. | |
 |
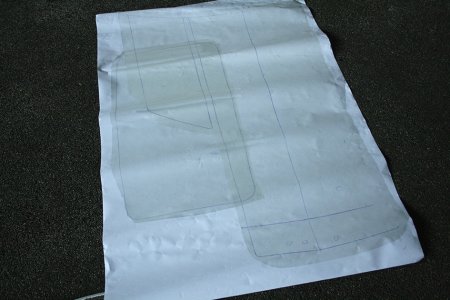 |
| to create a perfect match, the hood has to be digitalized | those pattern are used to cut the golden foil exactly to size |
 |
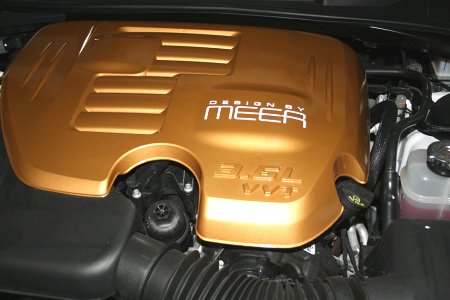 |
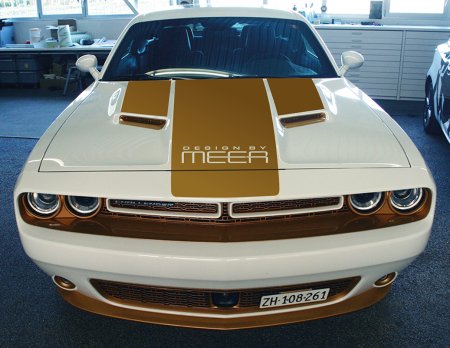
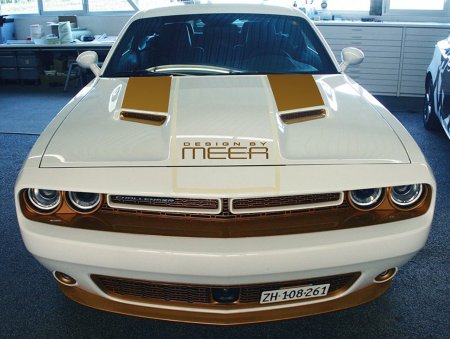
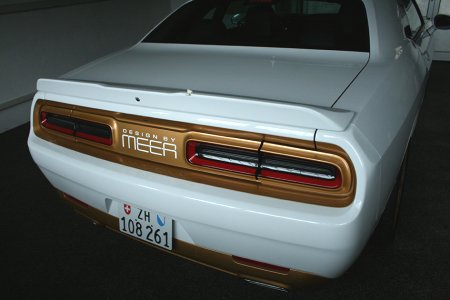
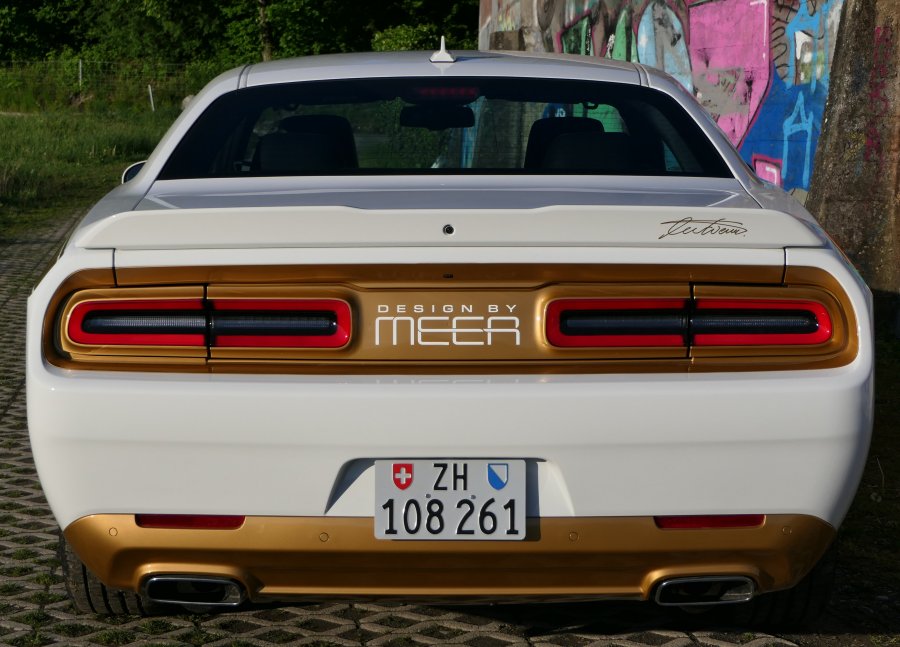
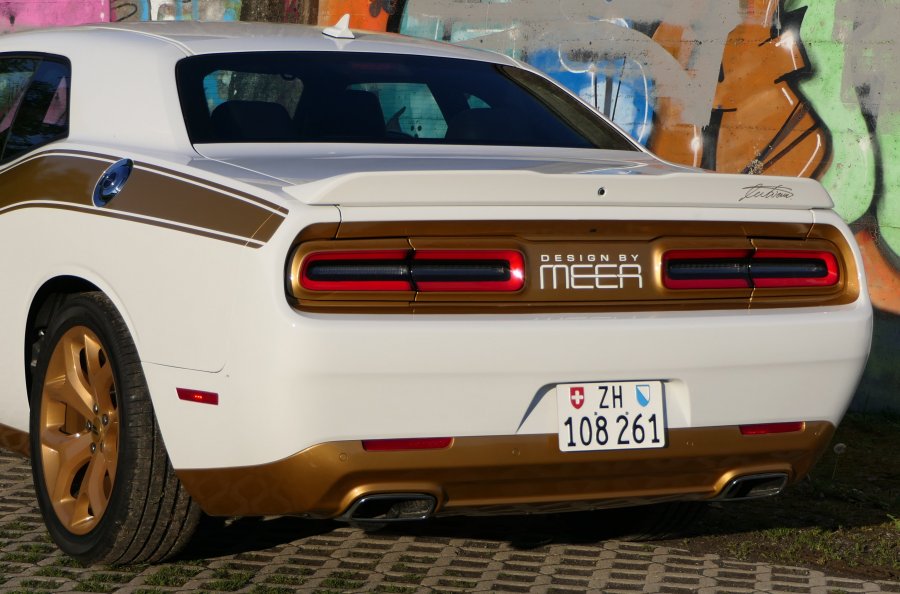
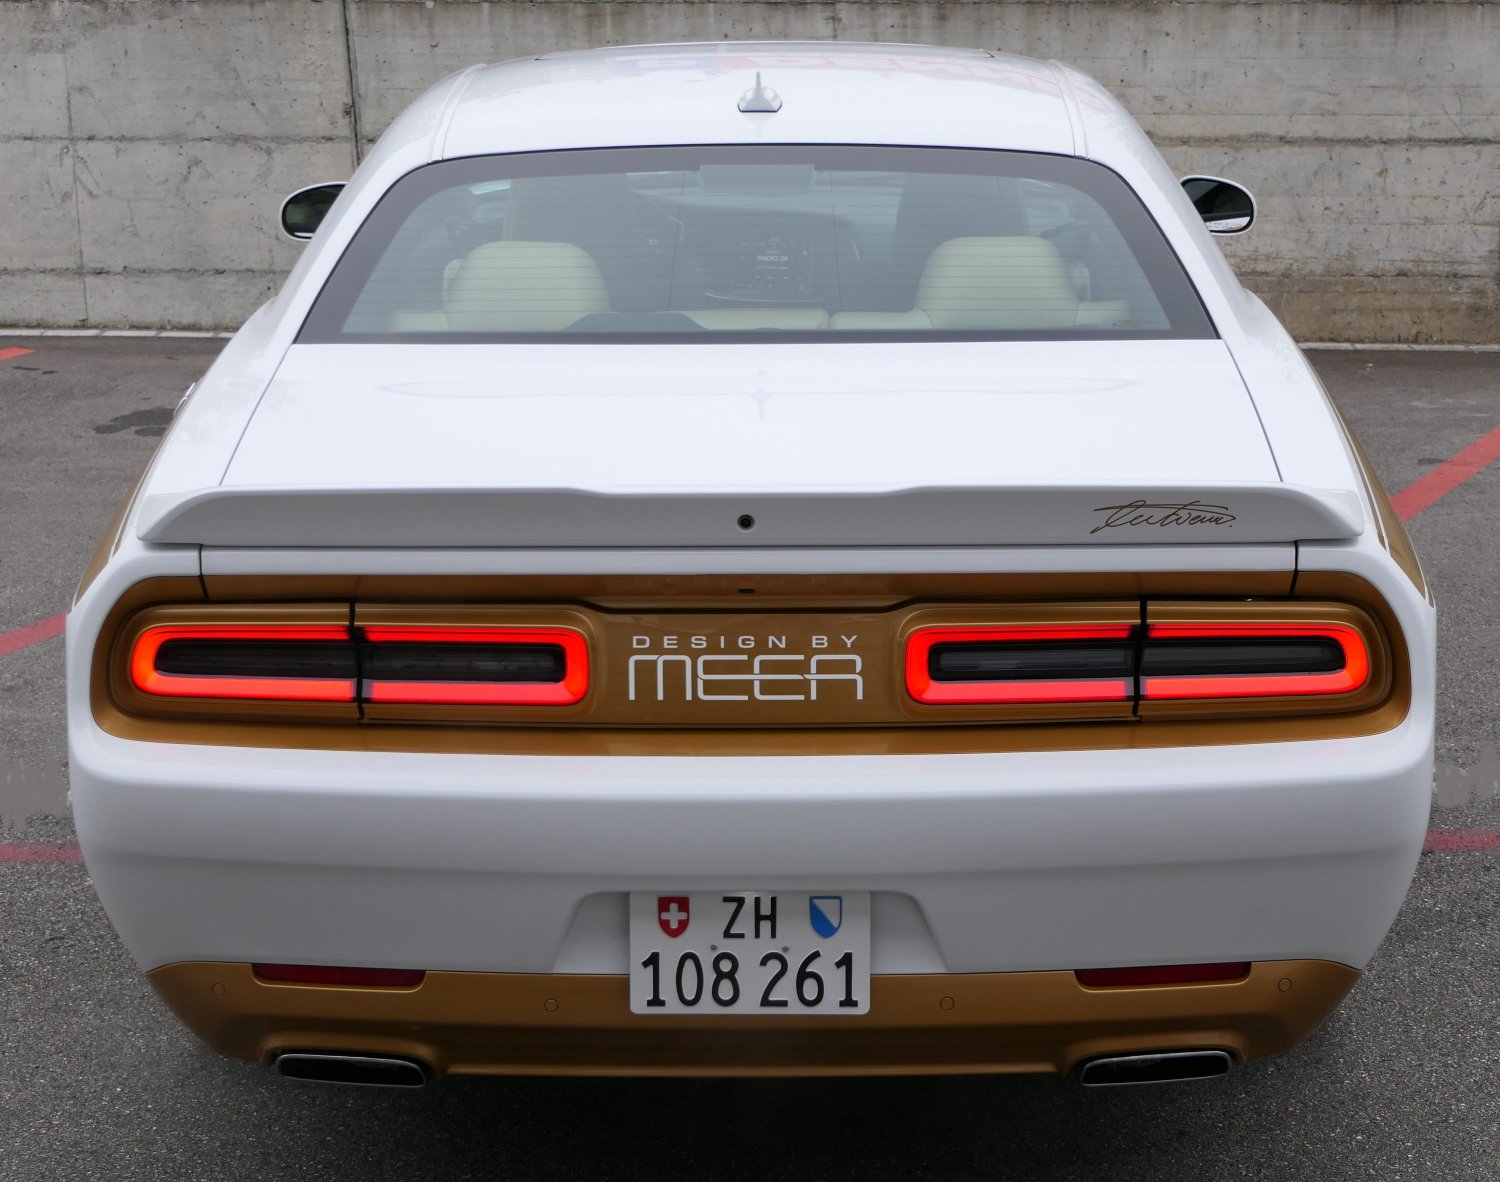
| the "Design by MEER" has been applied at the rear | and also on the motor cover under the hood - looks great |
 |
 |
| the making of the hood: step 1 - center stripe | the making of the hood: step 2 - side stripes |
 |
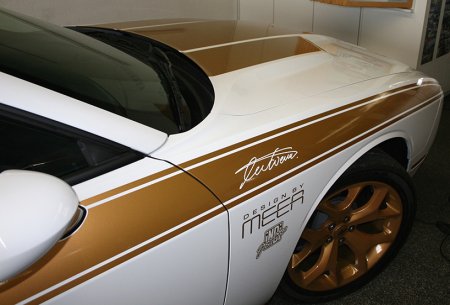 |
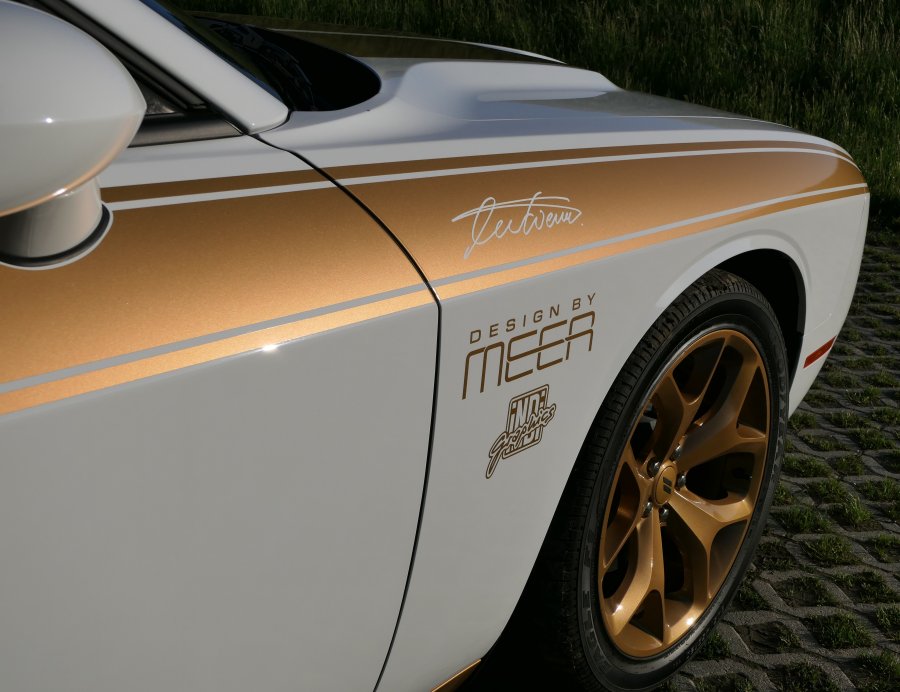
| all the way matching golden color | 3 Logos: signature, Design by MEER, iNDi Graphics. |
| 15 photos by Daniel Friedli (iNDi Graphics) - www.indi-graphics.ch | |
 |
|
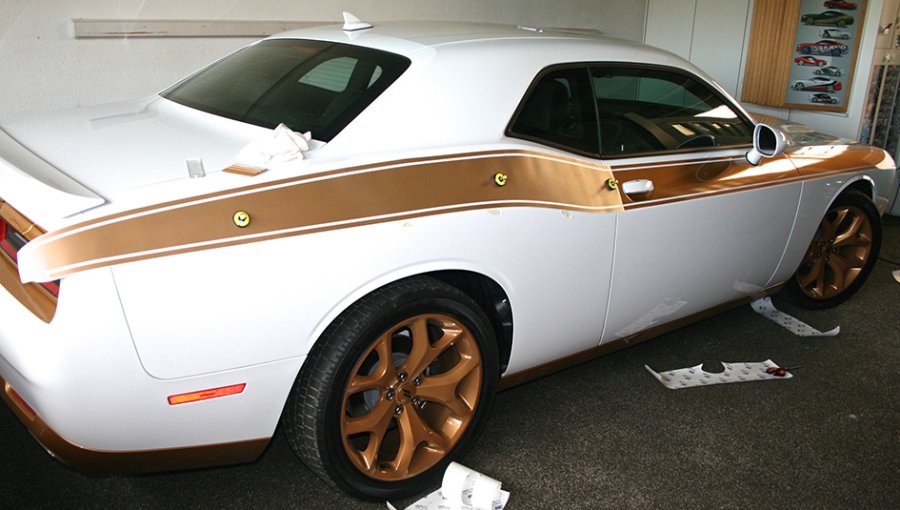
| mounting of side stripes on the passenger's side | |
 |
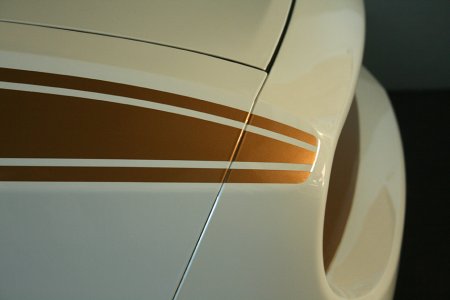 |
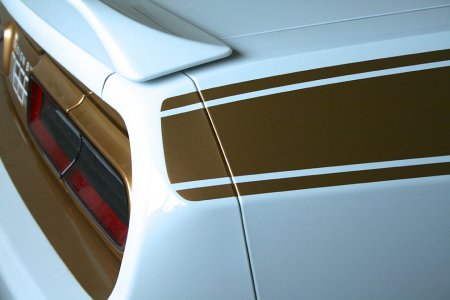
| rear end of stripes | front end of stripes |
 |
|
|
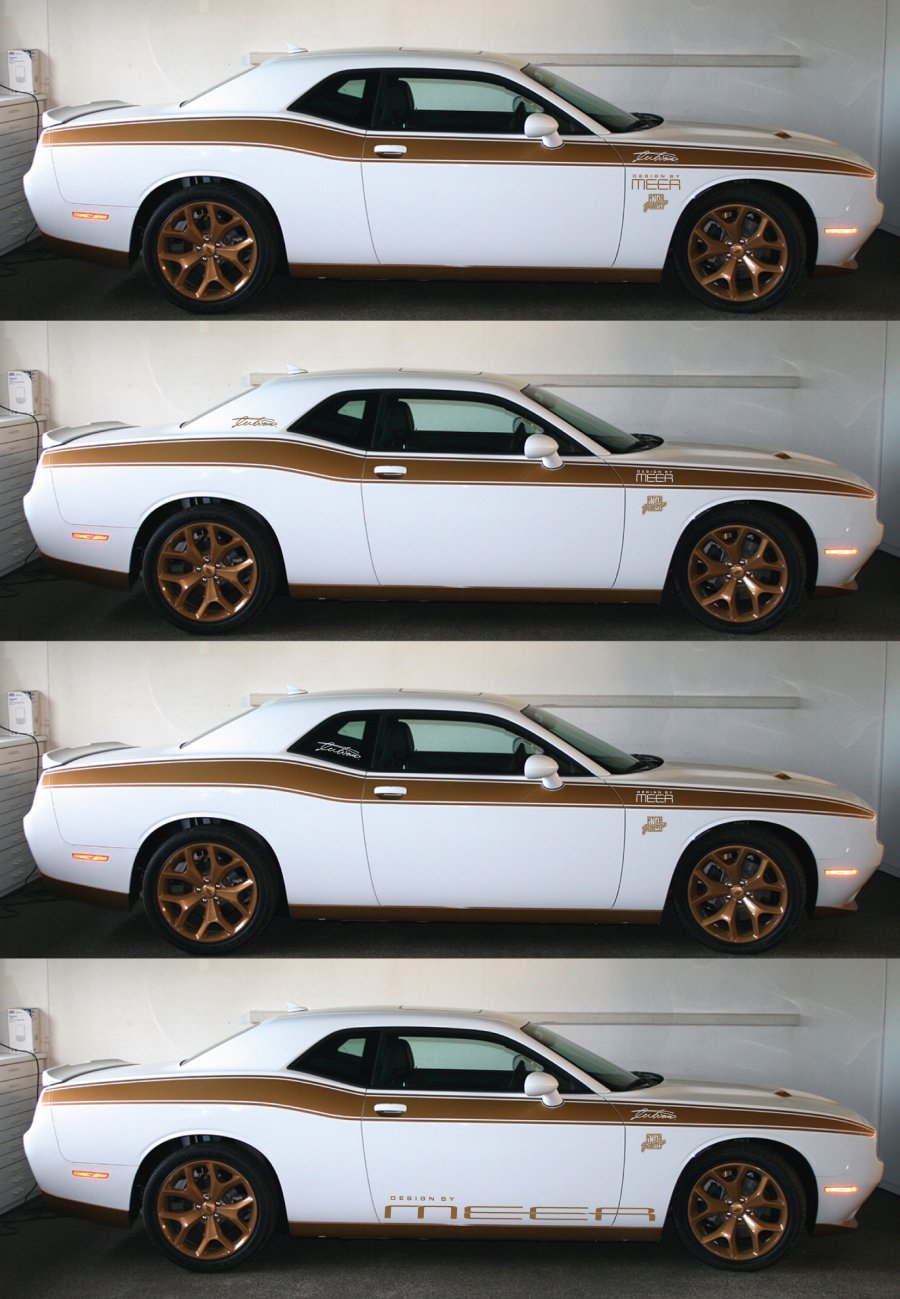
4 different possibilities for lettering on the side (signature/Design
by MEER/iNDi Graphics). I was choosing the first version |
|
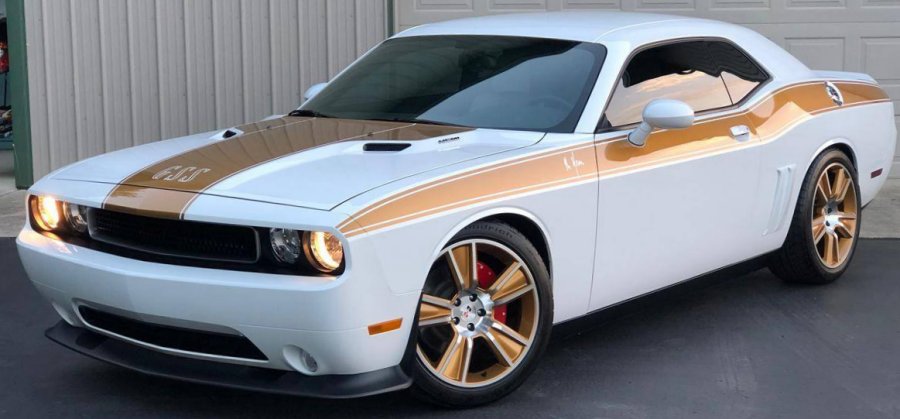
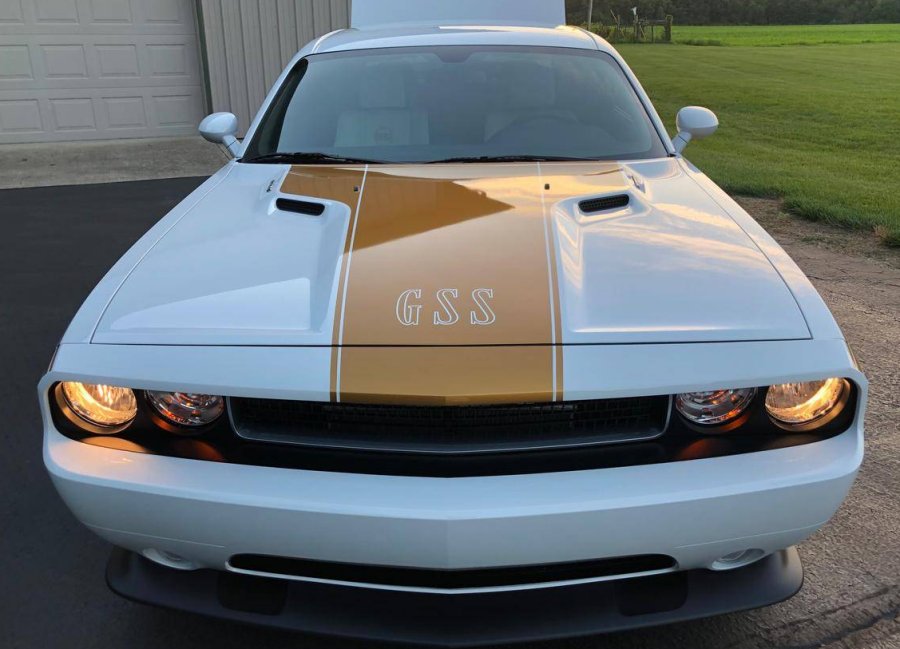
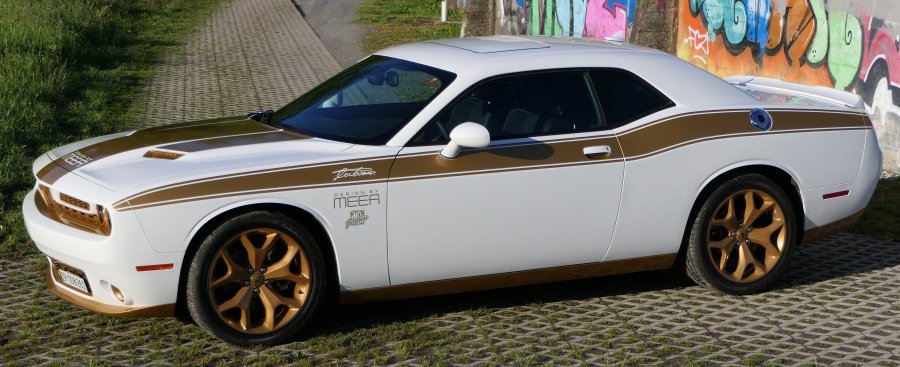
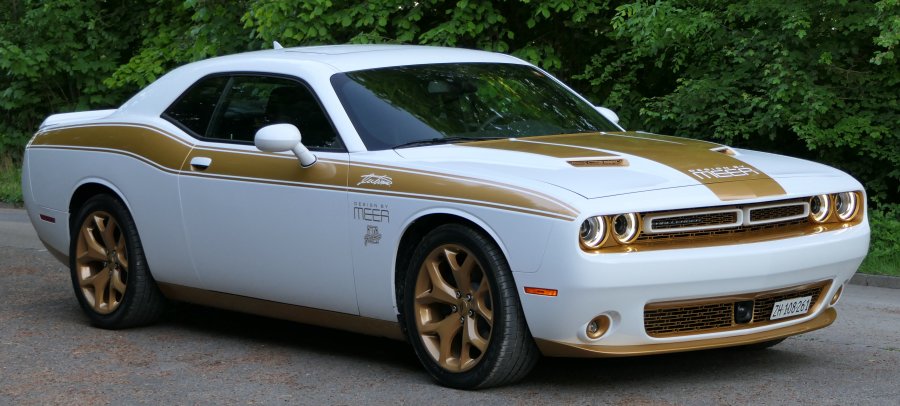
| the side stripes have been inspired by the GSS Challenger (Norms 50th Anniversary) below | |
 |
|
|
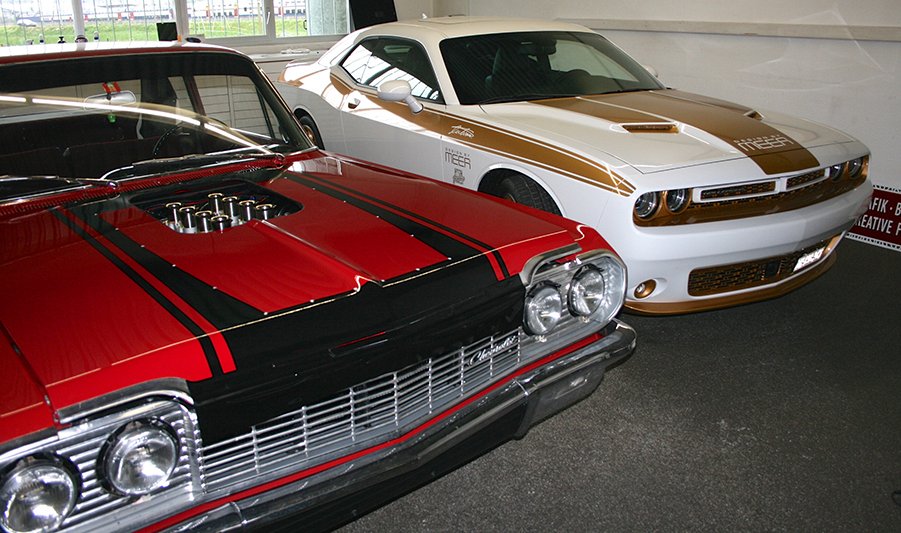
old generation ('62 Chevy Belair) meets new generation
('18 Dodge Challenger) the old gen Chevy needs some work and the new gen Dodge is ready for delivery on 5/06/20. |
|
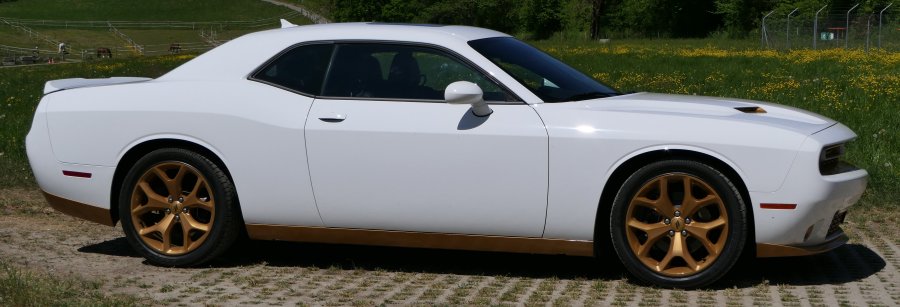
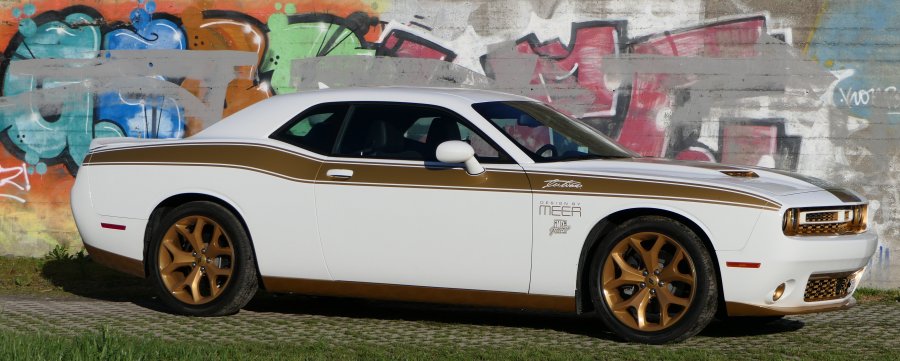
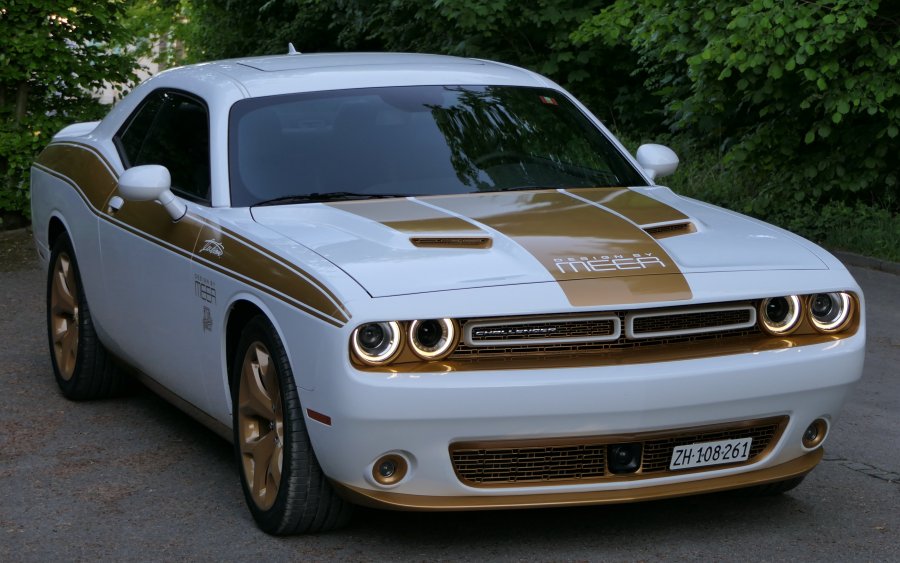
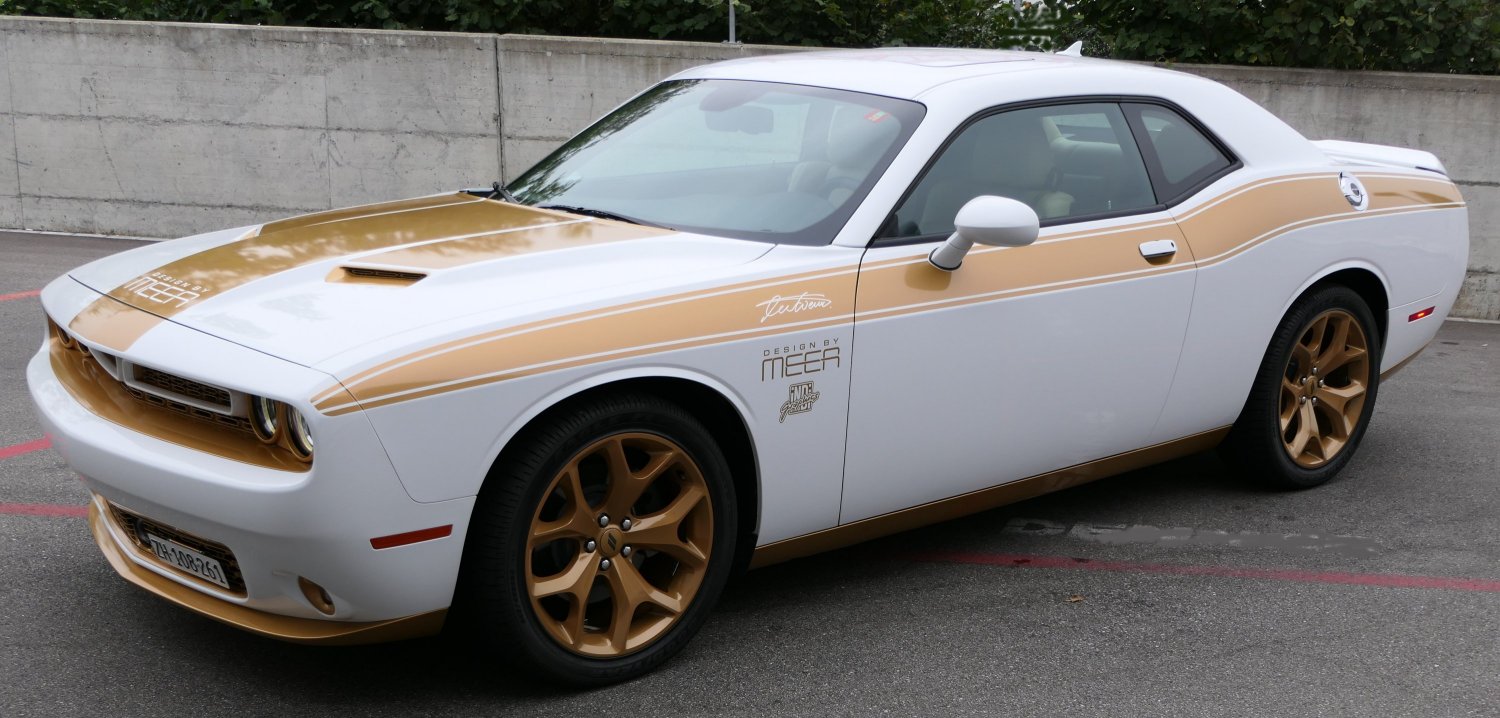
| So, my 2018 model above got similar golden stripes on the hood and on both sides. The golden stripes have been done with car wrapping by iNDi Graphics, Winterthur: www.indi-graphics.ch |
| Below: 2013 Dodge Challenger GSS (Mr. Norms 50th Anniversary) |
 |
 |
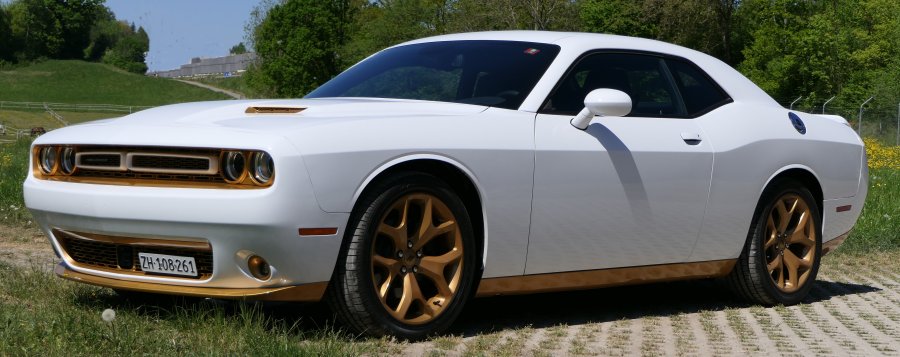
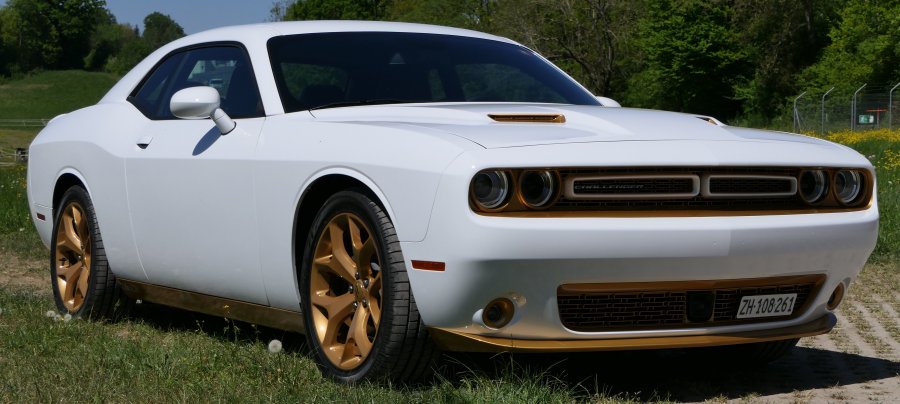
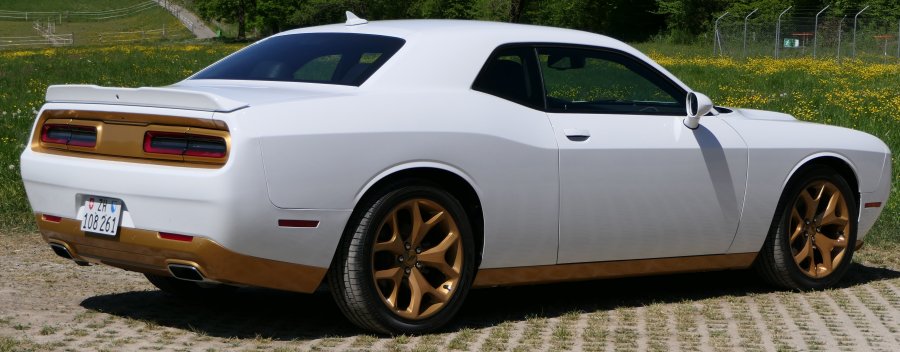
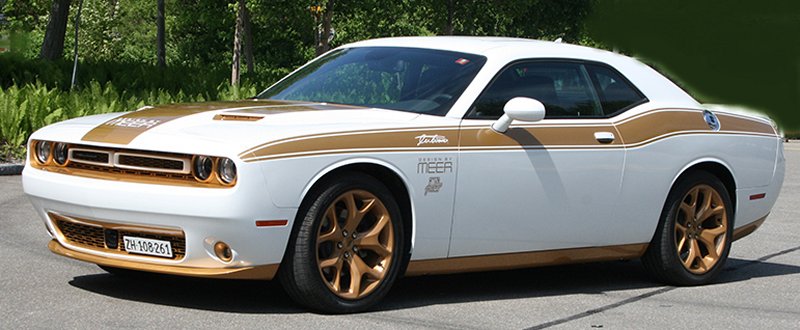
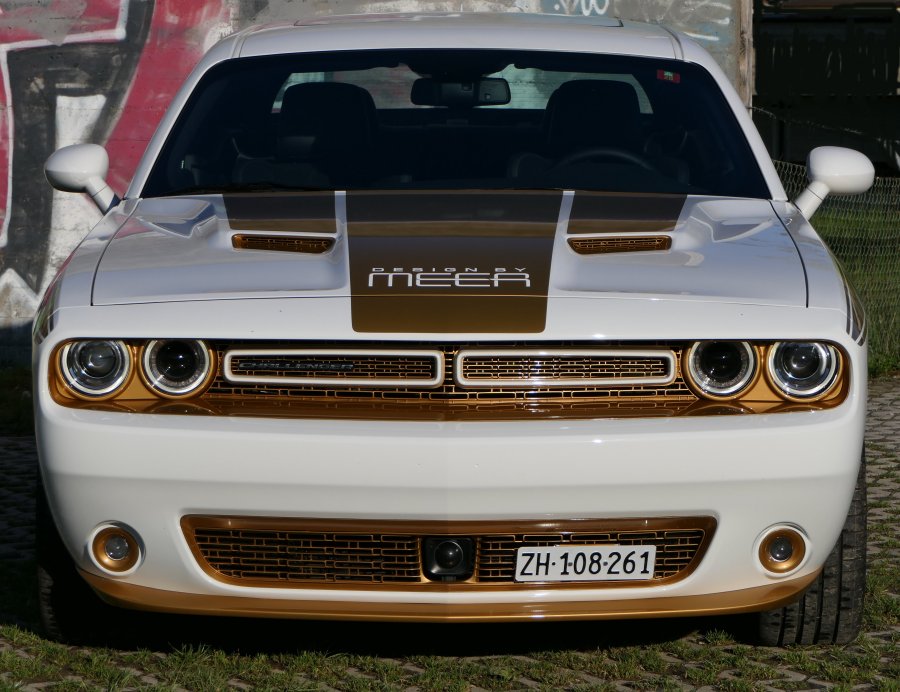
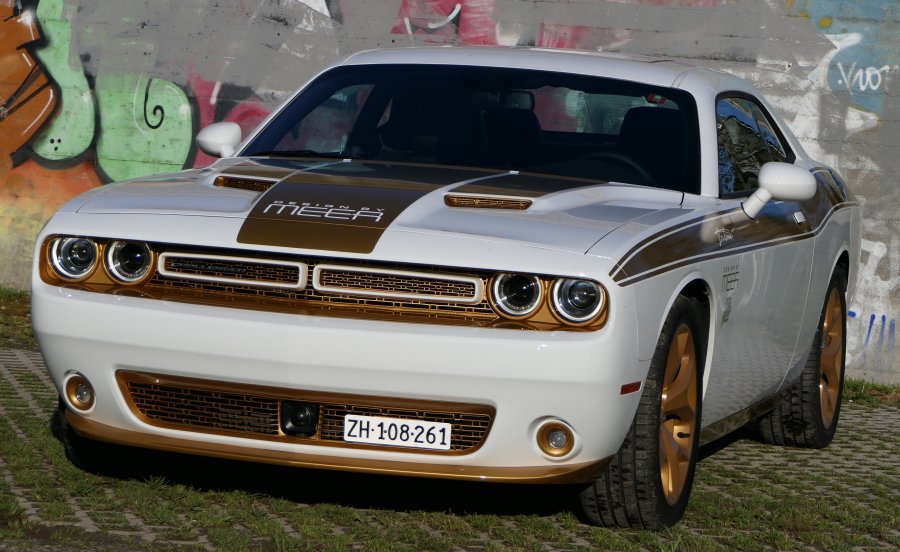
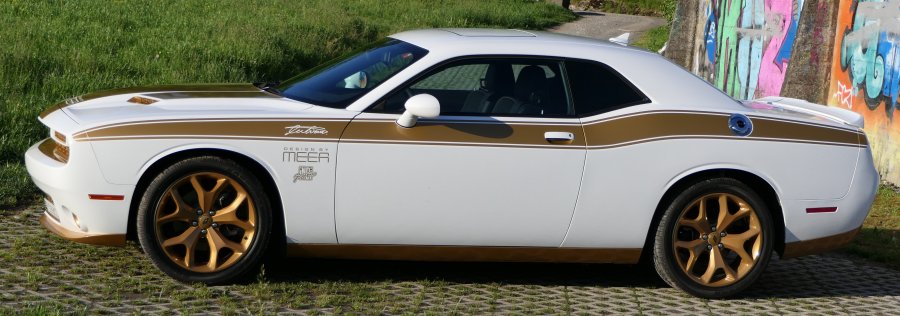
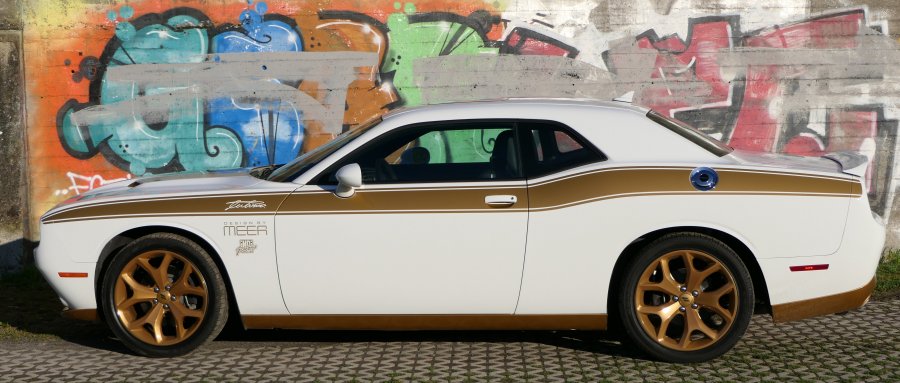
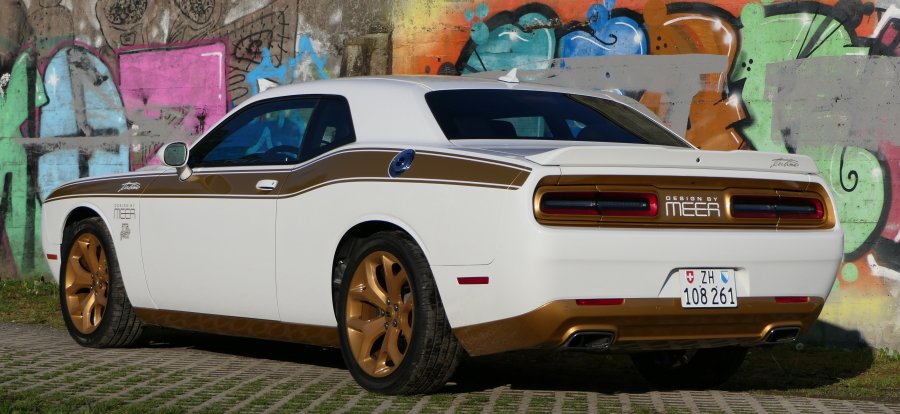
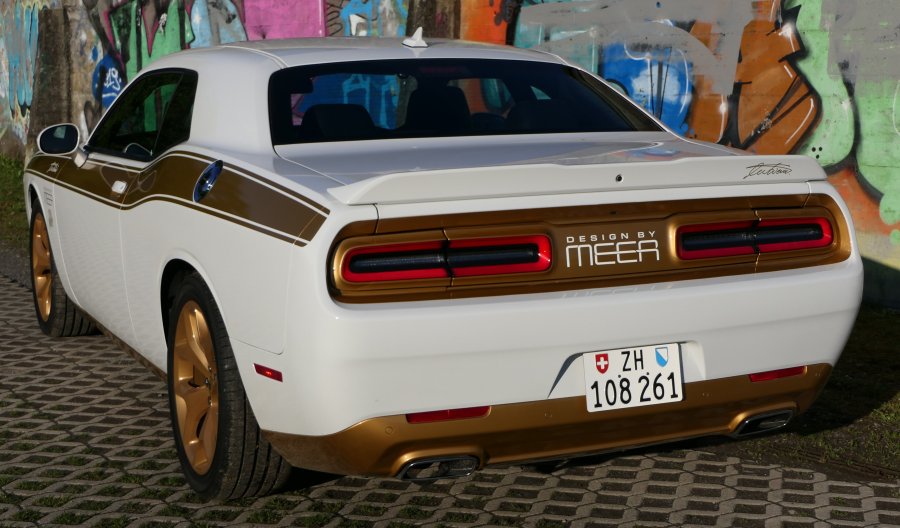
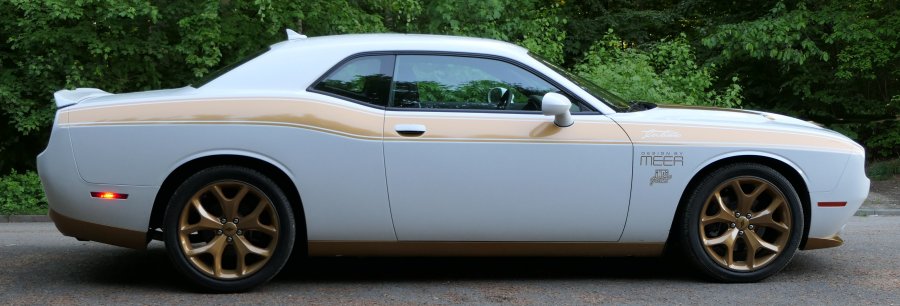
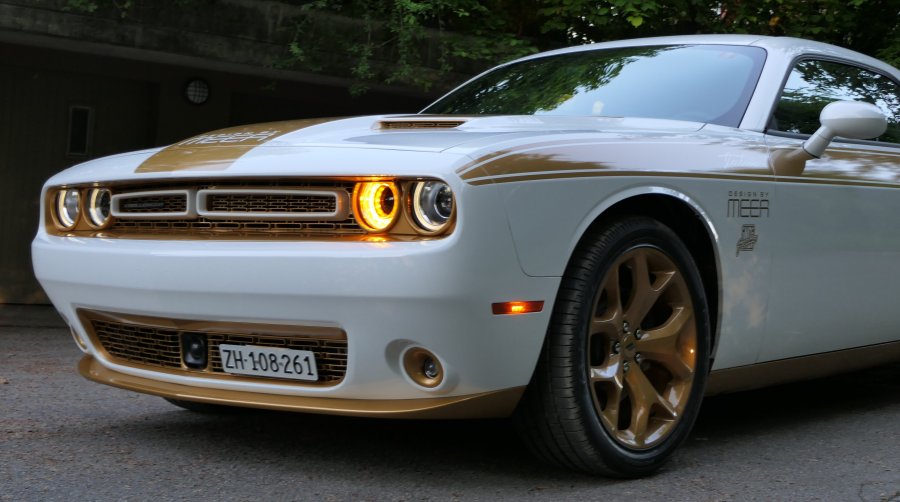
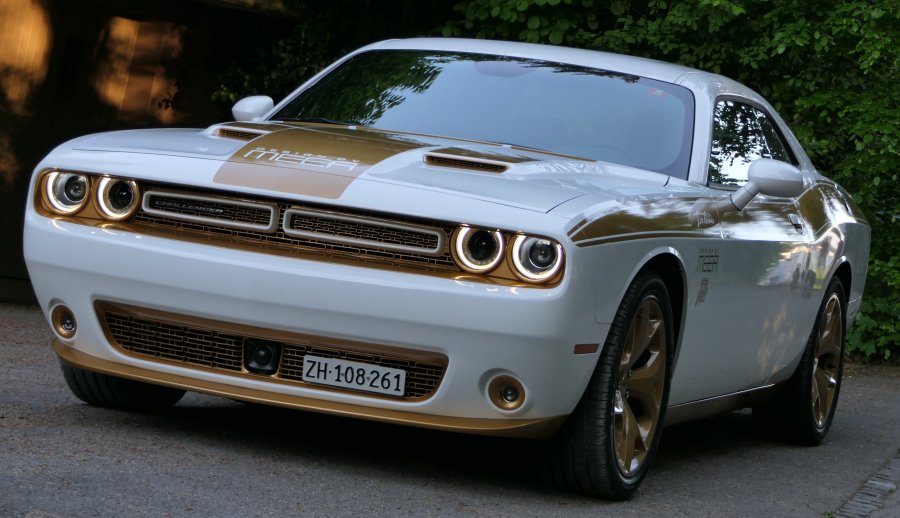
Part 5: Exterior is finally finished with car wrapping by Daniel Friedli (iNDi Graphics) - May 8, 2020
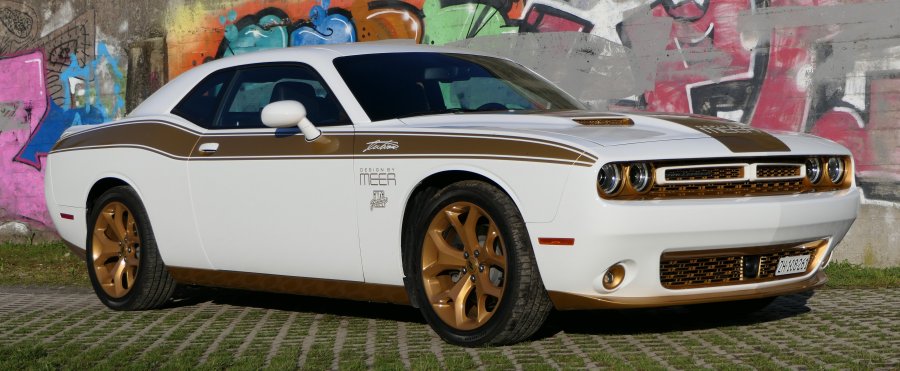
| A special car needs a special touch to become an one-of-a-kind vehicle |

 |
| Special design with car wrapping by iNDi Graphics, Winterthur: www.indi-graphics.ch |
 |
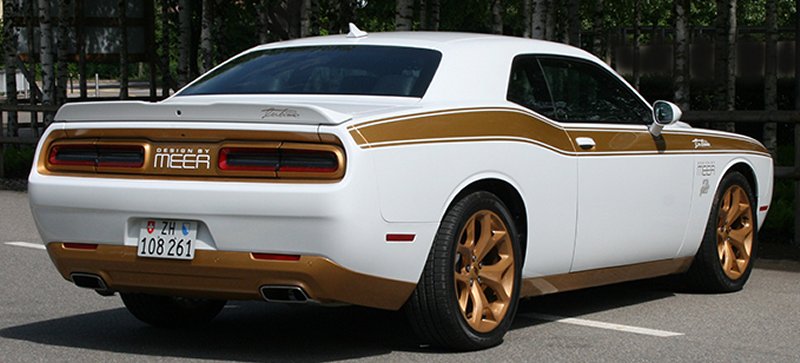 |
| the first two photos of the finished car by Daniel Friedli - I only can say, first class job, I am very pleased with the result. |
| A Dream Came True |
|
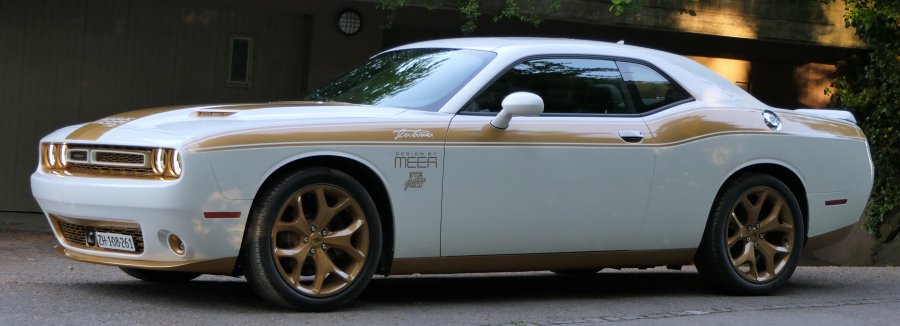
Here is a short story behind this project. One year
ago (April 2019) I sent a build application to Foose Design, Huntington
Beach, CA to inquire for this project. I even met Chip Foose back in October
2015 and we were talking about it. After a few days I got this reply: "Unfortunately, your build does not sound like a project best suited for
Foose Design. We have reviewed your information on your potential
build and must let you know that we will be passing on your project." Of course, I was disappointed. But I was still dreaming of having a Challenger as Chip would build it. In late January 2020, I found the right vehicle, a new 2018 Challenger SXT Plus in white color with 20" wheels. A lot of brainstorming and even sleepless nights formed my own design. Therefore, I created a "Design by Meer" look with a "one-of-a-kind" customizing. Thanks God, I found the best craftsmen in Switzerland for painting, powder coating and car wrapping as already mentioned above. The result is outstanding and guarantee the only one like this in the world. |
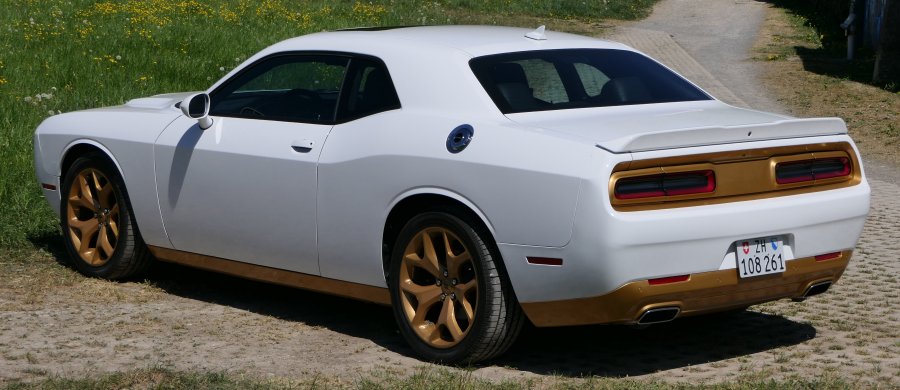
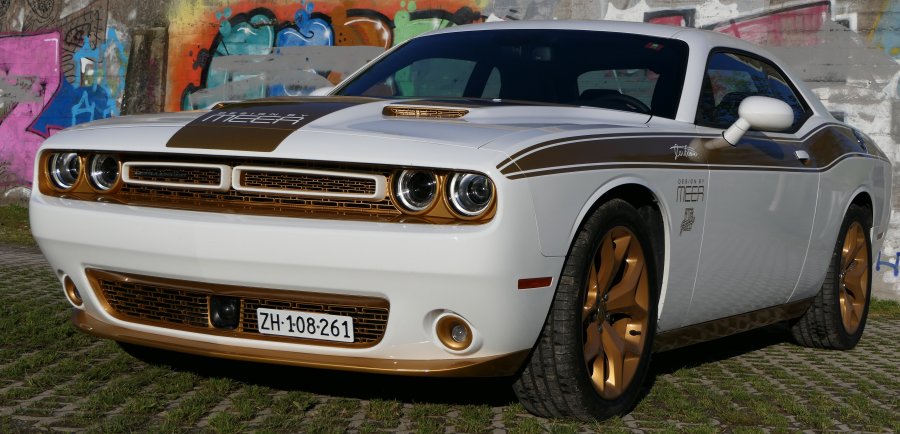
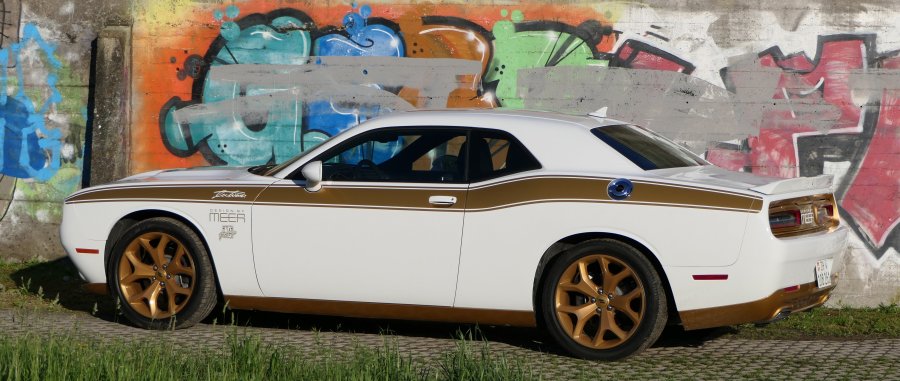
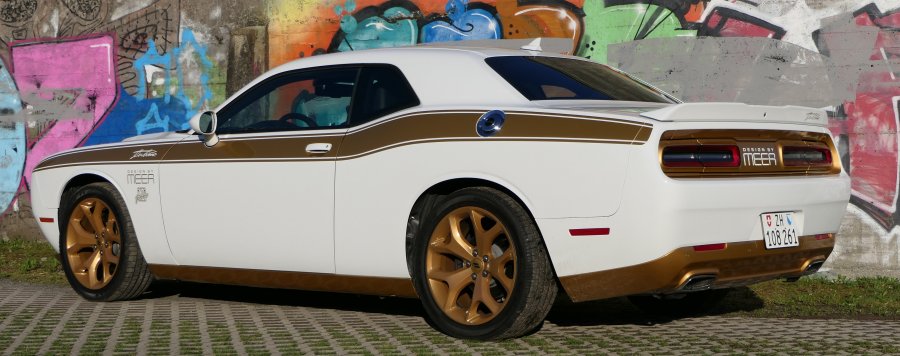
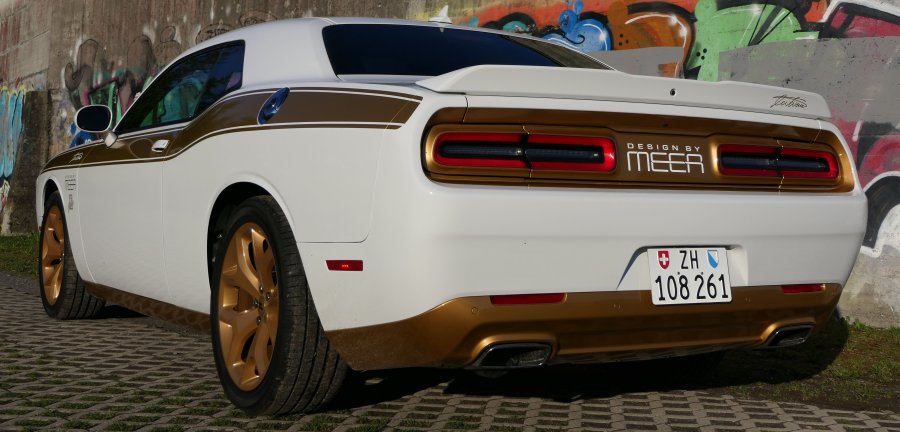
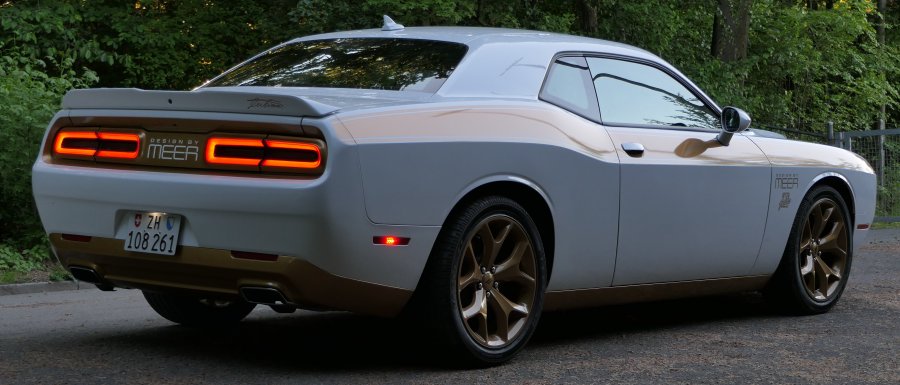
| I used the low evening sun with a graffiti wall as a background for my photo shooting. |
 |
 |
 |
 |
 |
 |
 |
 |
 |
 |
 |
 |
 |
 |
 |
 |
 |
 |
 |
 |
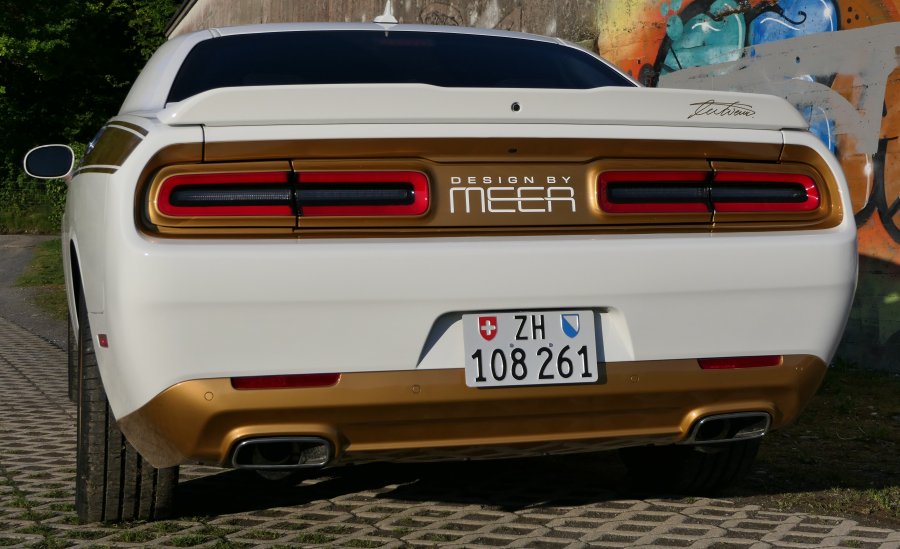
| below are some close-ups and details |
 |
 |
 |
 |
 |
 |
|
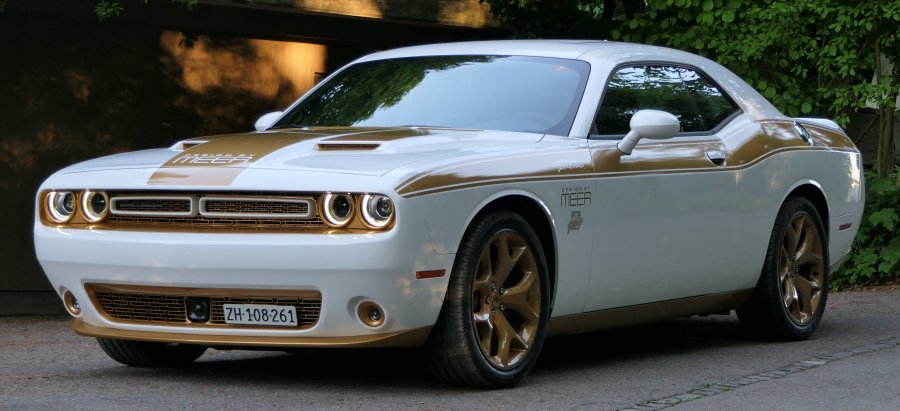
After this shooting I went home and in front of the
garage were completely different light conditions. So, I decided to make another shooting which is somehow like art. |
 |
 |
 |
 |
 |
 |
 |
 |
 |
 |
 |
 |
 |
| and if you are going to open the hood, there is nice surprise in gold - what else? |
 |
 |
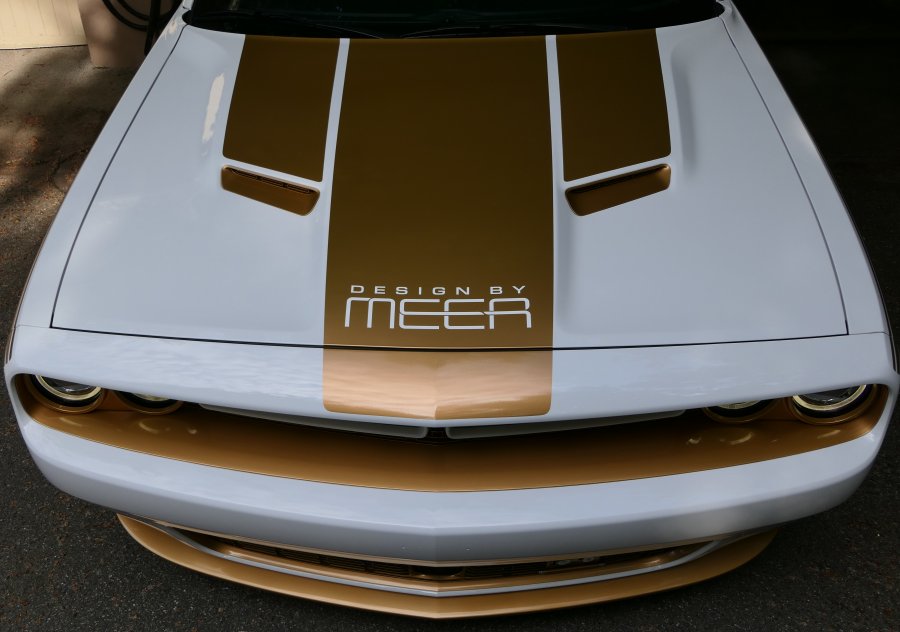
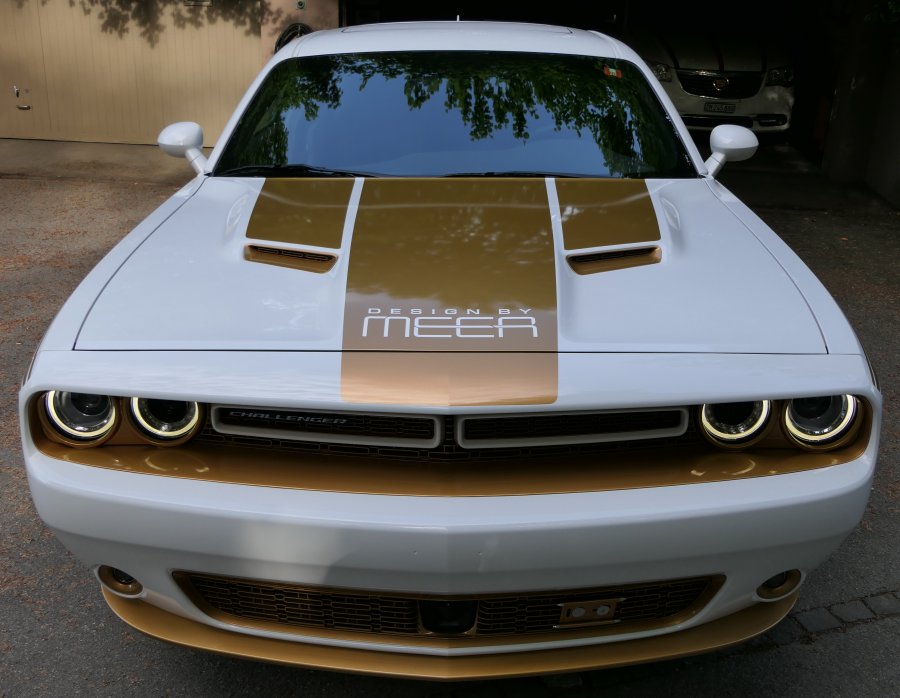
| some additional pictures of the hood from above to see the 3 stripes well |
 |
 |
 |
| did you note? the sunroof got white car wrapping |
 |
|
thank you for browsing this Challenger photo page. Of
course, I am aware, not everybody likes this design. But for me, it is my personal customizing project I was always dreaming of. Werner Meer - May 8, 2020 |
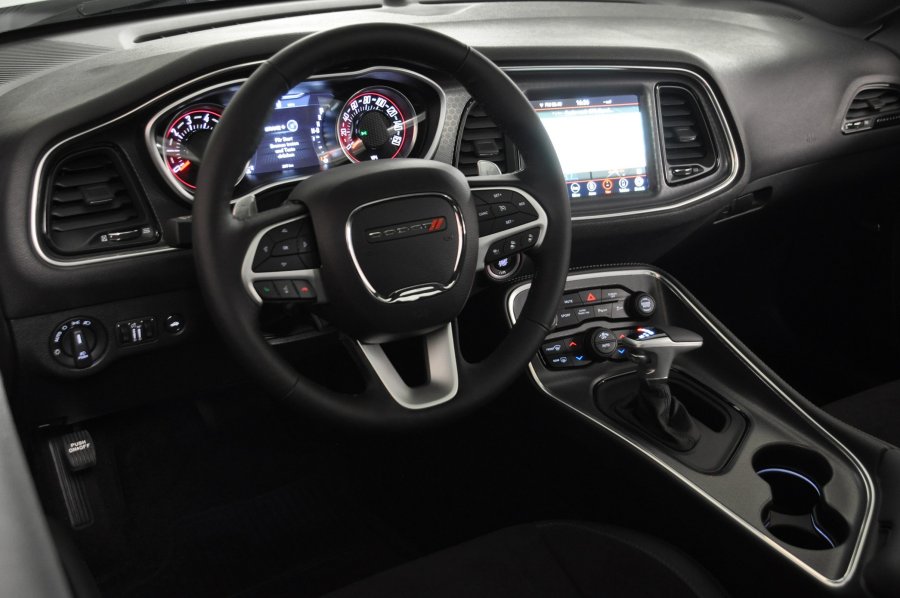
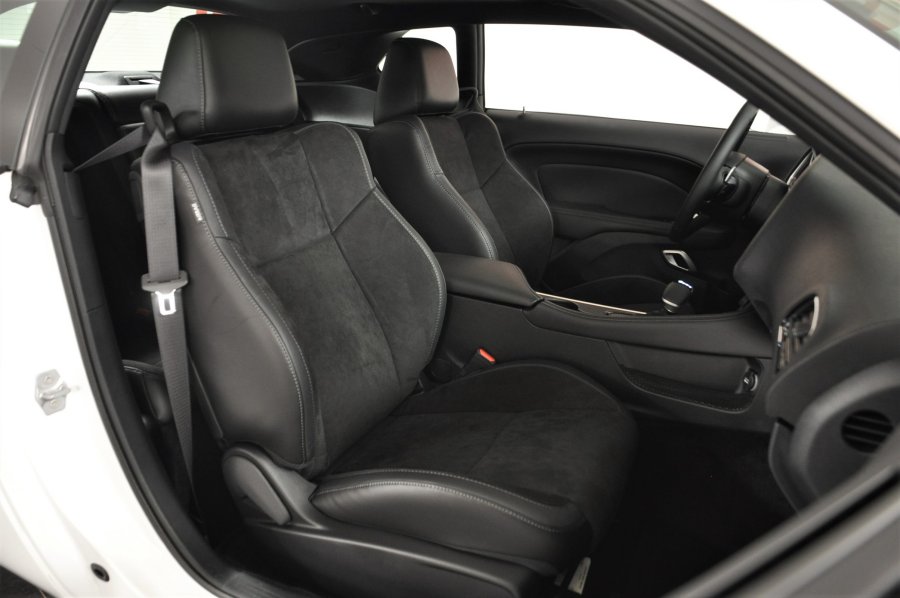
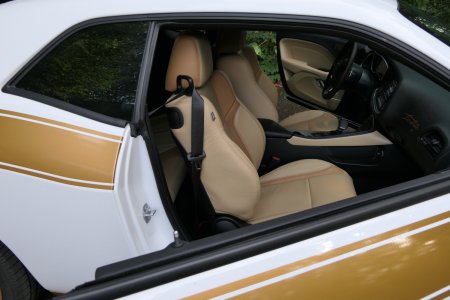
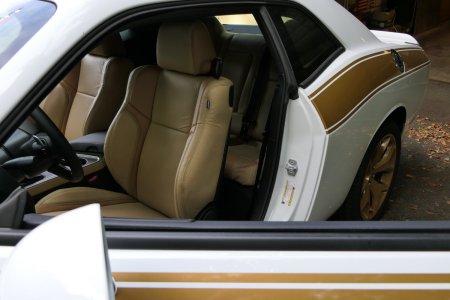
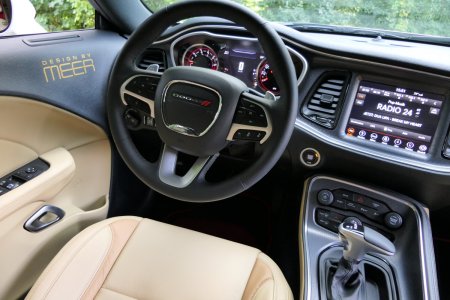
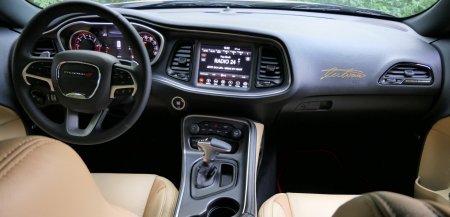
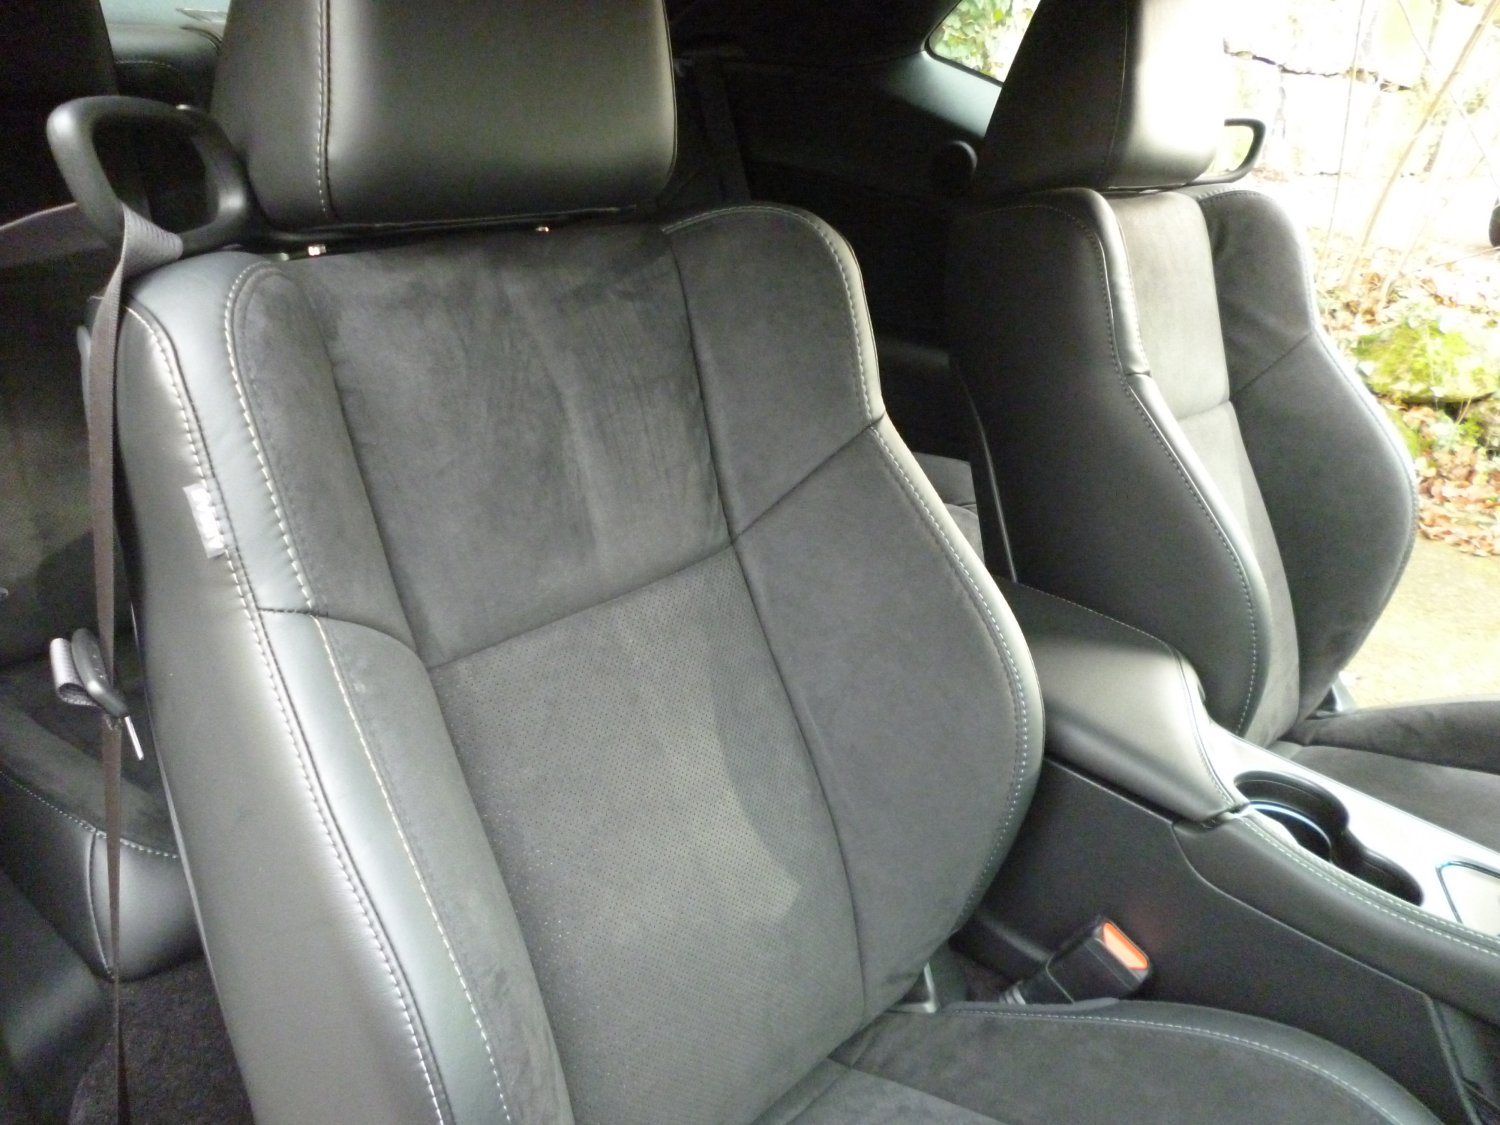
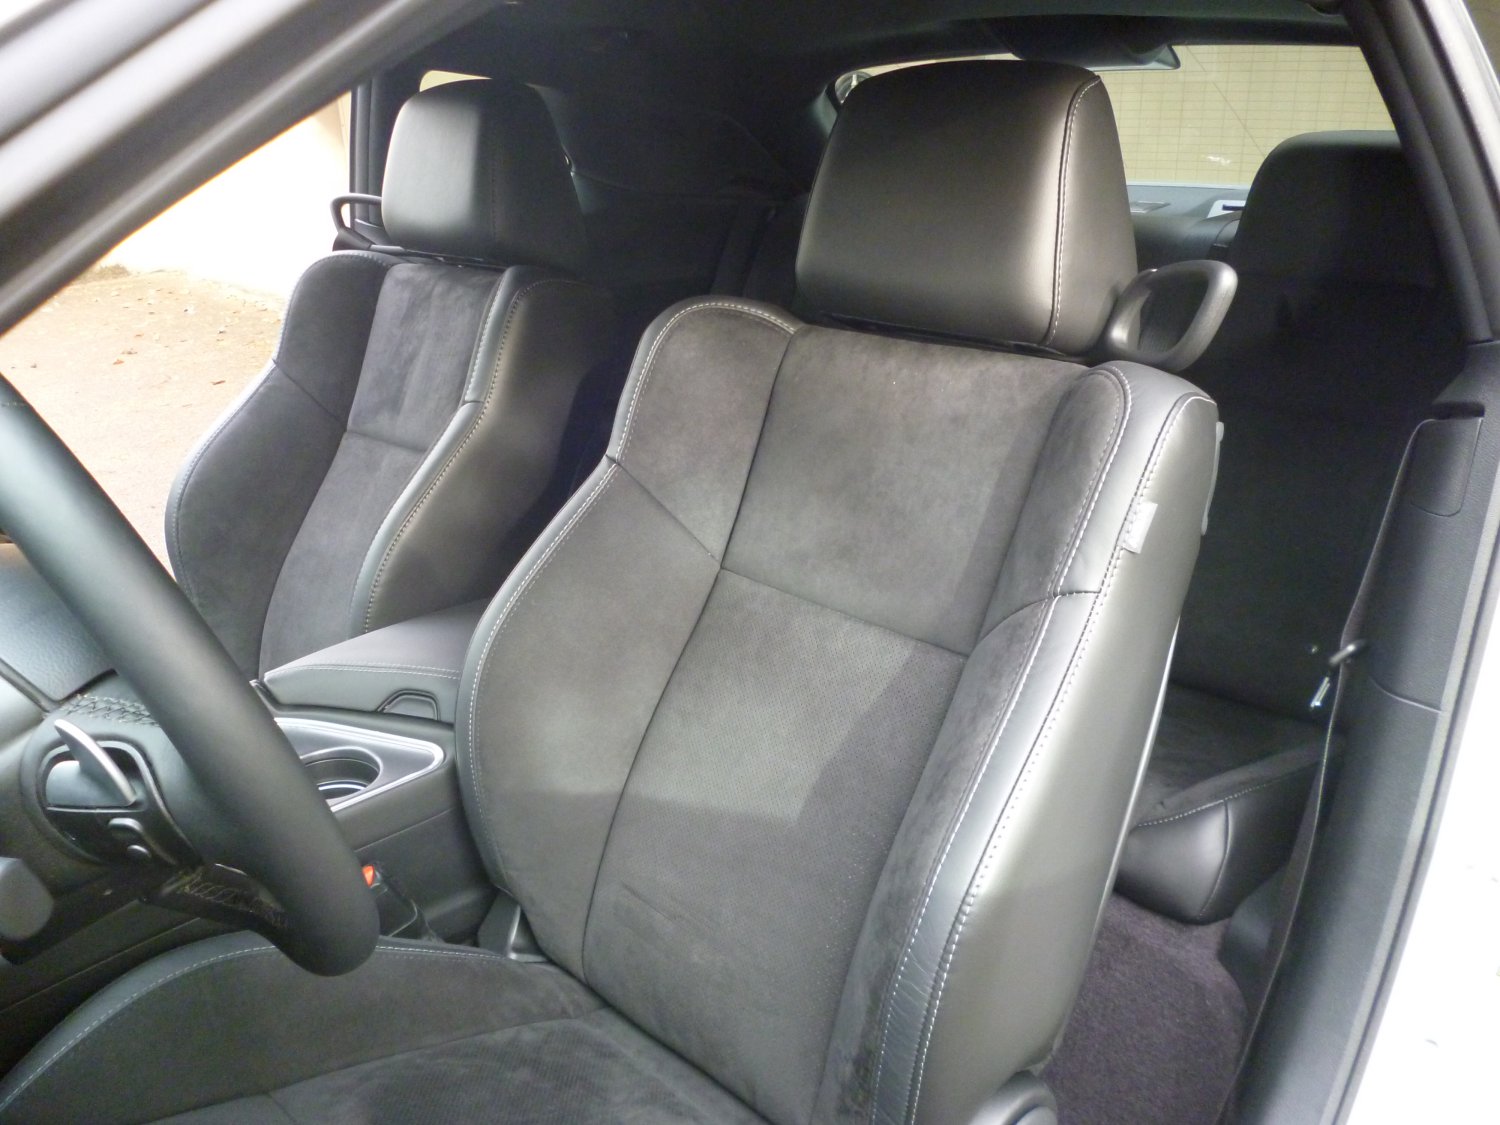
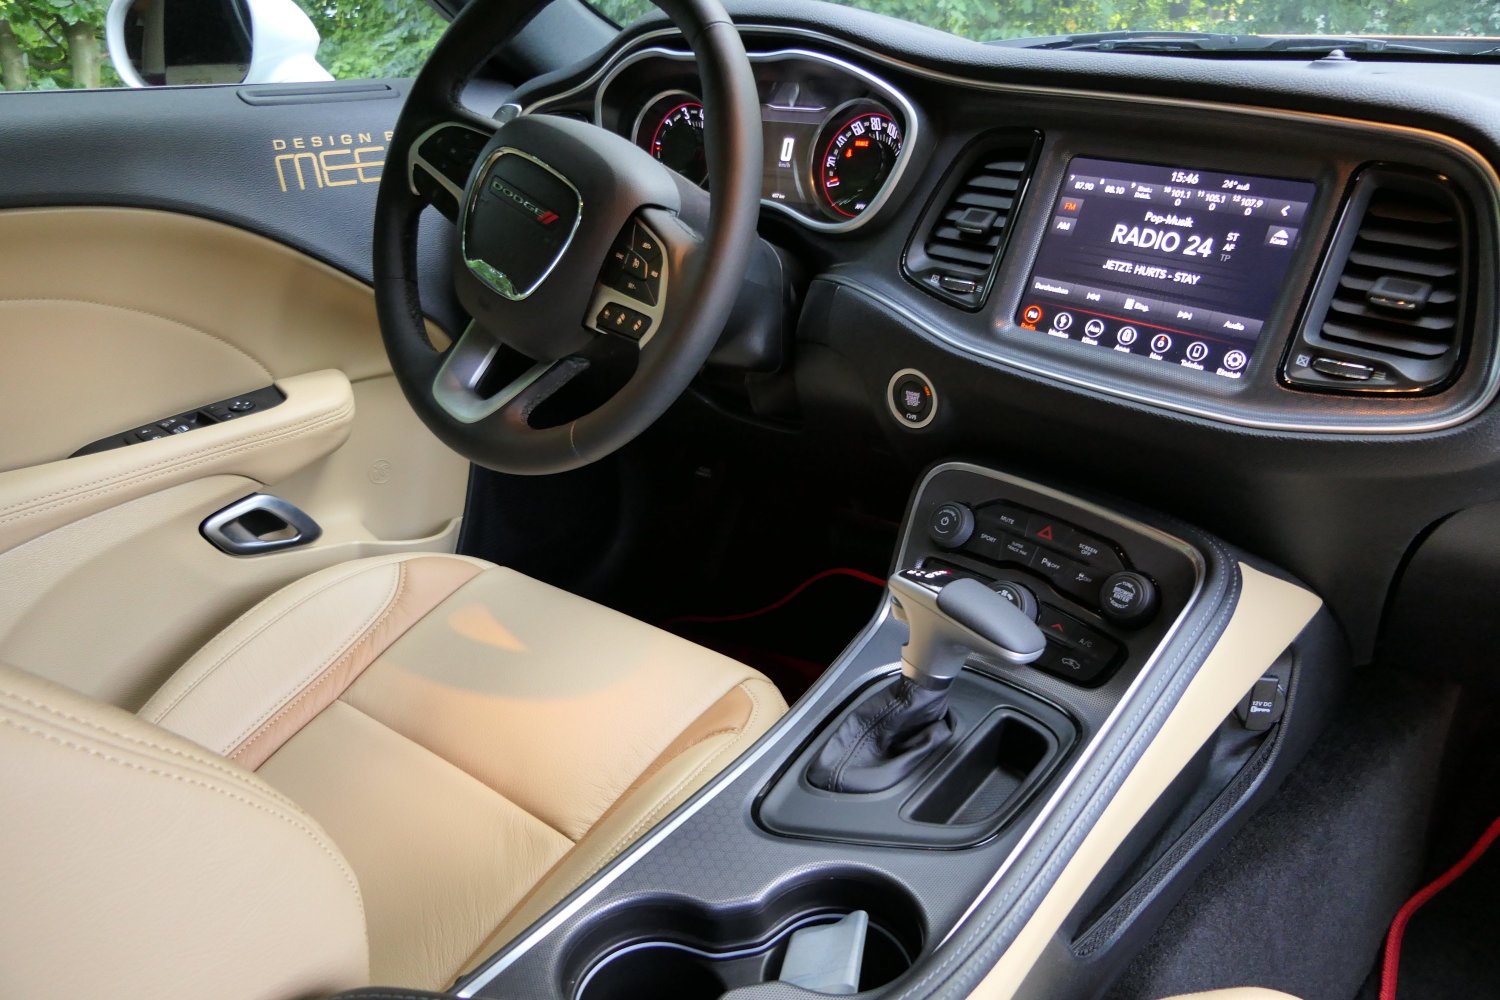
Part 6: Black interior has been replaced with cream color (August 30, 2020)
| Below: 2 Photos copyright by PRO CARS AG - www.procars.ch | |
 |
|
 |
|
|
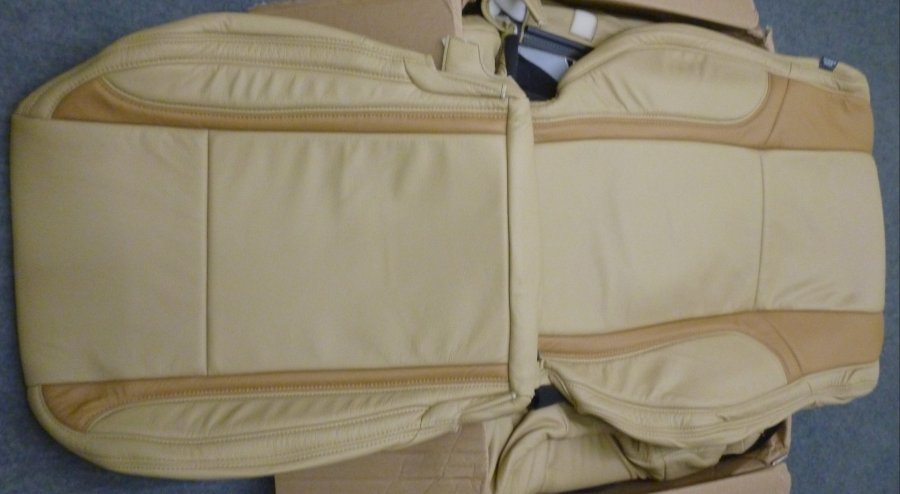
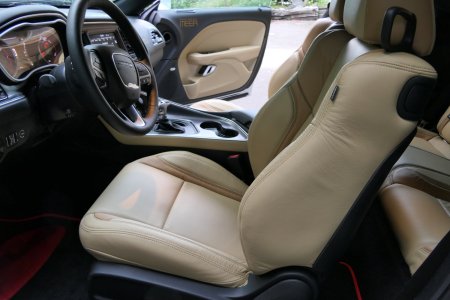
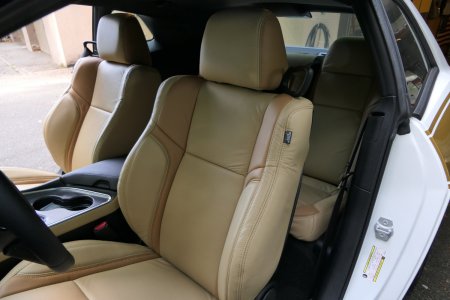
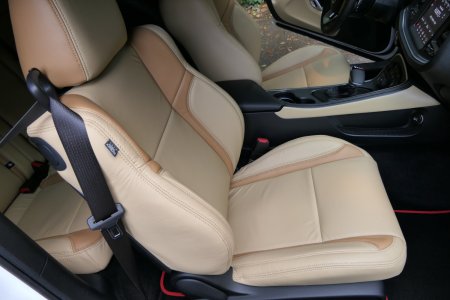
As I do not like the black interior, I was trying to find a solution for a beige interior. So, Katzkin Leather did produce and deliver the seat covers and more. official website: https://katzkin.com/ |
|
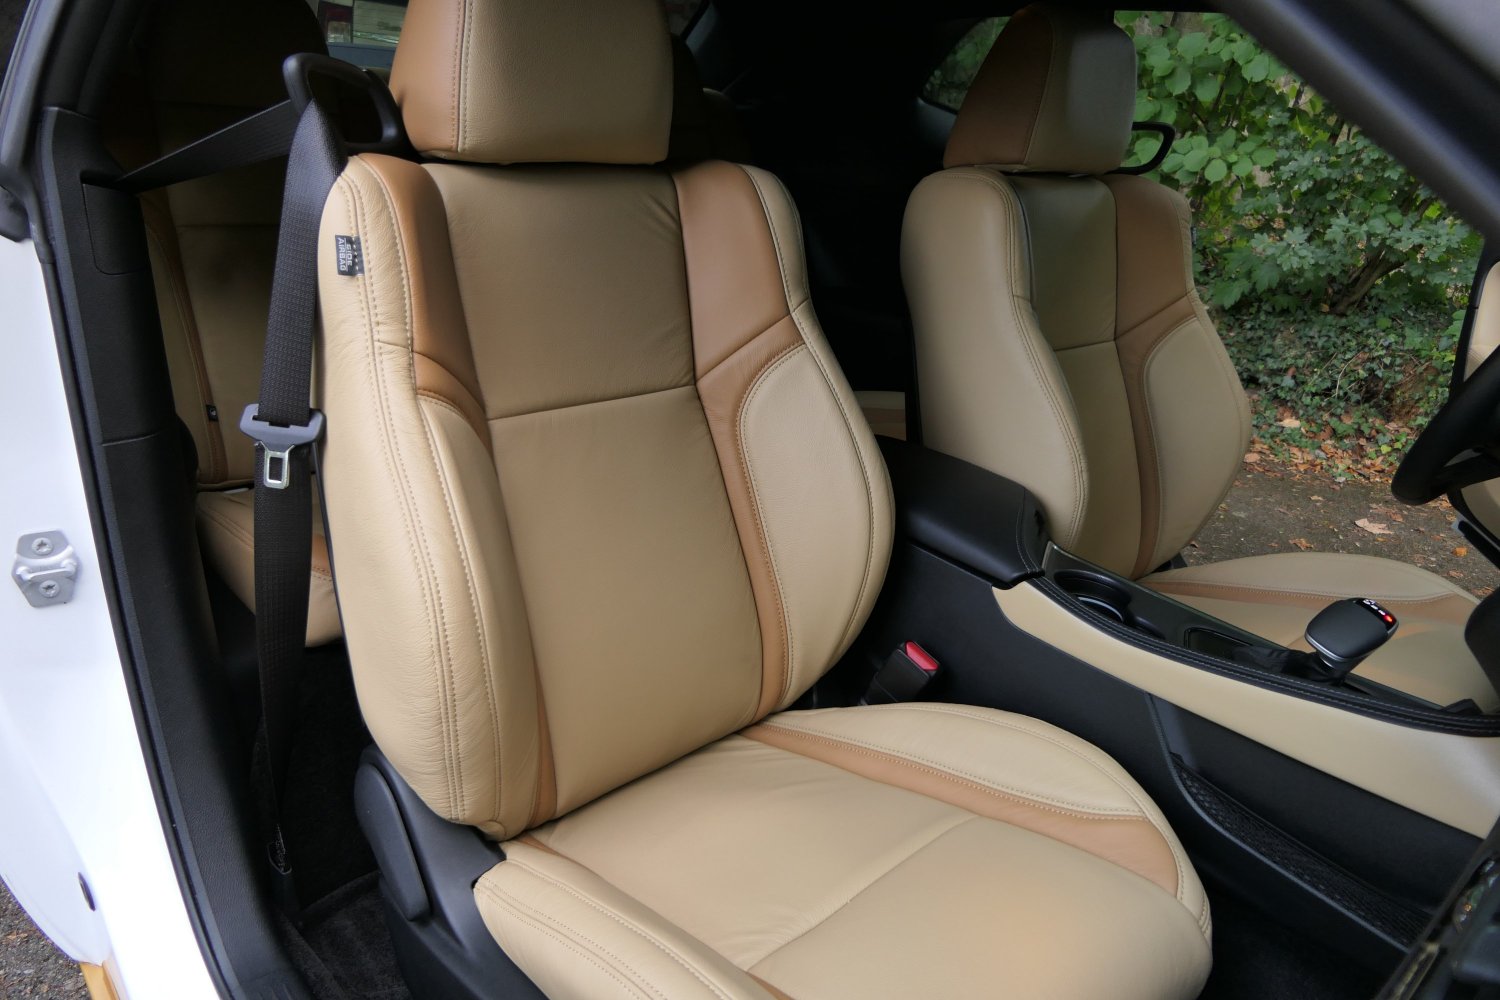
 Katzkin is the official supplier for Dodge Challenger Leather Seats. 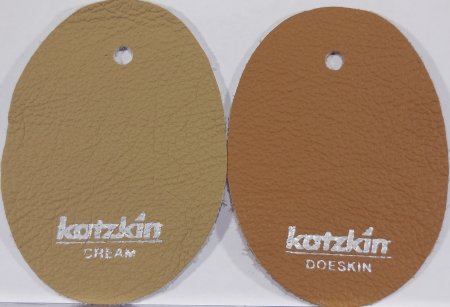 On April 6, I received these leather samples. For my new interior, I was chosing "Cream" as the main color for the seats and "Doeskin" as the second color for the wing inserts. It will match the golden/white exterior colors. |
 |
 |
|
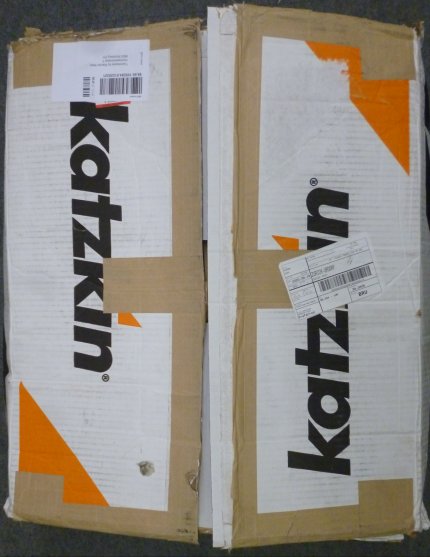
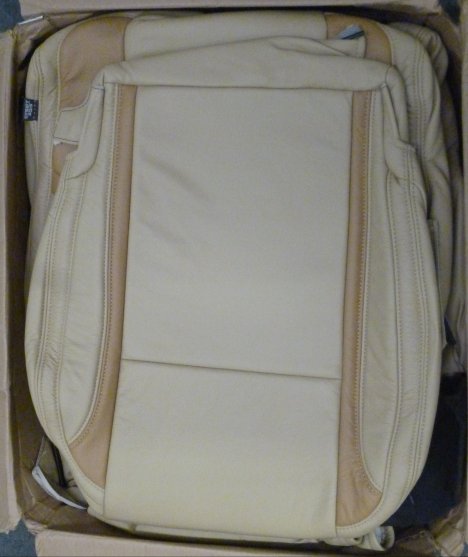
| On April 30, I placed my firm order with Katzkin. On June 11, my package left Oklahoma City and arrived on August 8 in Switzerland. The delay was because of Covid-19. Here is the box with the new leather seat covers. | |
 |
|
|
Hof Sattlerei, 8903 Birmensdorf took care of mounting
the Katzkin Leather and even more. official website: https://hof-sattlerei.ch/ |
|
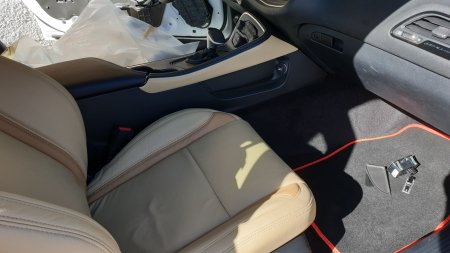
| The making of the interior by Hof Sattlerei. | |
| Mounting the seat covers was not an easy task. But Mr. Hof always knew a suitable solution. Here we are showing some dificult steps in mounting everything. These photos below are copyright of Hof Sattlerei. | |
| to see large photos just click on the 3-digit number under each photo | |
 |
|
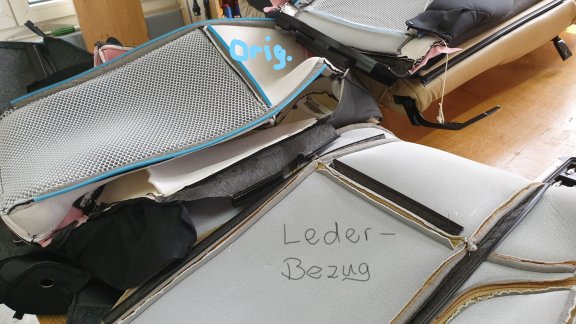
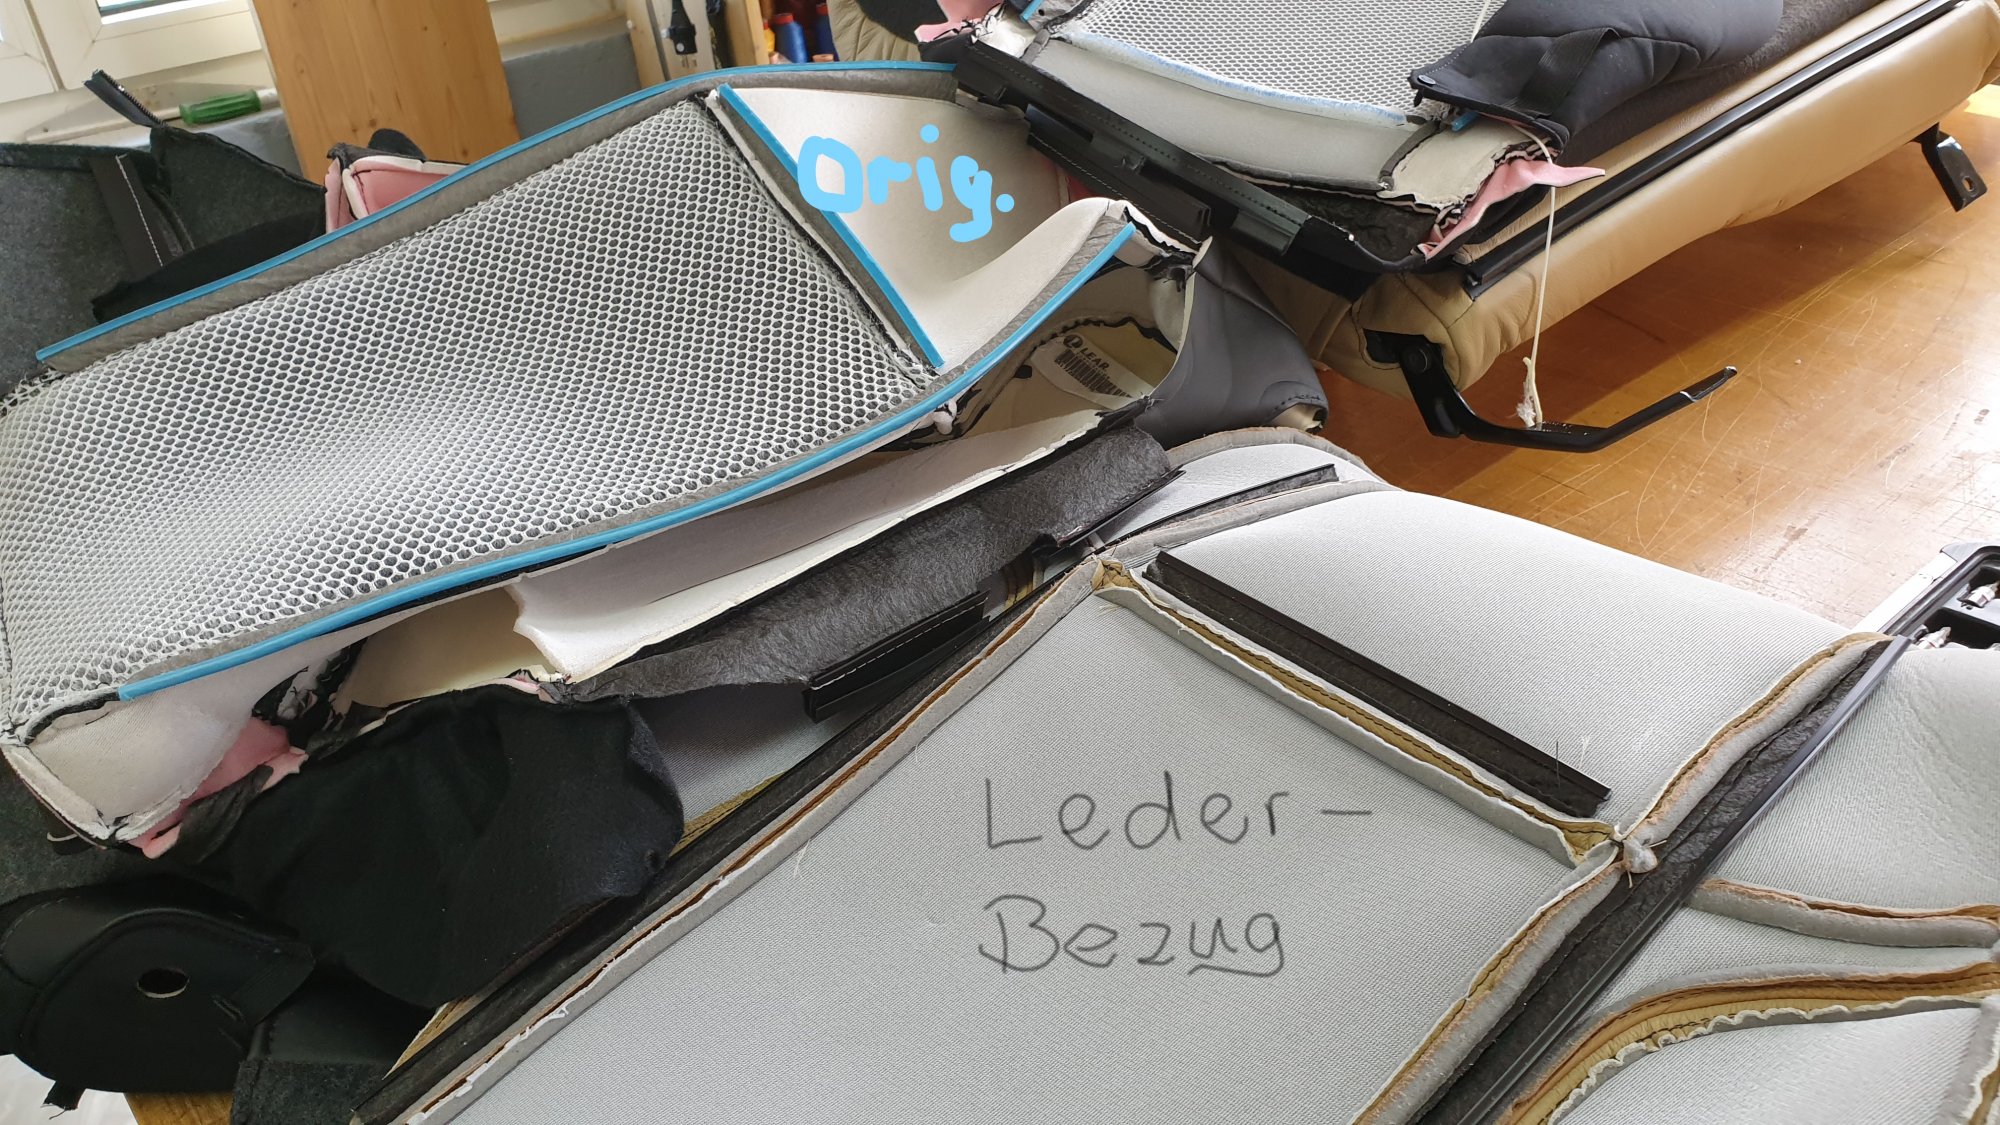
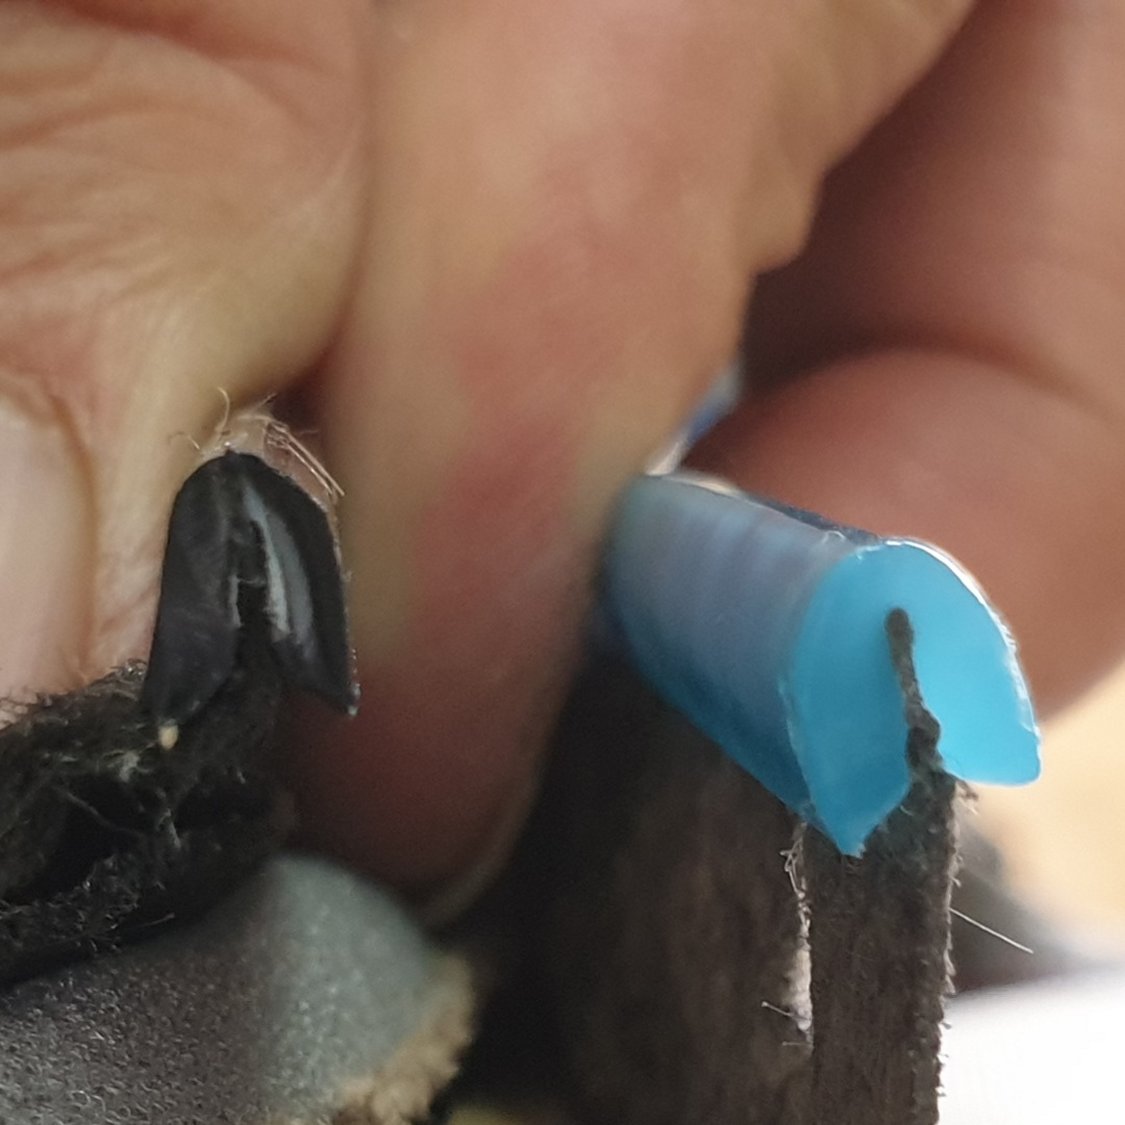
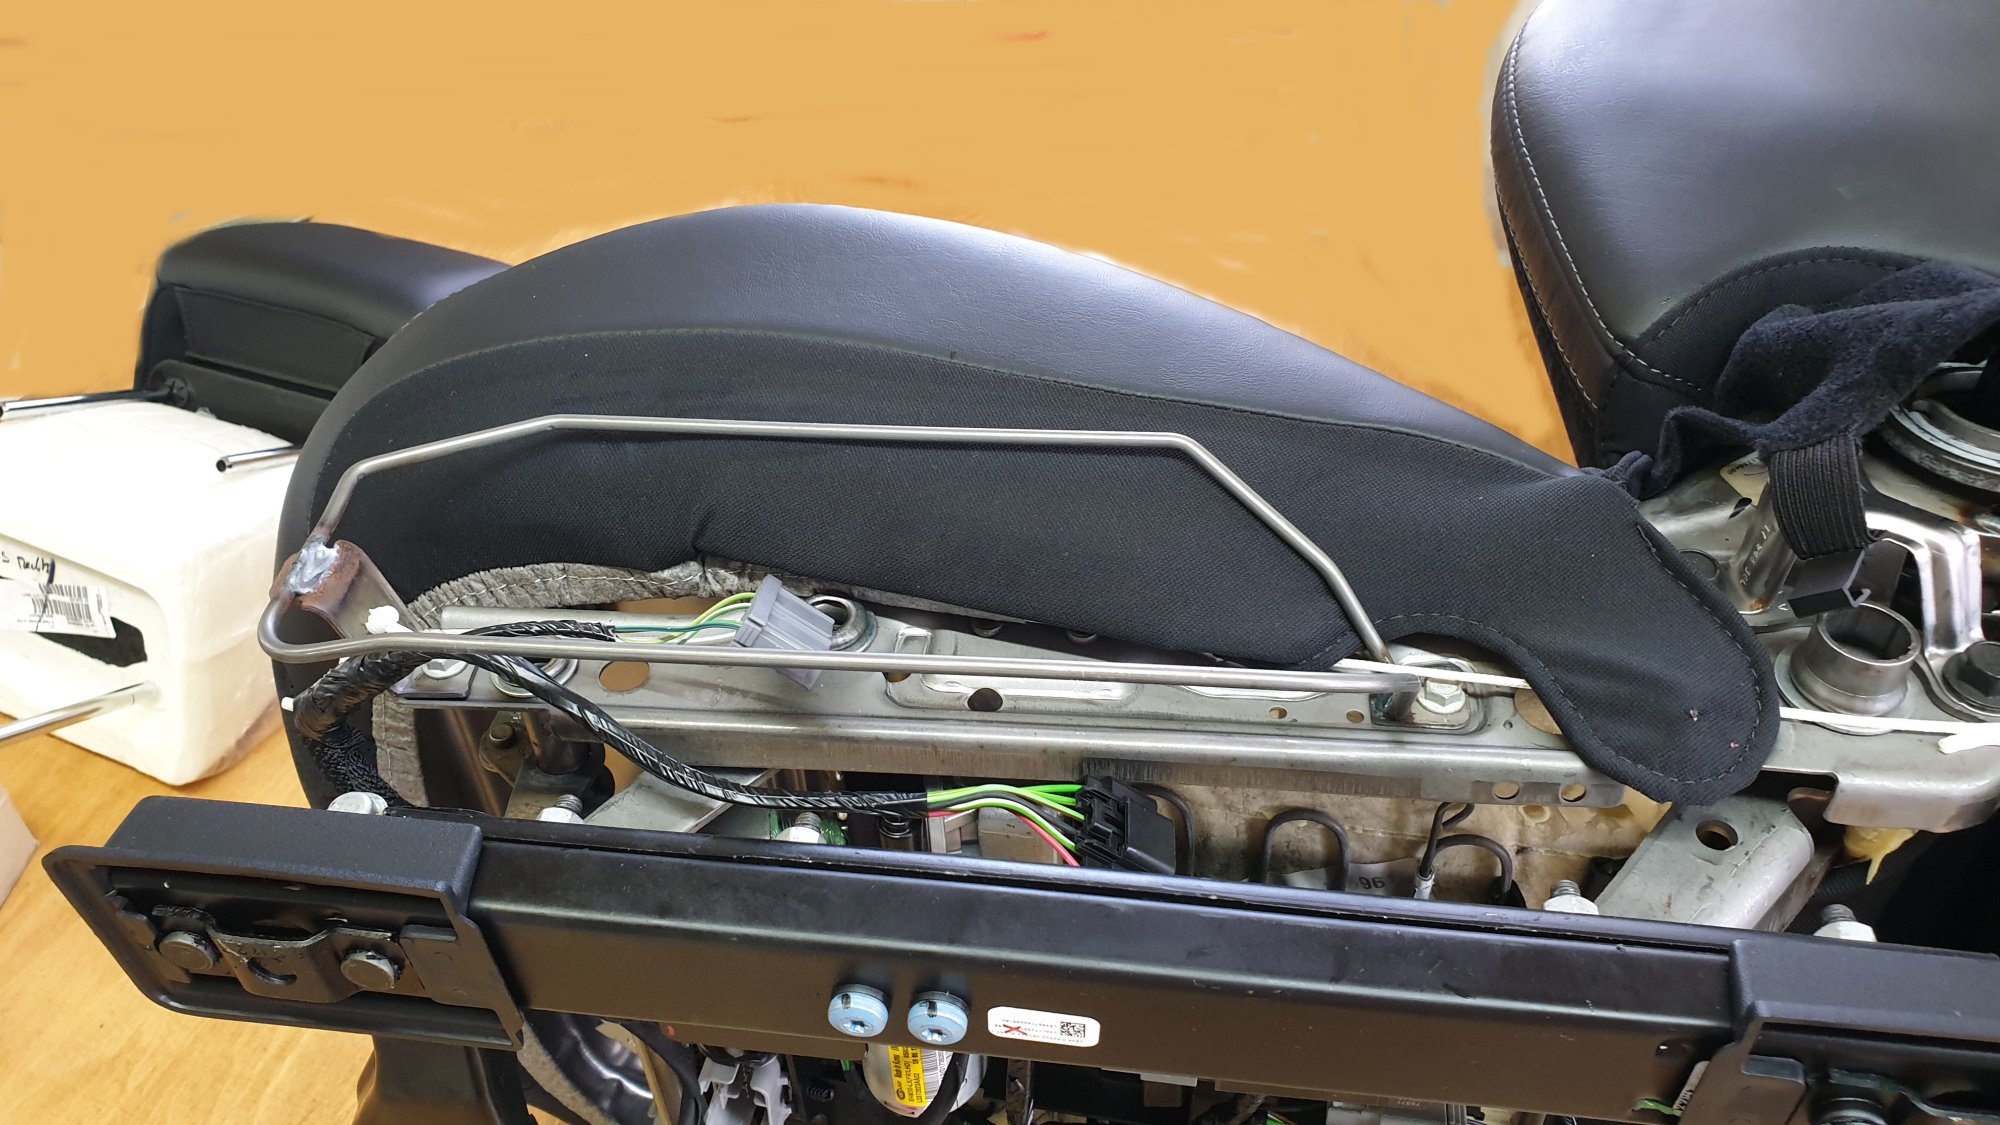
| 258 - factory stock (left) w/blue plastic rails and new seat cover with black rails (1 mm less). - 259 | |
| There are problems in assembling the front covers. Metal rods are no longer cast in the seat cushions so that the covers can be pulled in with clips, but now there are plastic clips that fit and clamp the plastic rails precisely. The problem with the seat covers and the back covers is that the retaining strips sewn into the leather covers are 1 mm too thin and therefore no longer hold in the plastic clips. You can see a picture with the original plastic rails (blue) and the rails on the leather cover (black) in those photos above. | |
 |
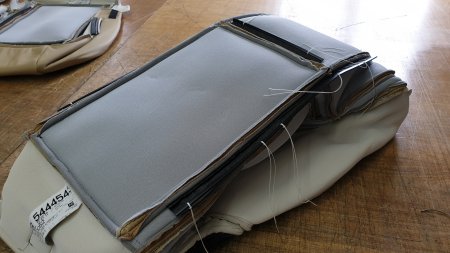 |
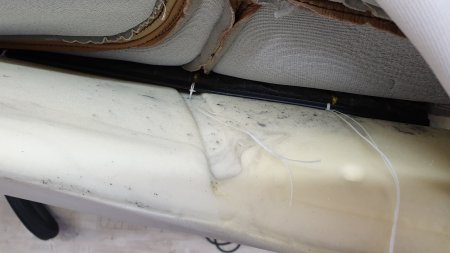
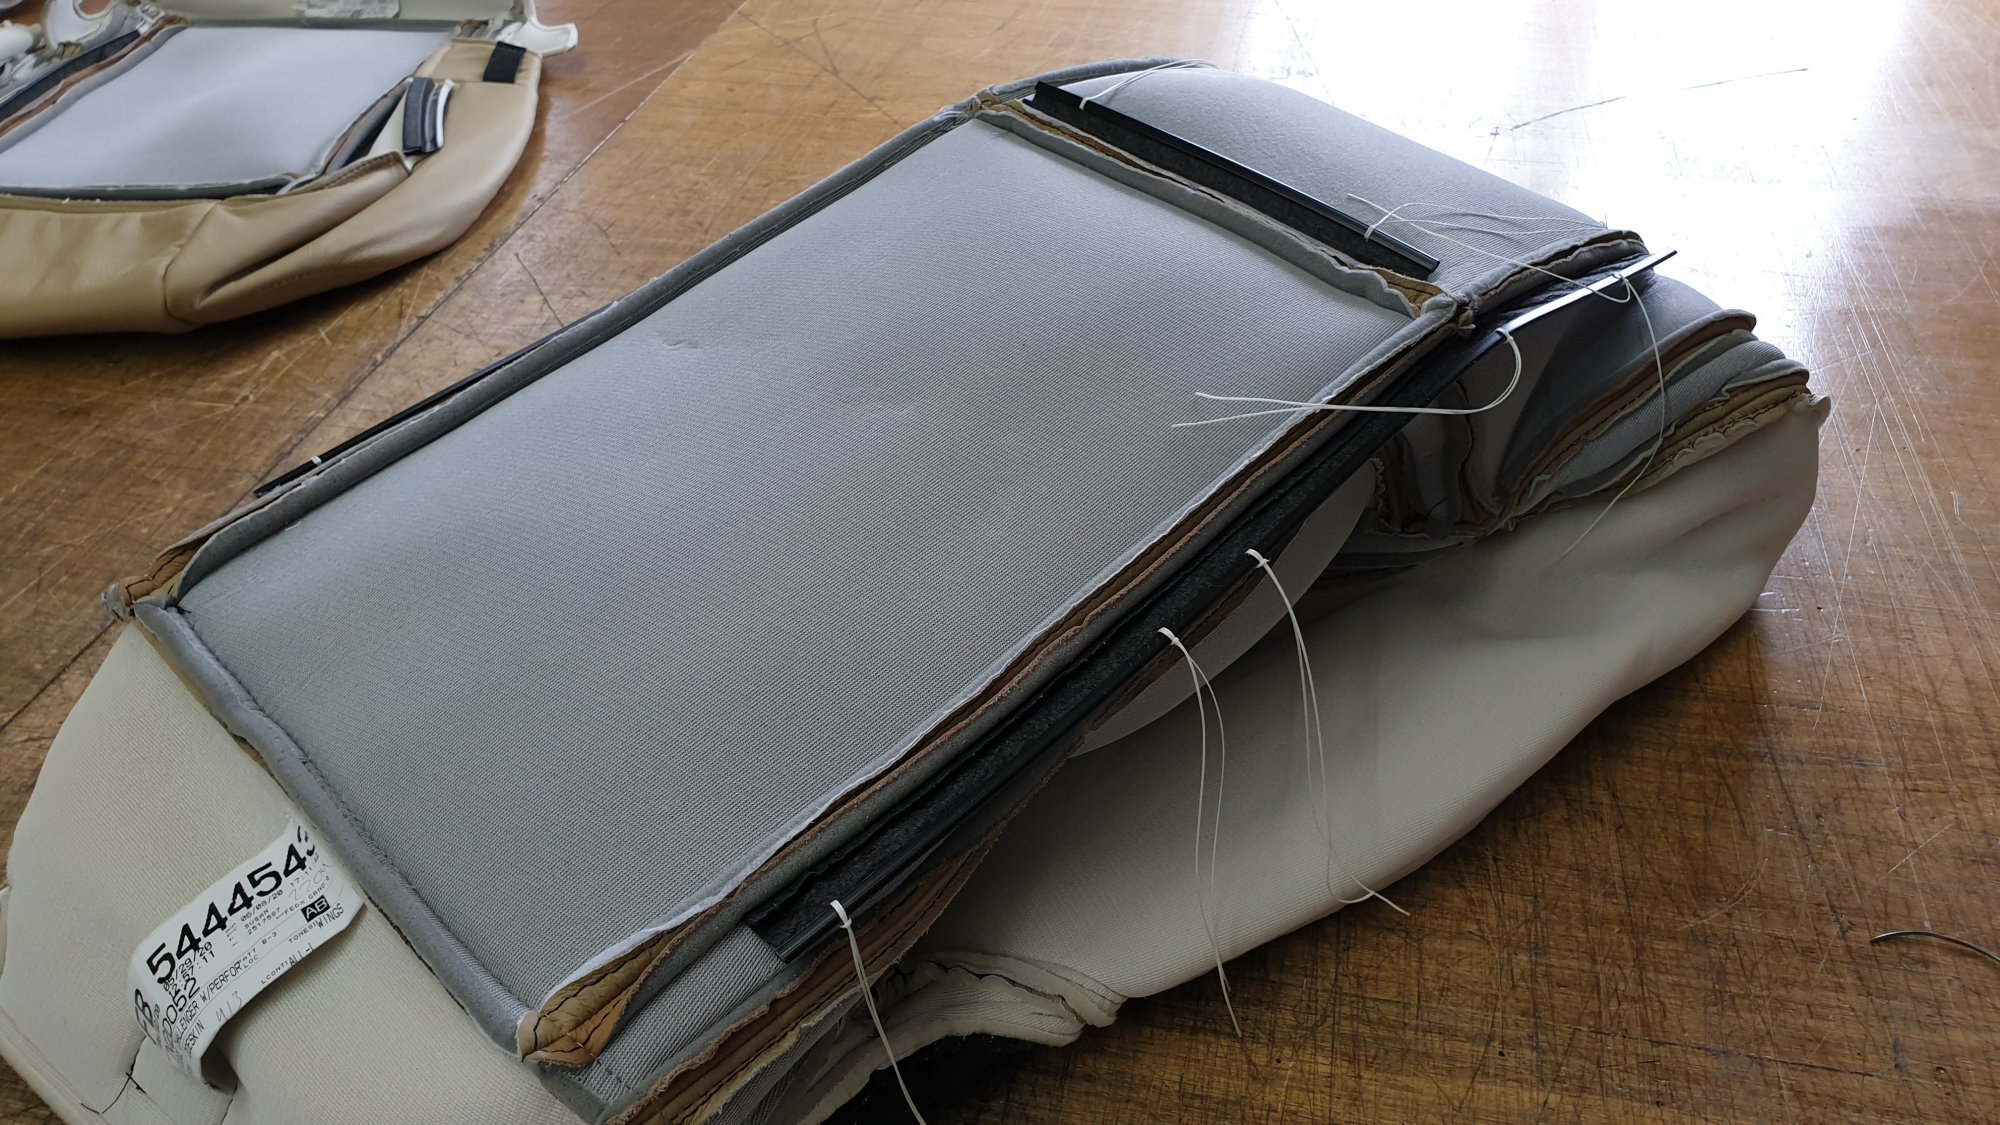
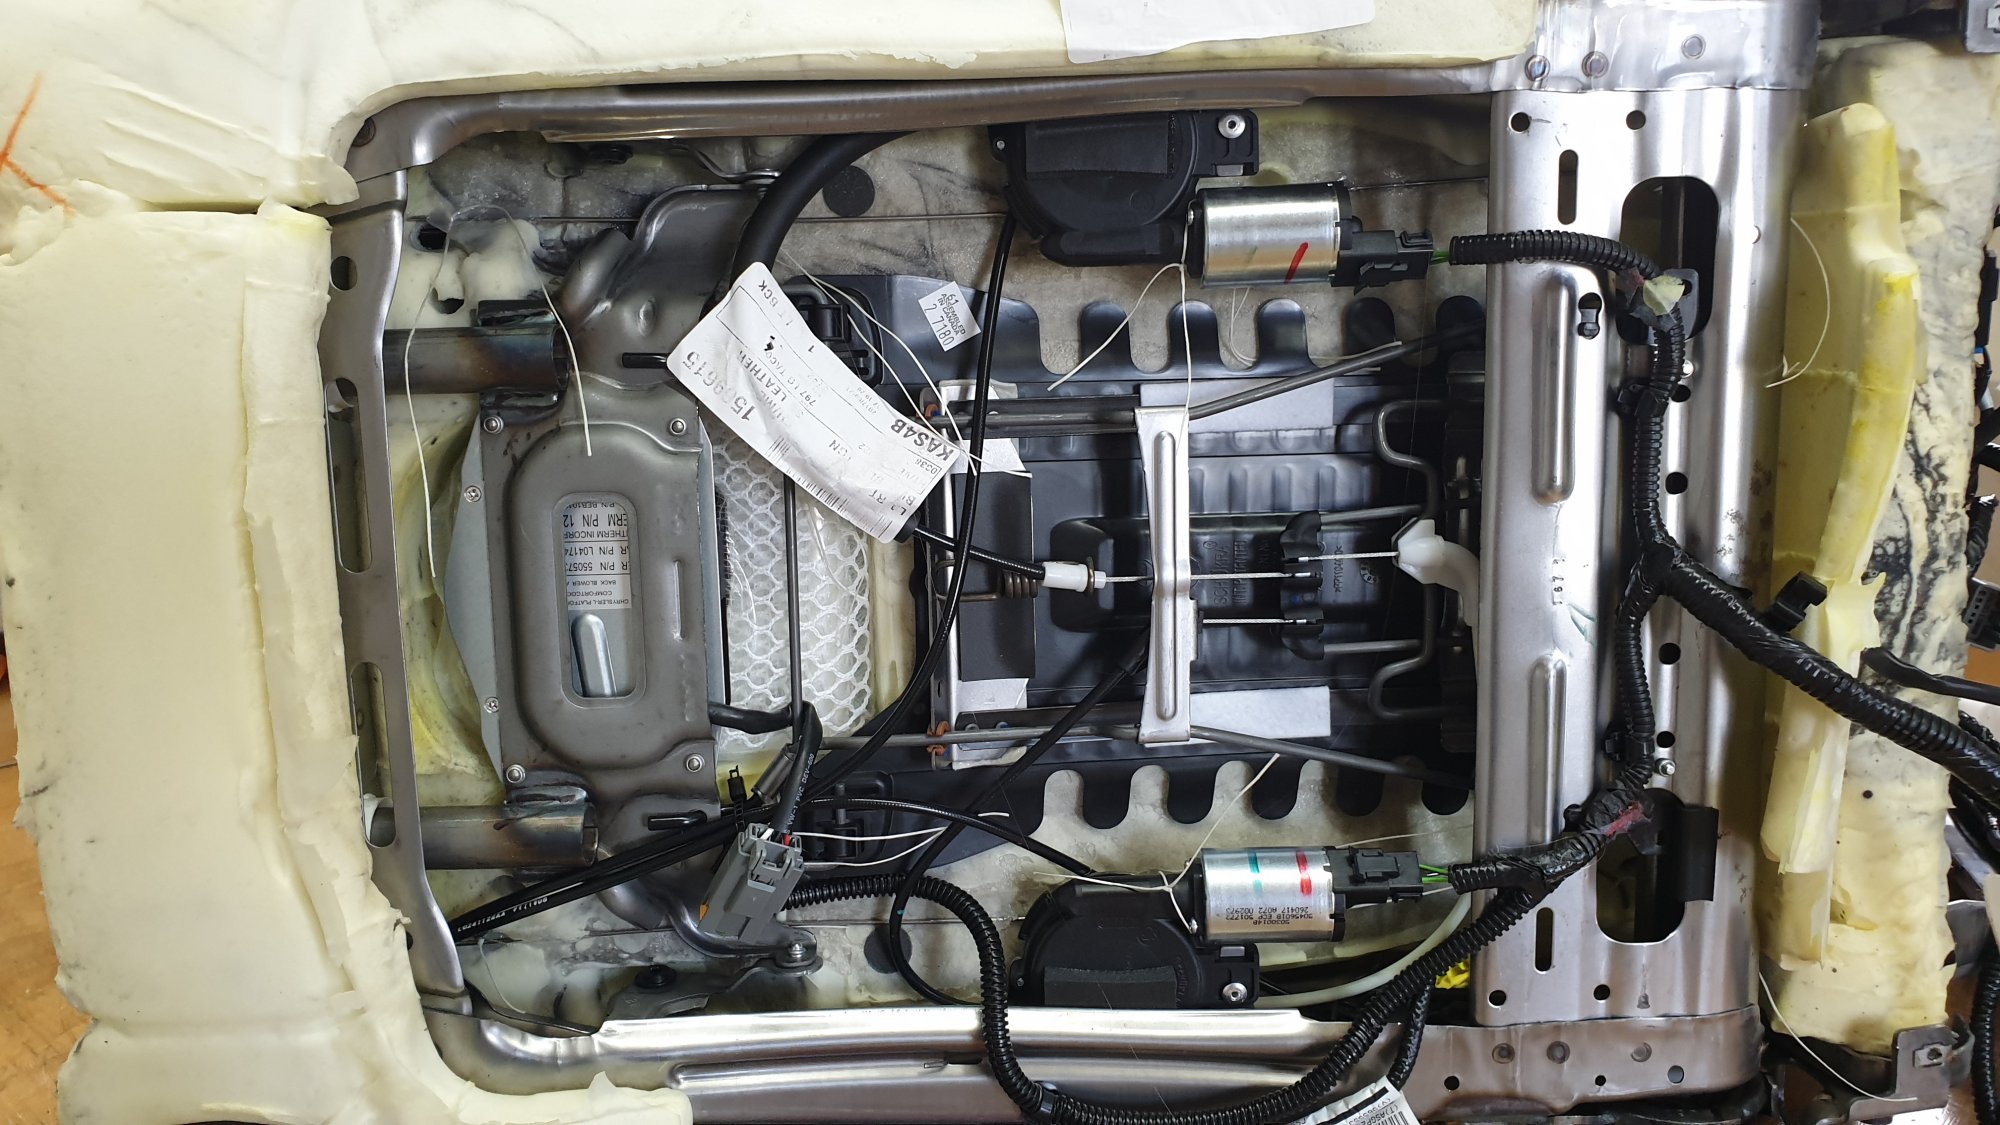
| The threads help holding the seat covers in place. - 260 | The threads help holding the seat covers in place. - 261 |
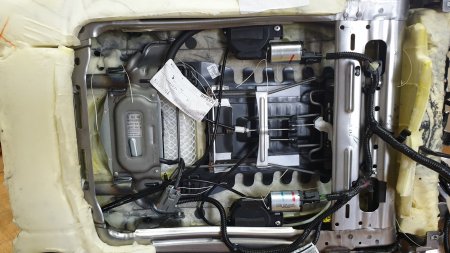
| The covers of the backrests are tightened with the existing rails by means of tie threads attached to the back of the holding rods. This means that they cannot break out of the clips. In addition the seat covers are glued into the clips with hot glue and fix the rails on the left and right with 2 binding threads each in the seat area (behind the stitch line) to secure them. | |
 |
 |
| diver's seat with *old" seat cover. - 262 | driver's seat underside: you can see the threads (enlarge). - 263 |
 |
 |
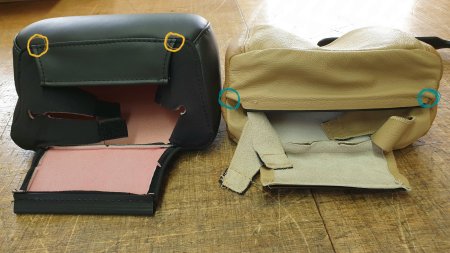
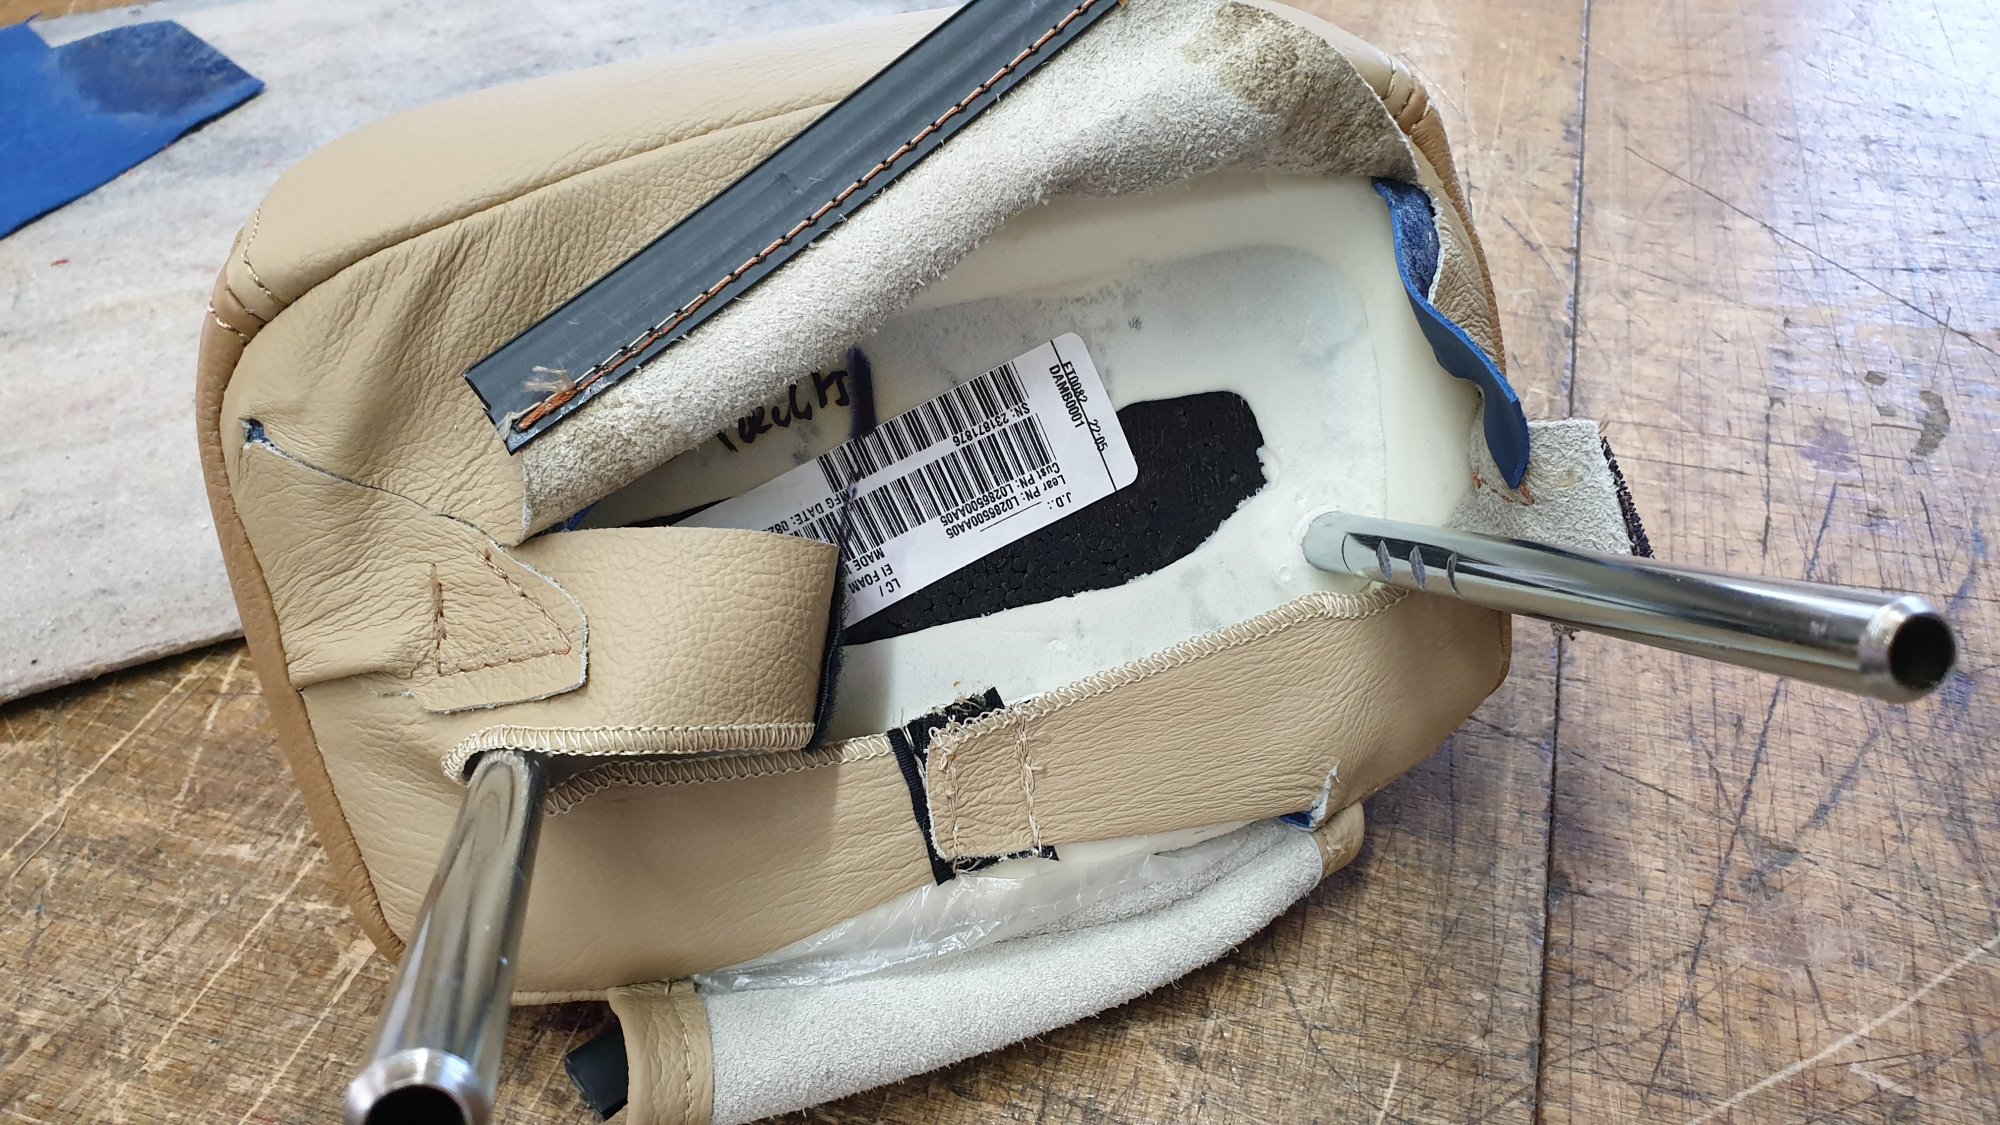
| The headrest cover cannot be mounted because the opening is by far too small. - 264 | But the specialist found a solution in cutting both corners and fixed it with "hook-and-loop" fasteners. - 265 |
 |
|
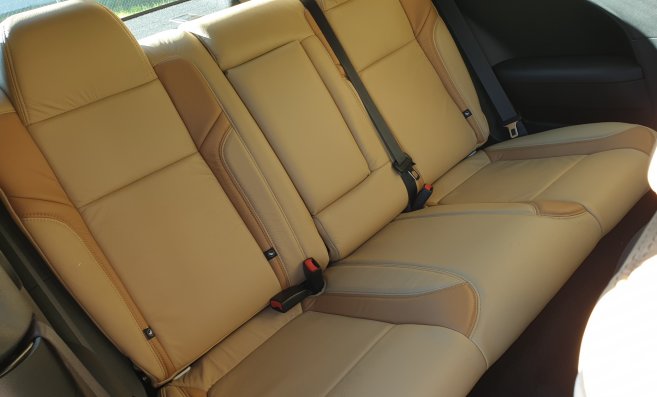
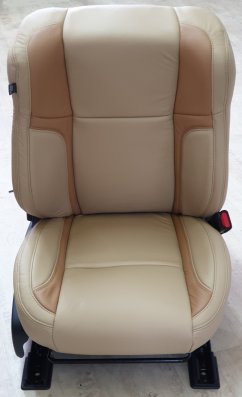
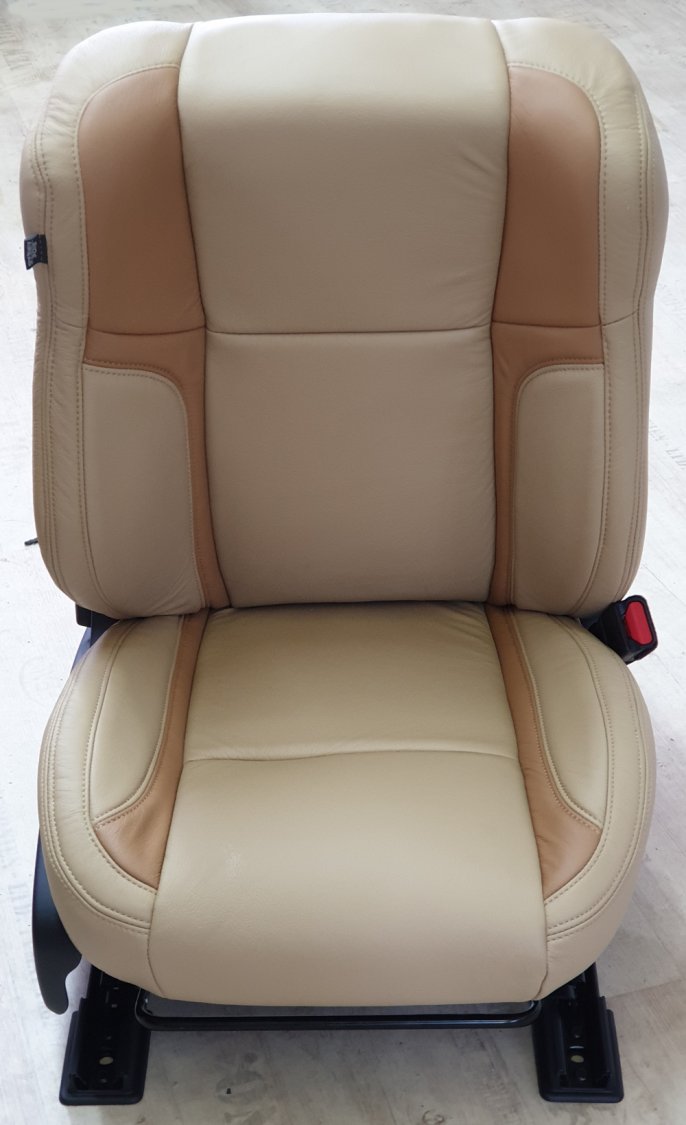
| 266 - The rear seat bench could be mounted w/o any problems. The pasenger's seat is finished as per the description above. - 267 | |
 |
 |
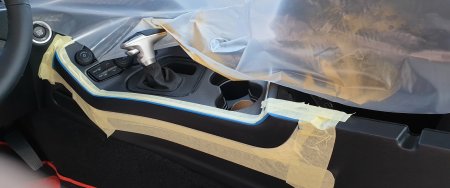
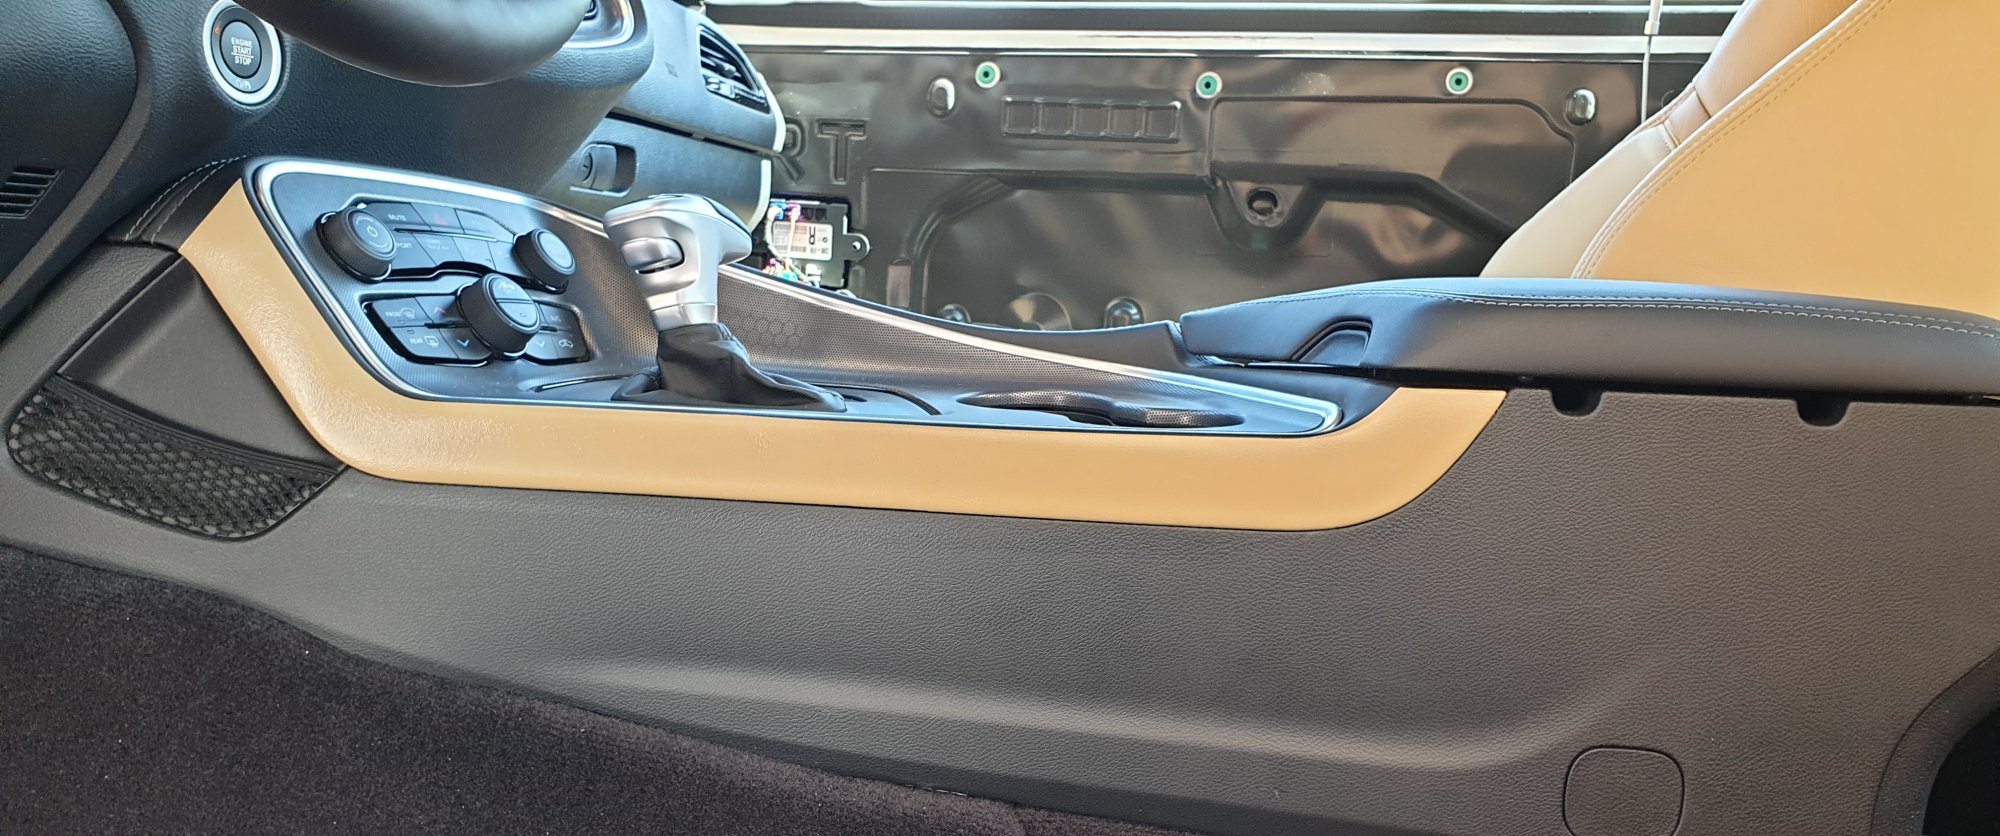
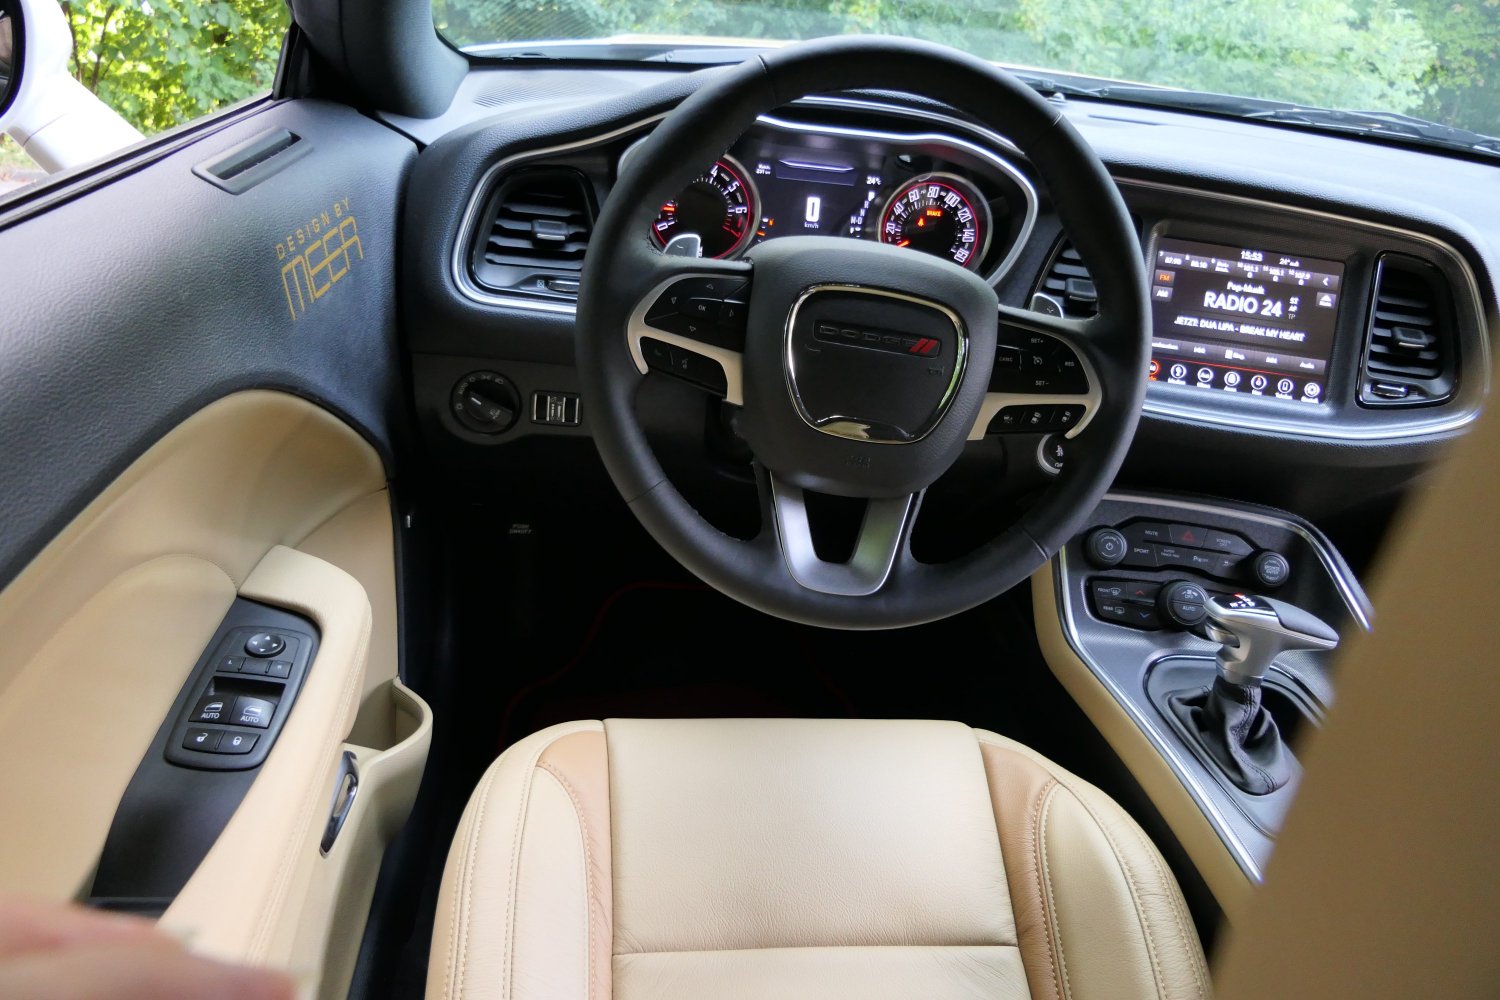
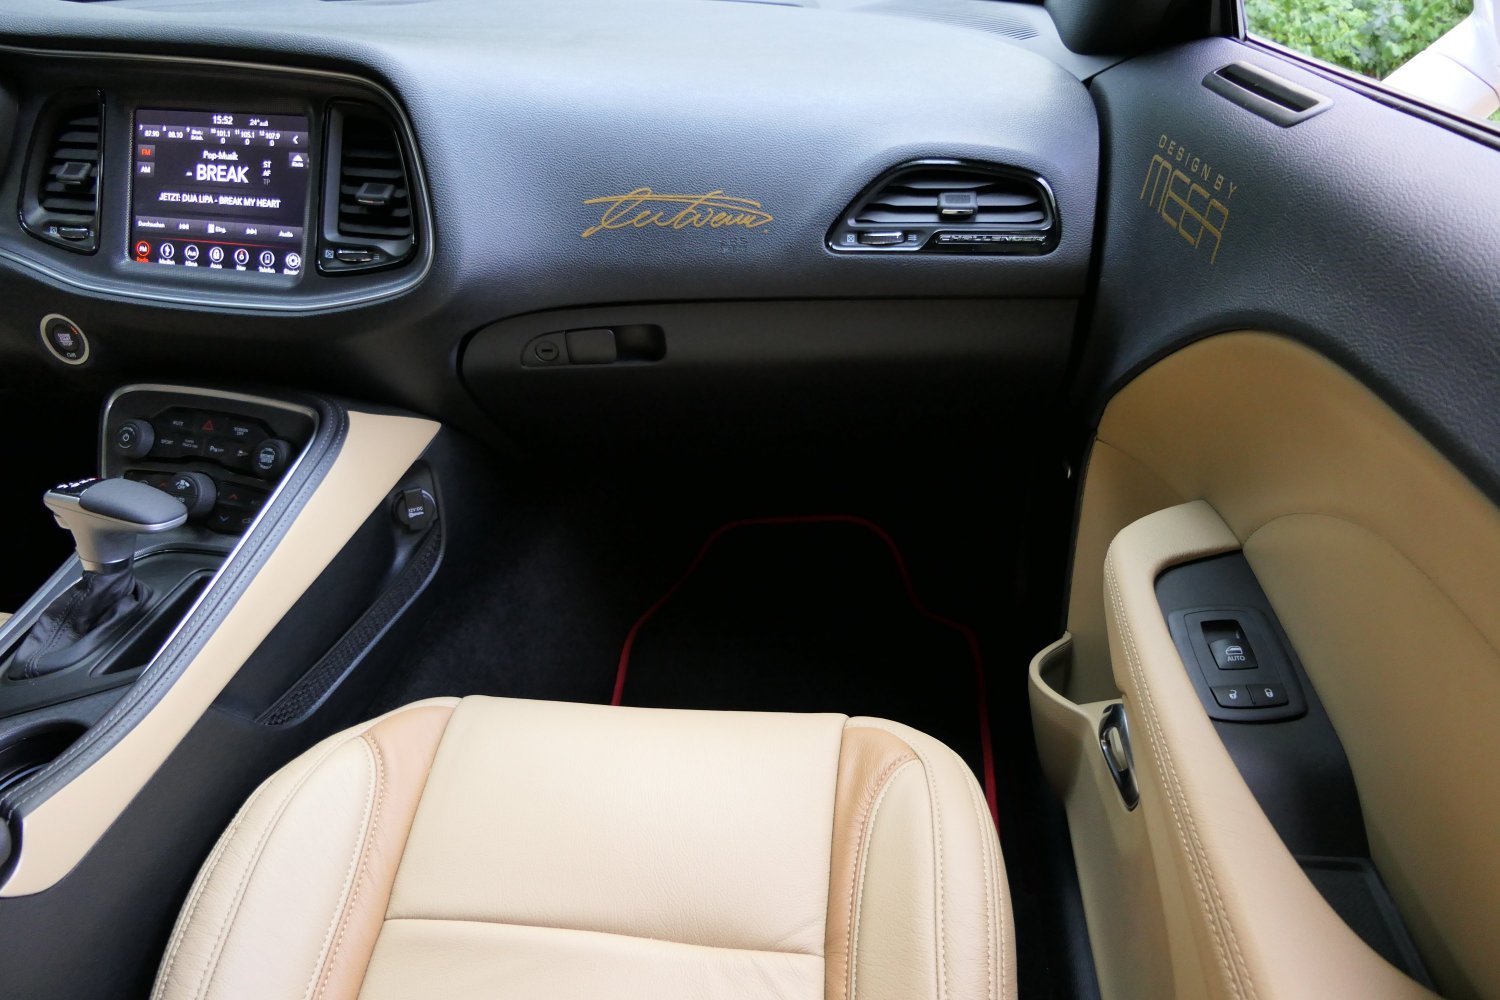
| The middle console was masked and painted beige with a special kind of leather spray. - 268 | The result is perfect because the special (leather) paint is 100 % the same color like the real leather seats. - 269 |
 |
 |
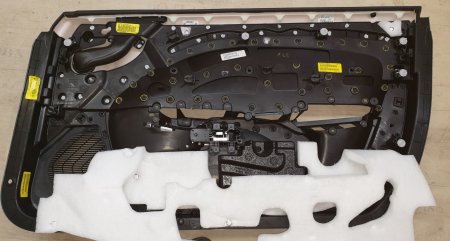
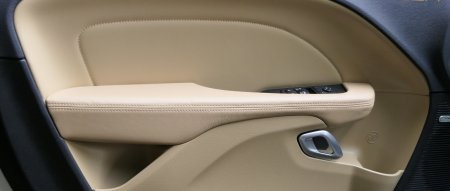
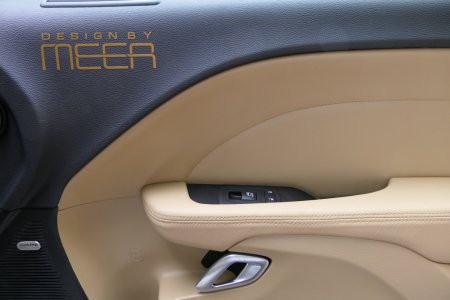
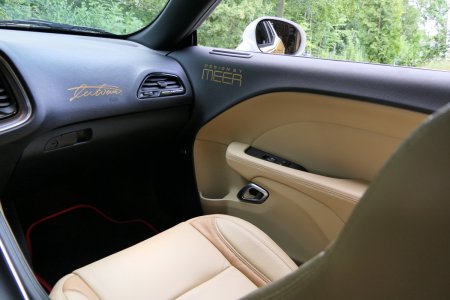
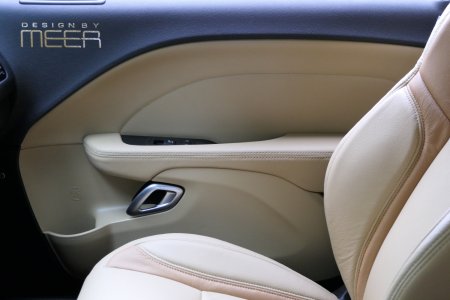
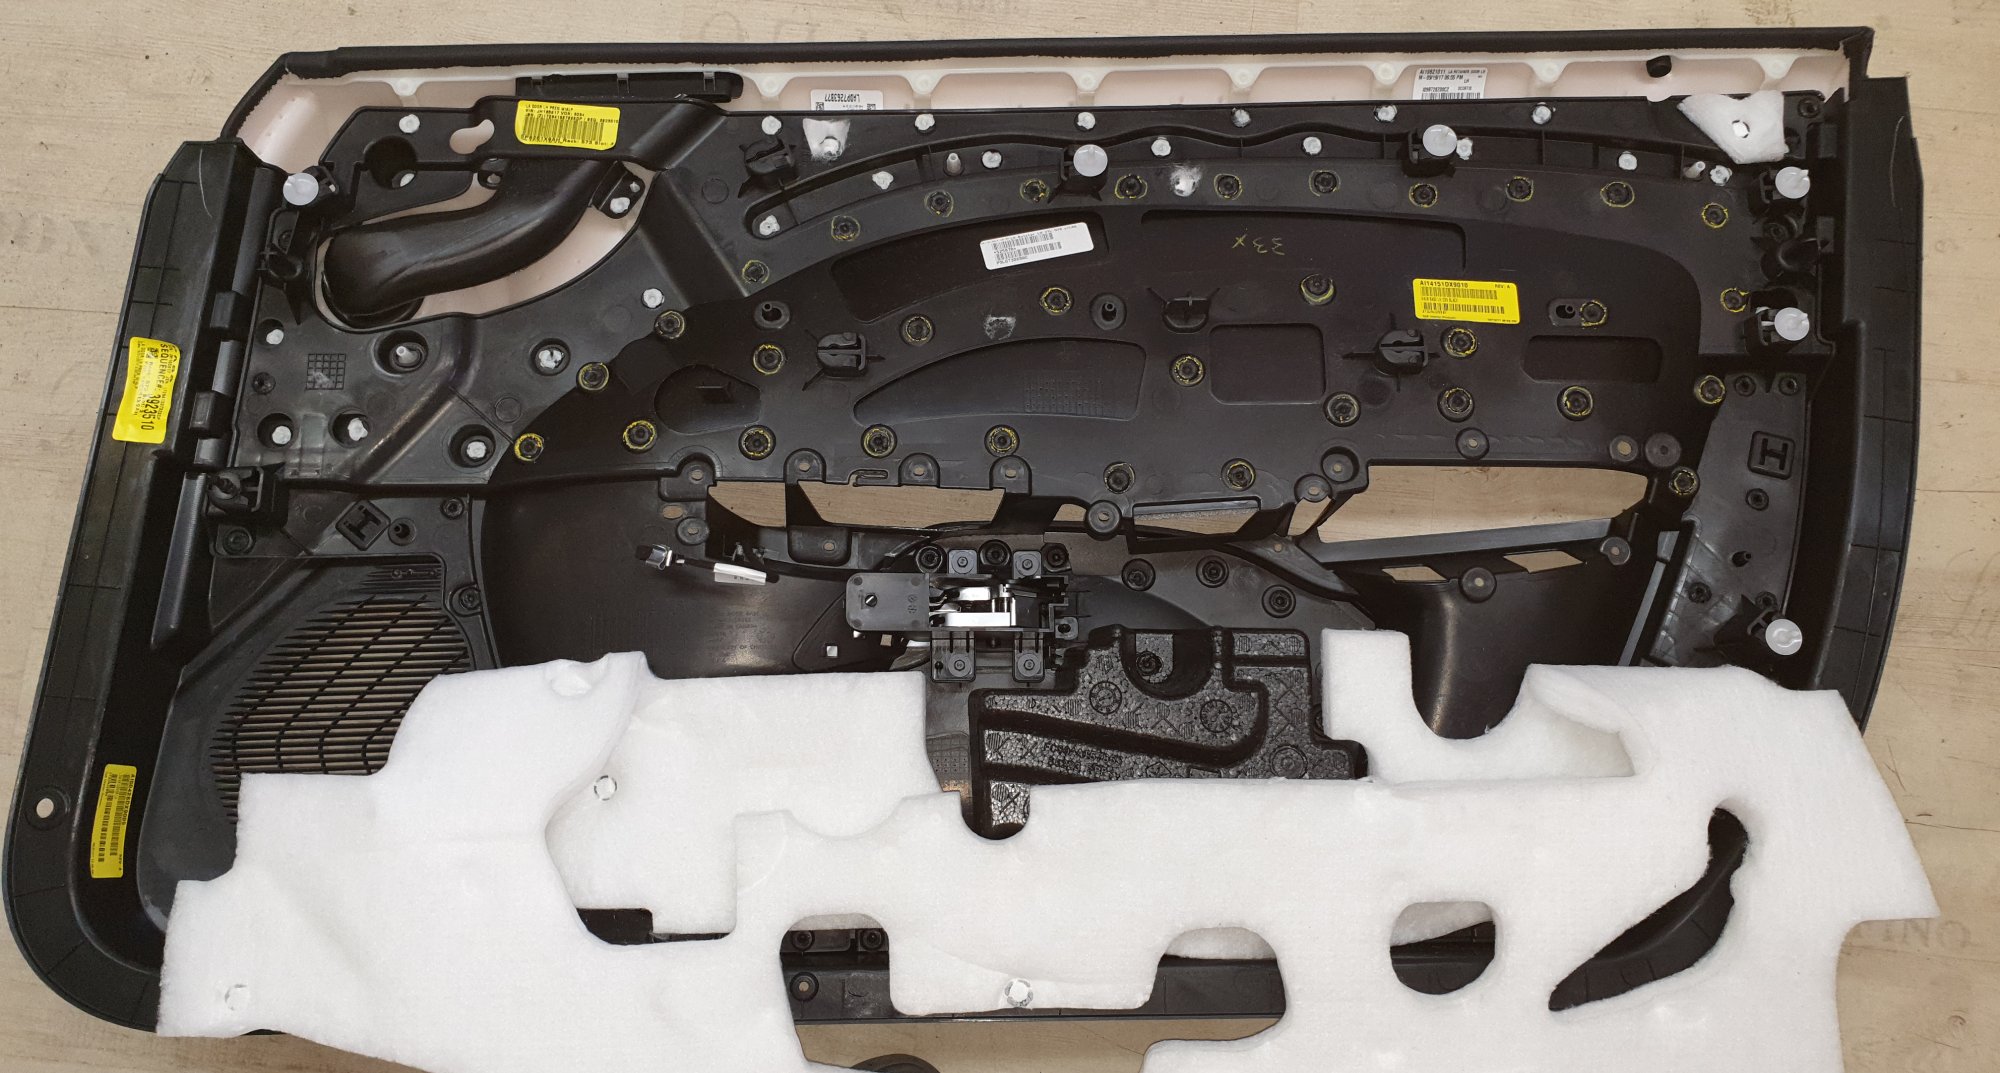
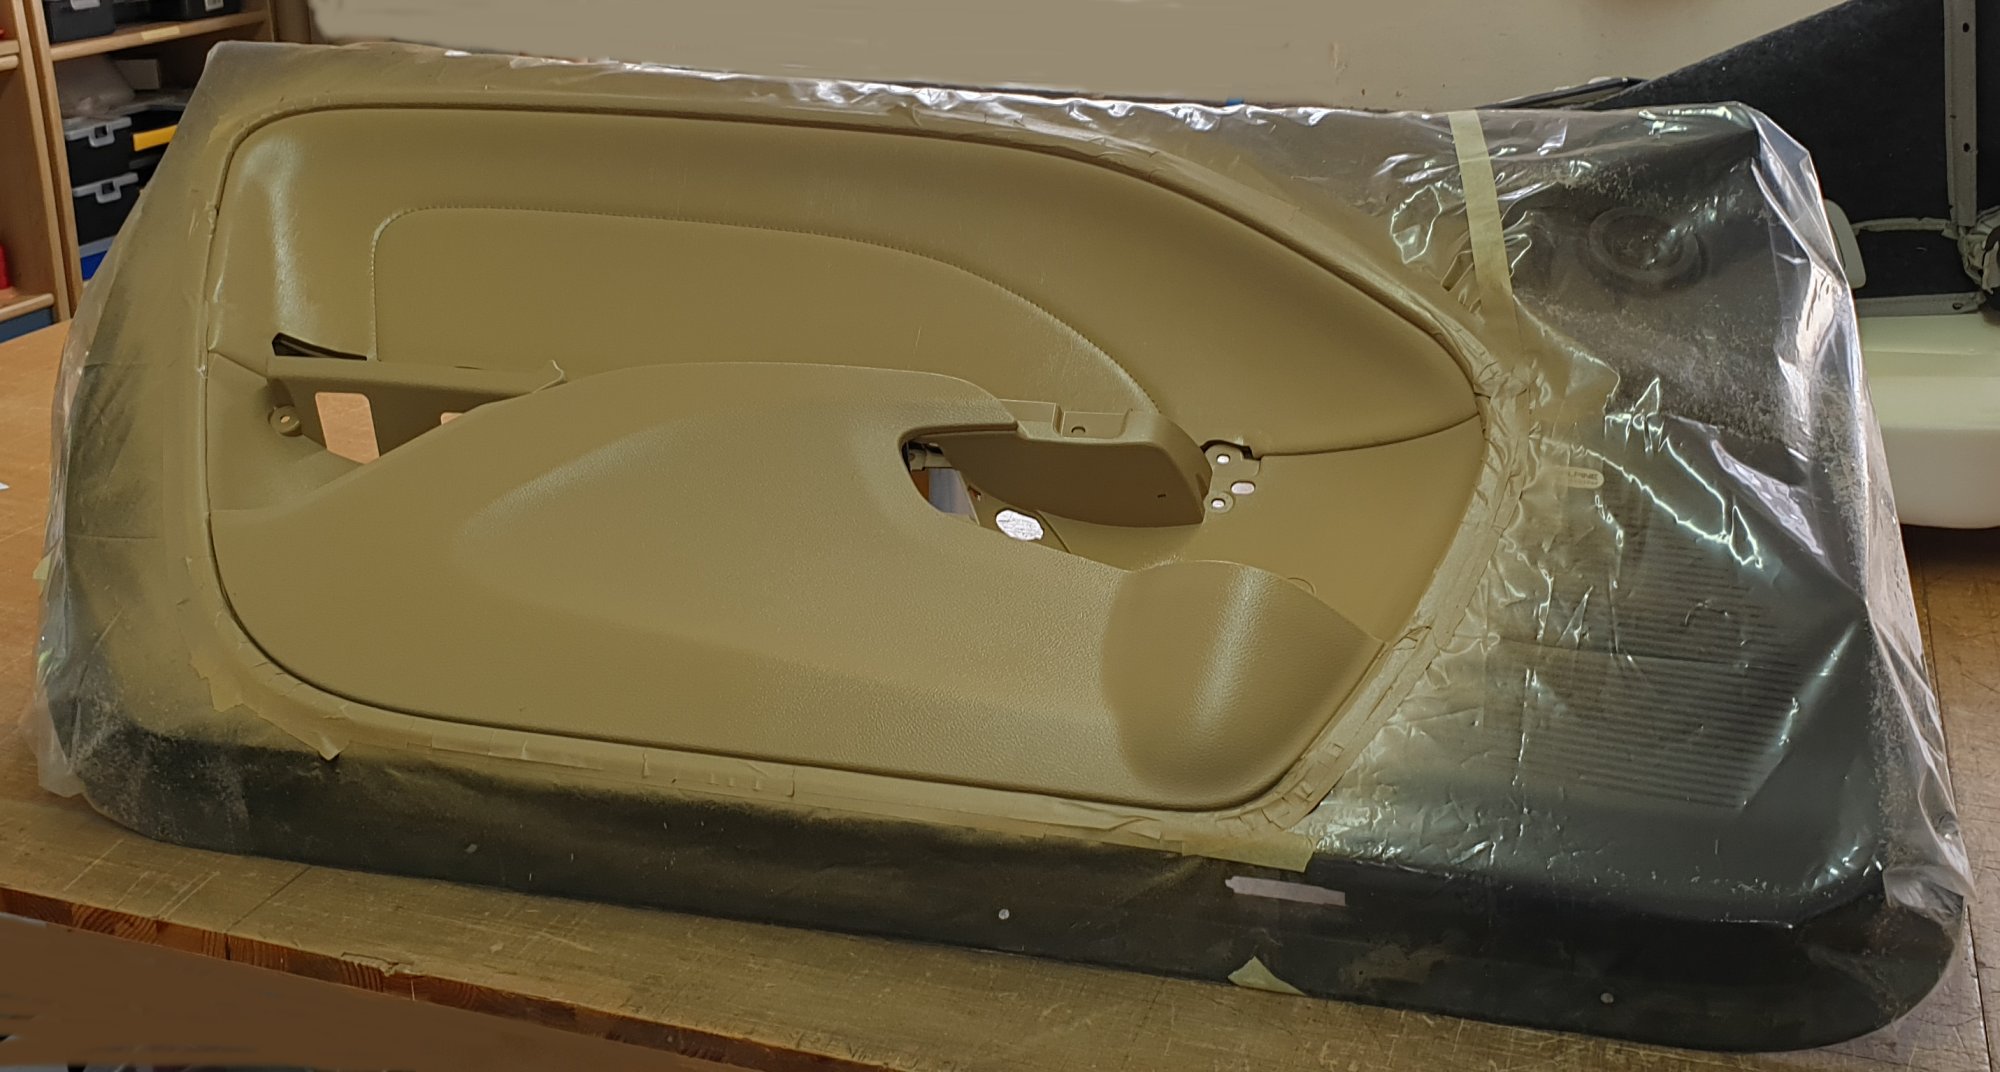
| Rear side of door panel (driver's door). - 270 | Insert of door panel has been painted beige. Don't be confused of the "strange" color as it was taken inside- - 271 |
|
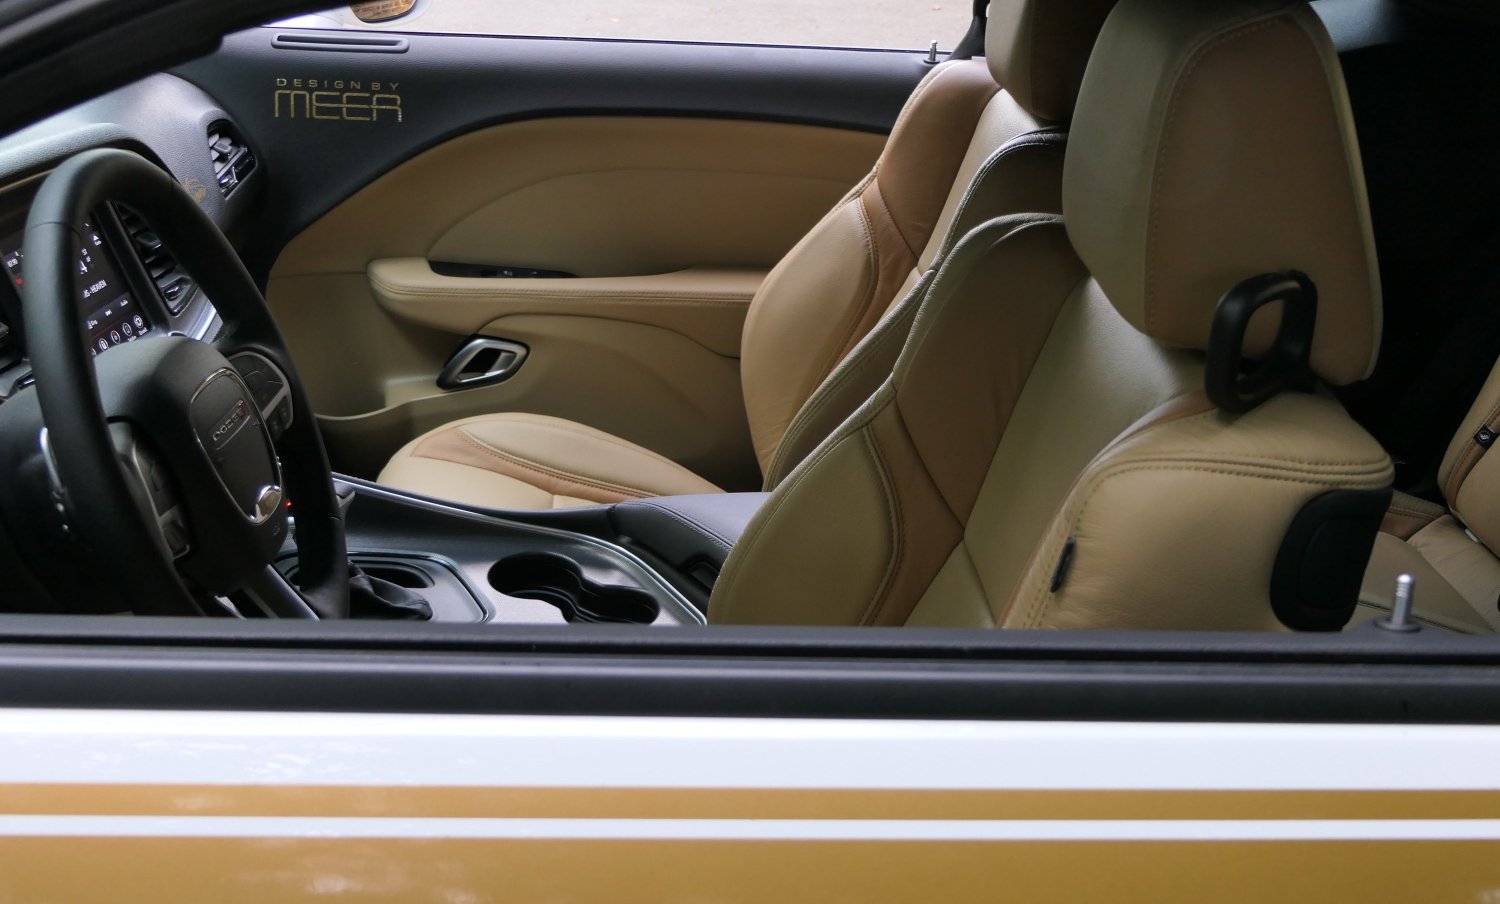
One more problem with the
door panels. The 33 points circled in yellow are the welding nubs which
holds the plate over the handle. Since drilling out and reattaching is hardly possible, we agreed to spray it with leather paint, as on the center console. That seems like the simplest version without breaking the panels. Therefore, we could not mount the leather on the upper half. But the result with paint is great. |
|
 |
 |
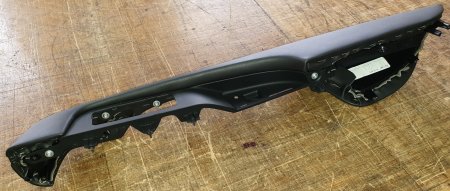
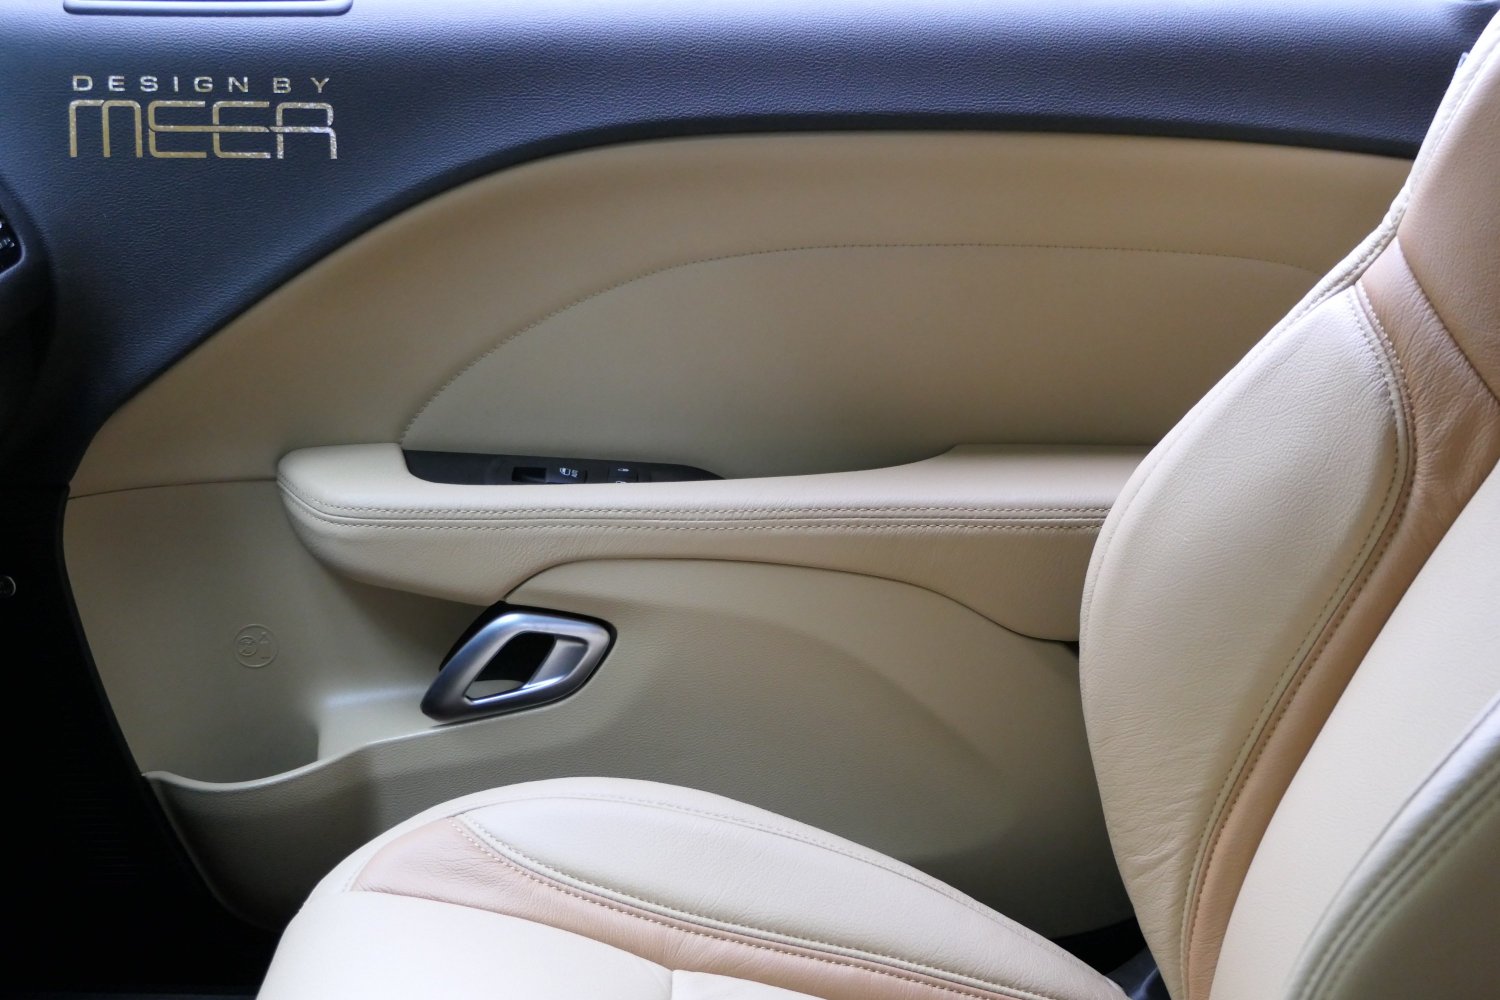
| The armrest of the door was wrapped with leather. - 272 | The finished result could not be any better. - 273 |
 |
 |
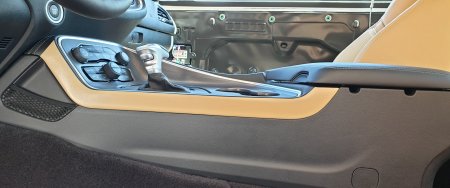
| Middle console painting was just finished (passenger's side). - 274 | Complete finished interior incl. door panles. - 275 |
 |
 |
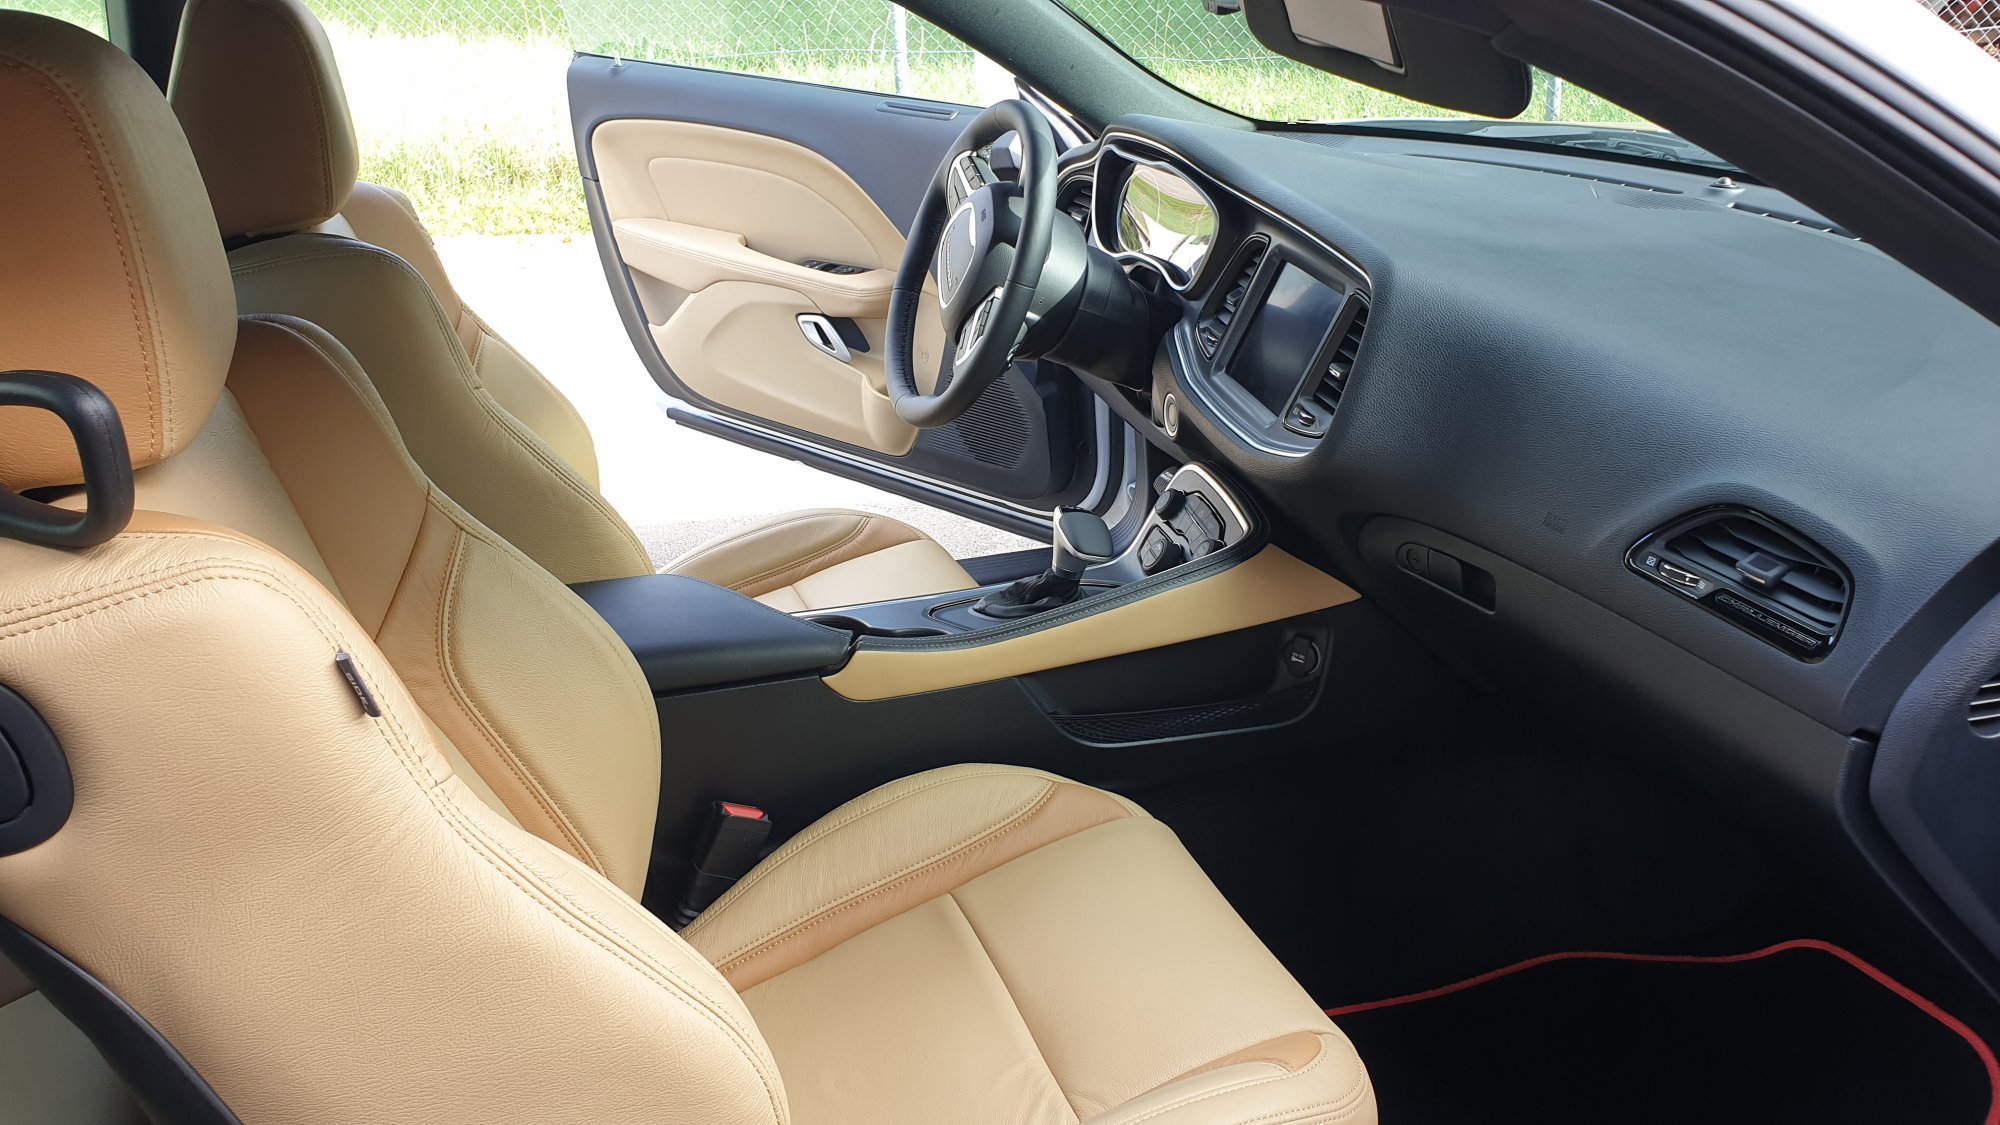
| Driver's side of finished vehicle. - 276 | Passenger's side of finished vehicle. - 277 |
| A special thank you goes to our upholstery shop for their excellent work and the photos of the different steps. | |
to see large photos just click on the 3-digit number under each photo
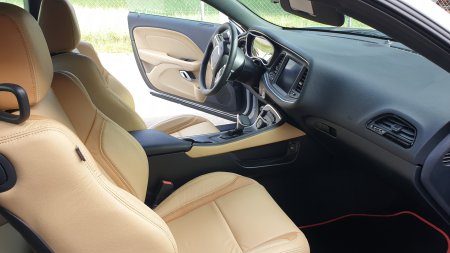
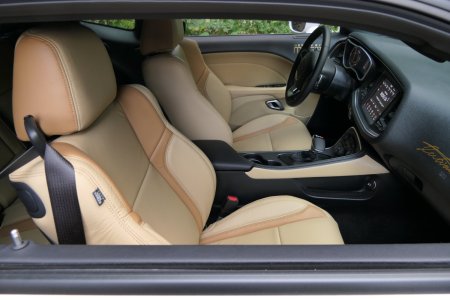
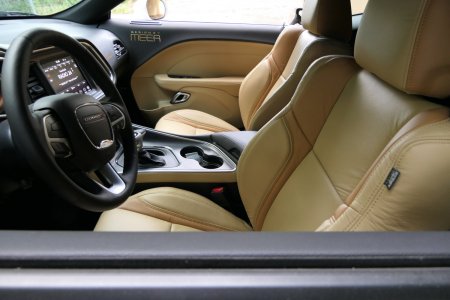
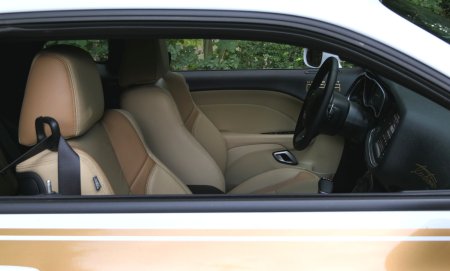
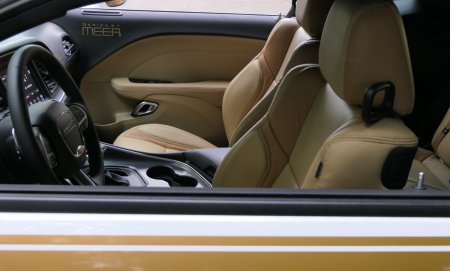
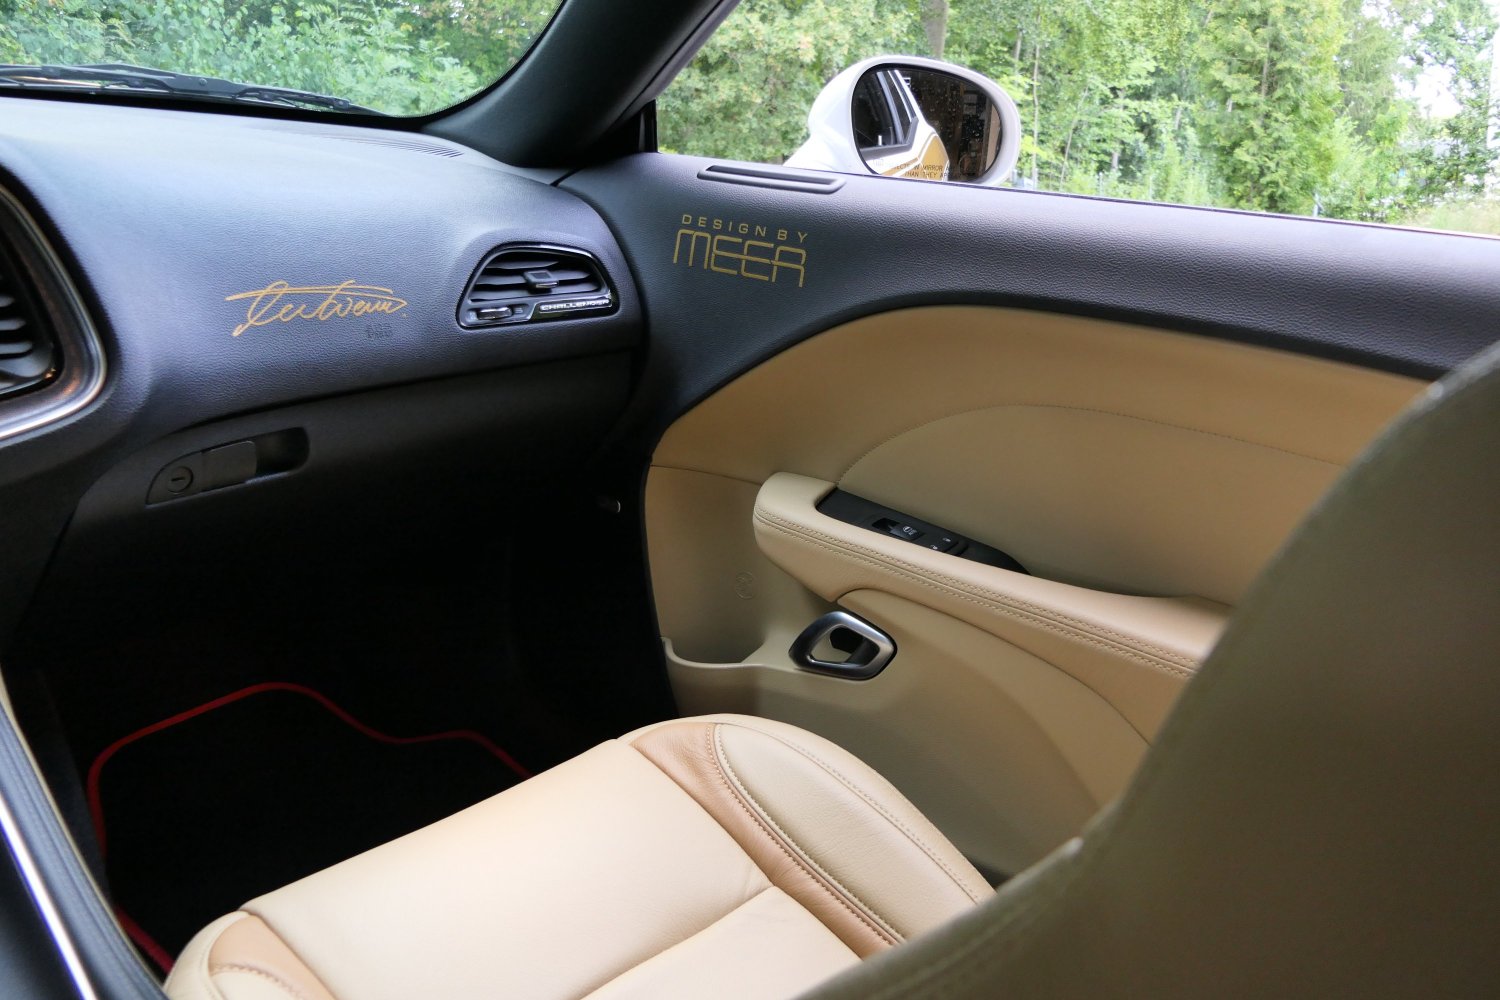
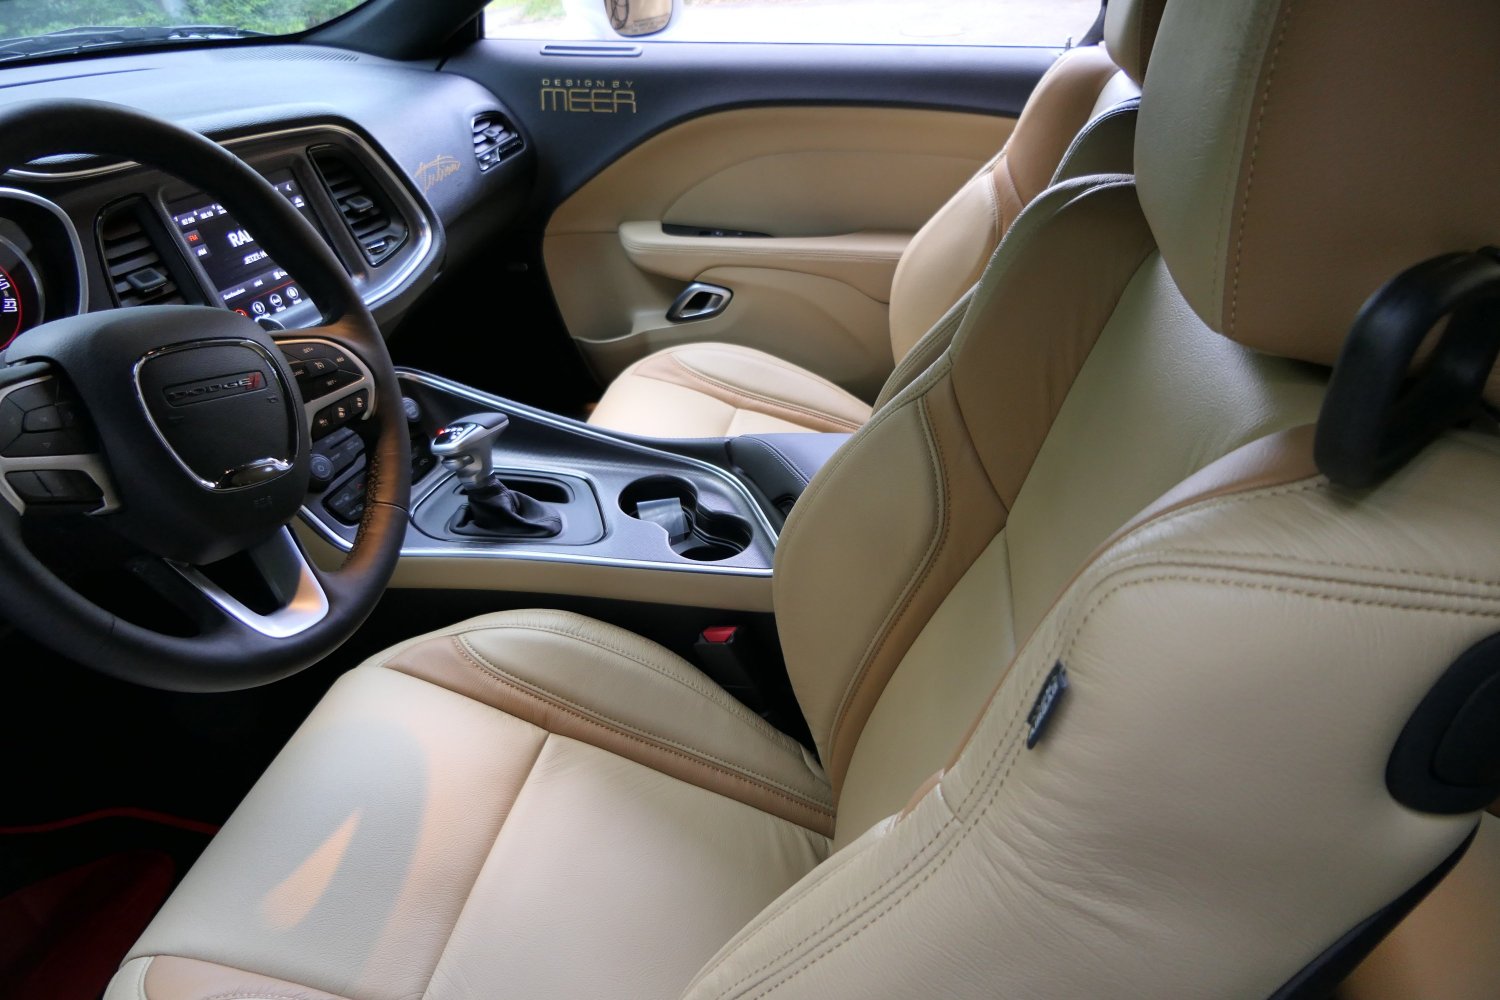
| From an all black interior to a nice combination of cream and doeskin (brown). | |
| I am very pleased with the result of Katzkin Leather as the seat covers are done very well. On top, Mr. Hof (Hof Sattlerei) did a fantastic job in mounting the new seat covers, armrests and door panels. He is a real pro and the final result is first class. I am having a unique interior like no one else. It is a "Design by Meer" vehicle inside and outside. | |
 |
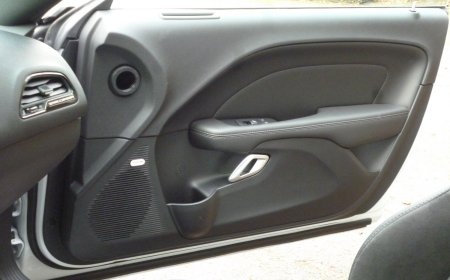 |
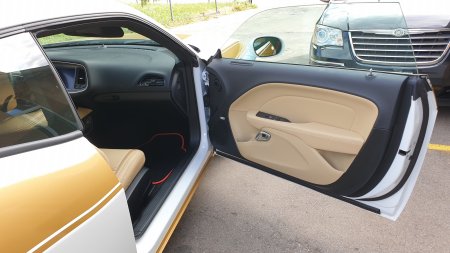
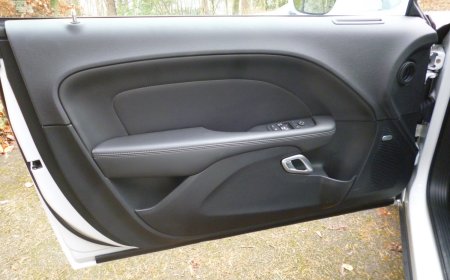
| factory stock left door - 221 | factory stock right door - 222 |
 |
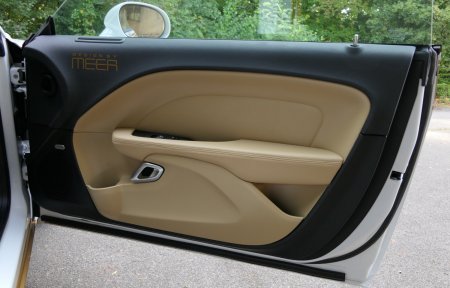 |
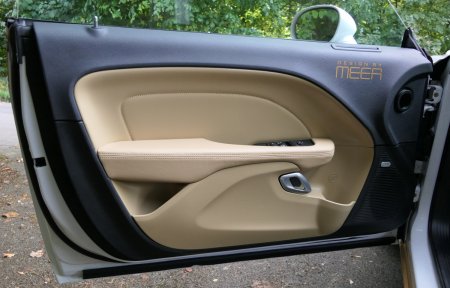
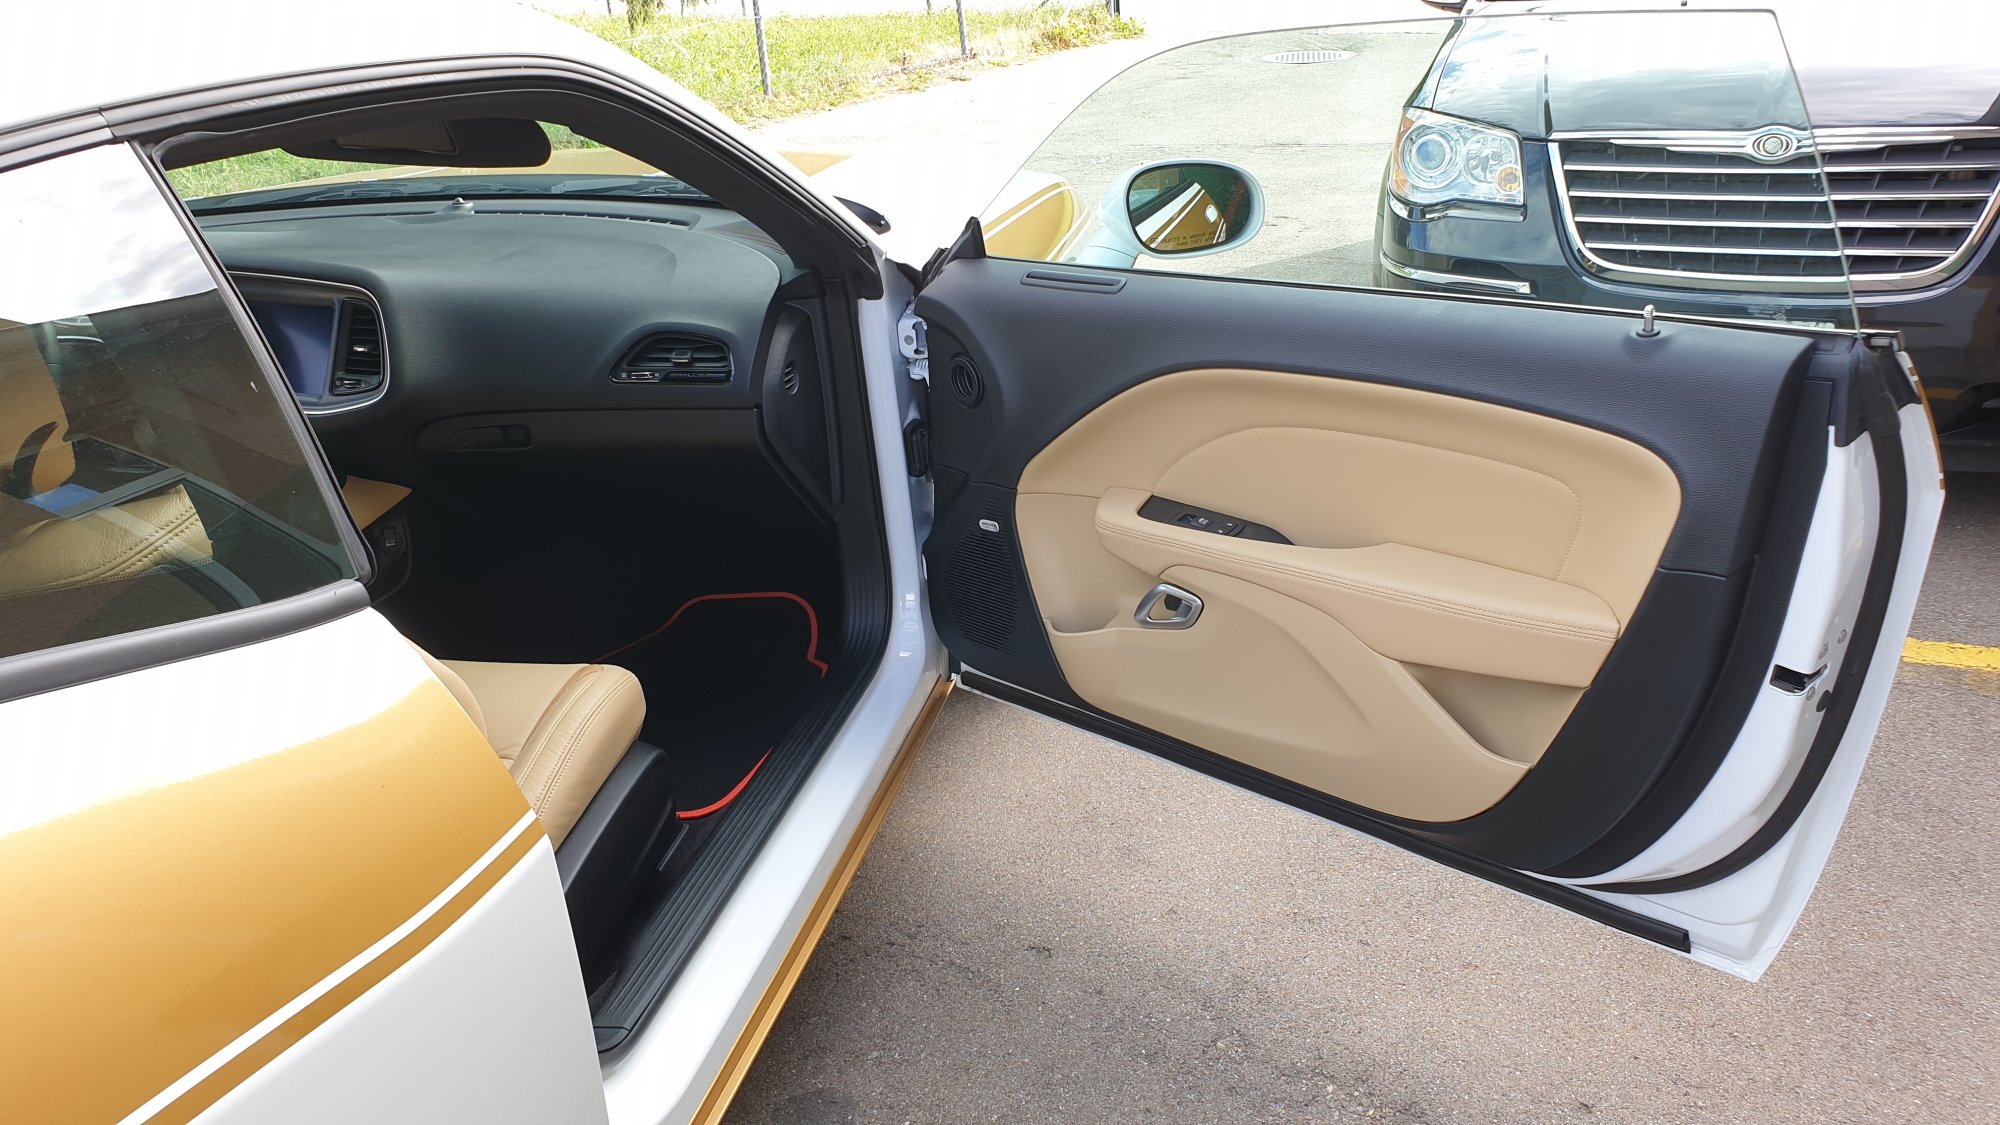
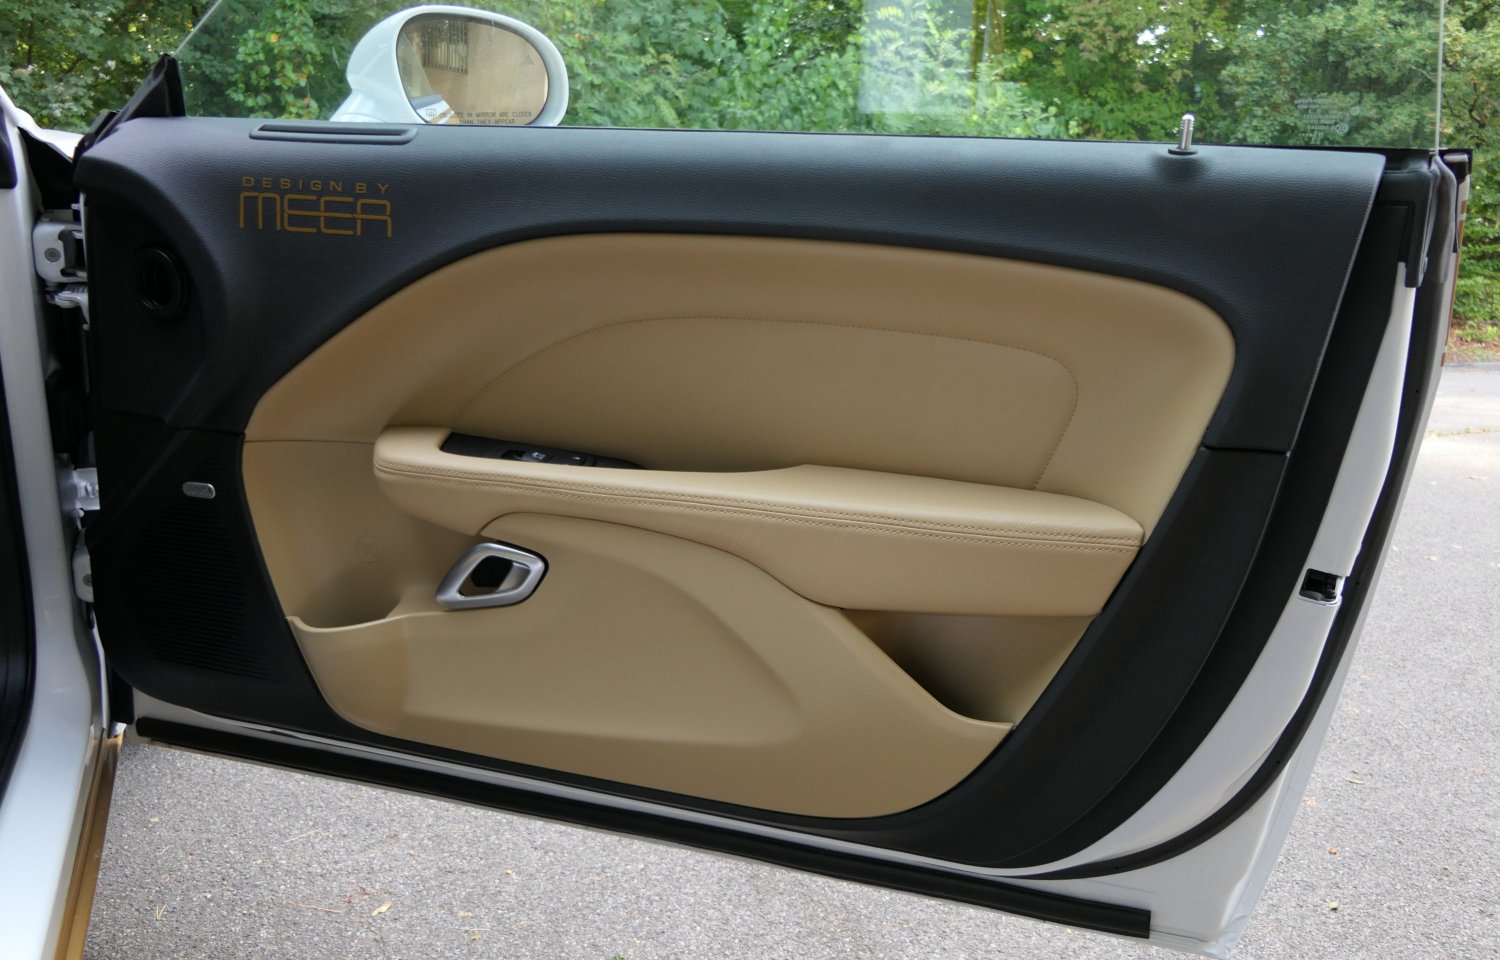
| custom made left door - 223 | custom made right door - 224 |
 |
 |
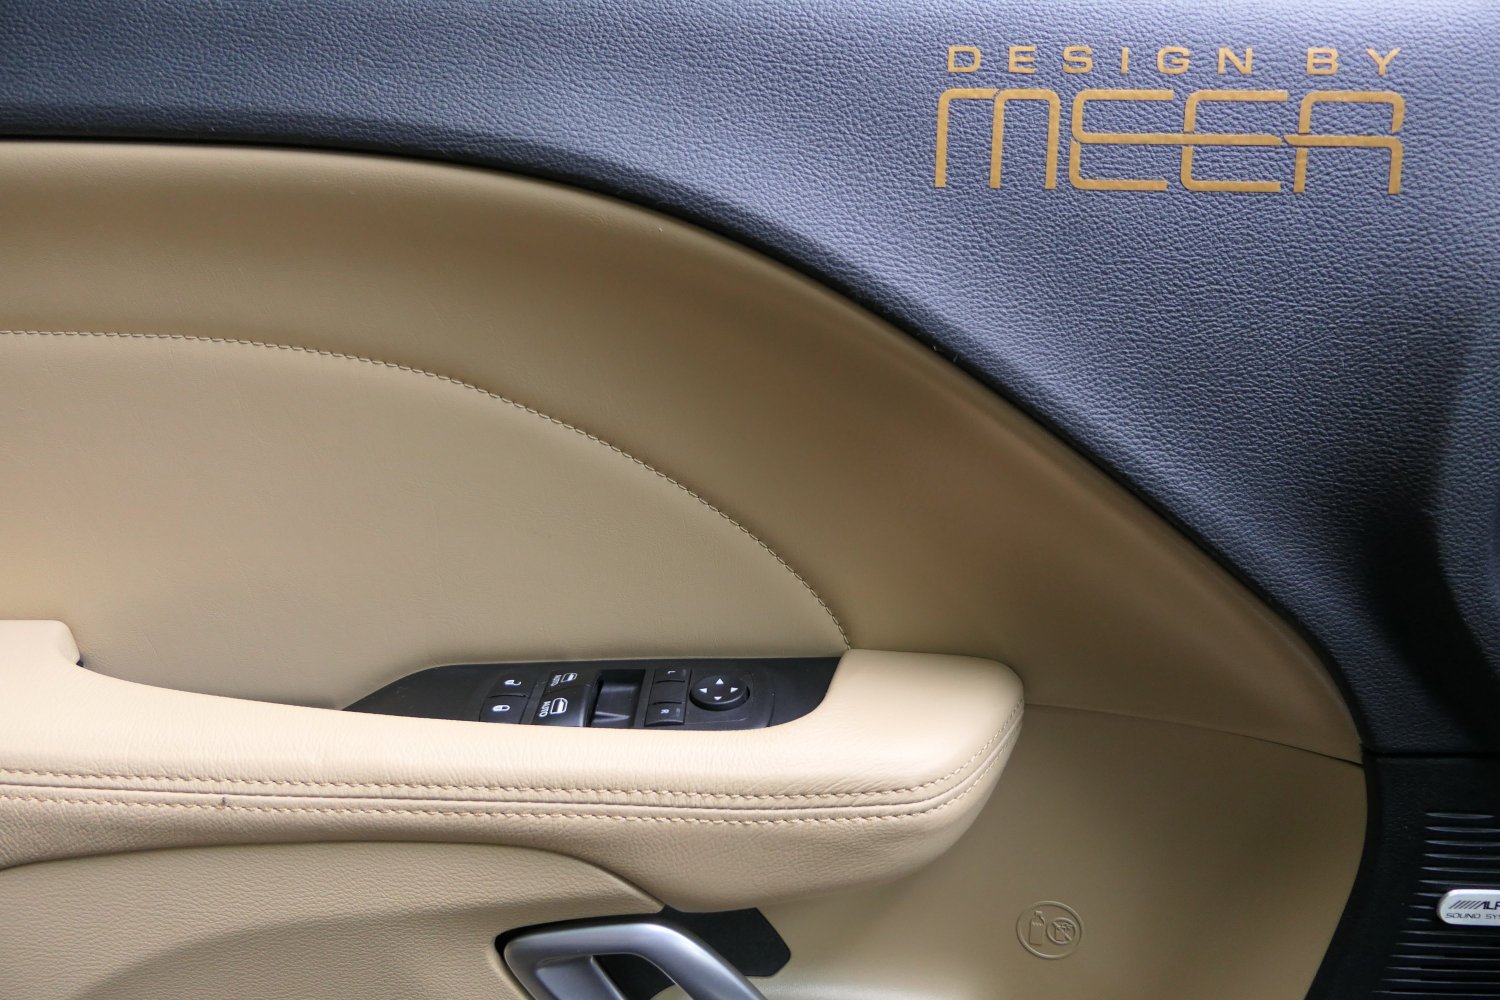
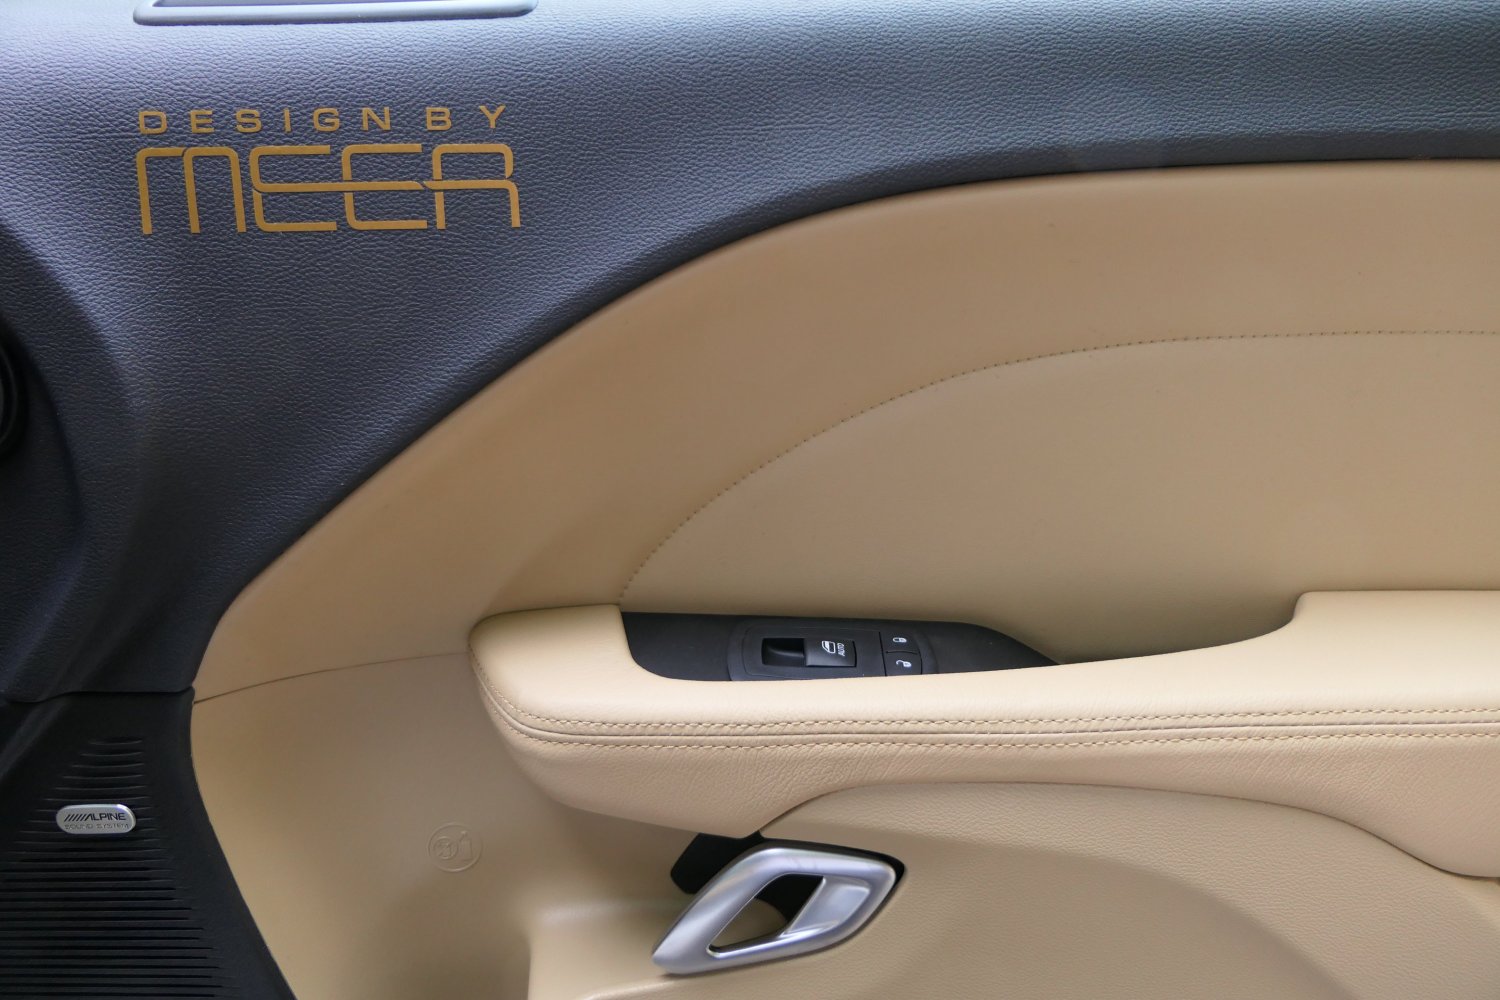
| detail left door - 225 | detail right door - 226 |
 |
 |
| passenger's side - 227 | driver's side - 228 |
 |
 |
| passenger's side before - 229 | driver's side before - 230 |
 |
 |
| passenger's side after - 231 | driver's side after - 232 |
 |
 |
| passenger's side - 233 | driver's side - 234 |
 |
 |
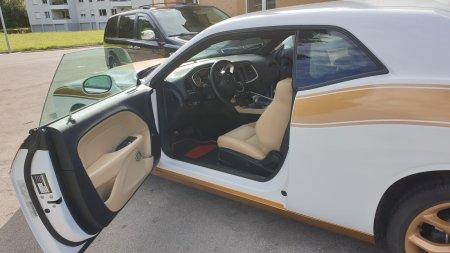
| the combination of gold outside . . . . - 235 | . . . . is matching to beige inside - 236 |
 |
 |
| the combination of gold outside . . . . - 237 | . . . . is matching to beige inside - 238 |
 |
 |
| on the middle console is also a beige part . . . - 239 | . . . on both side to complete the design - 240 |
 |
 |
| the combination with the colors looks great - 241 | at least, there is no other Challenger like this one - 242 |
 |
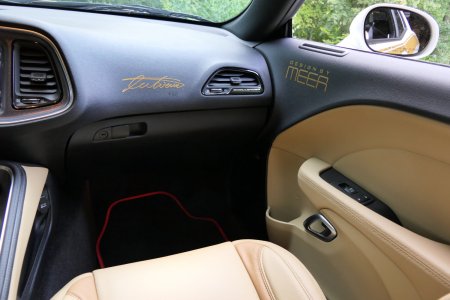 |
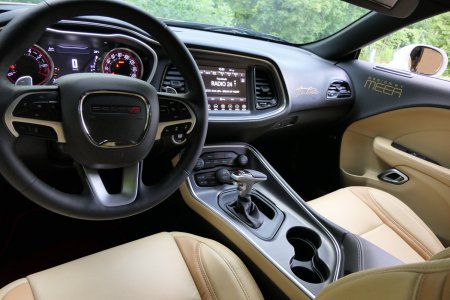
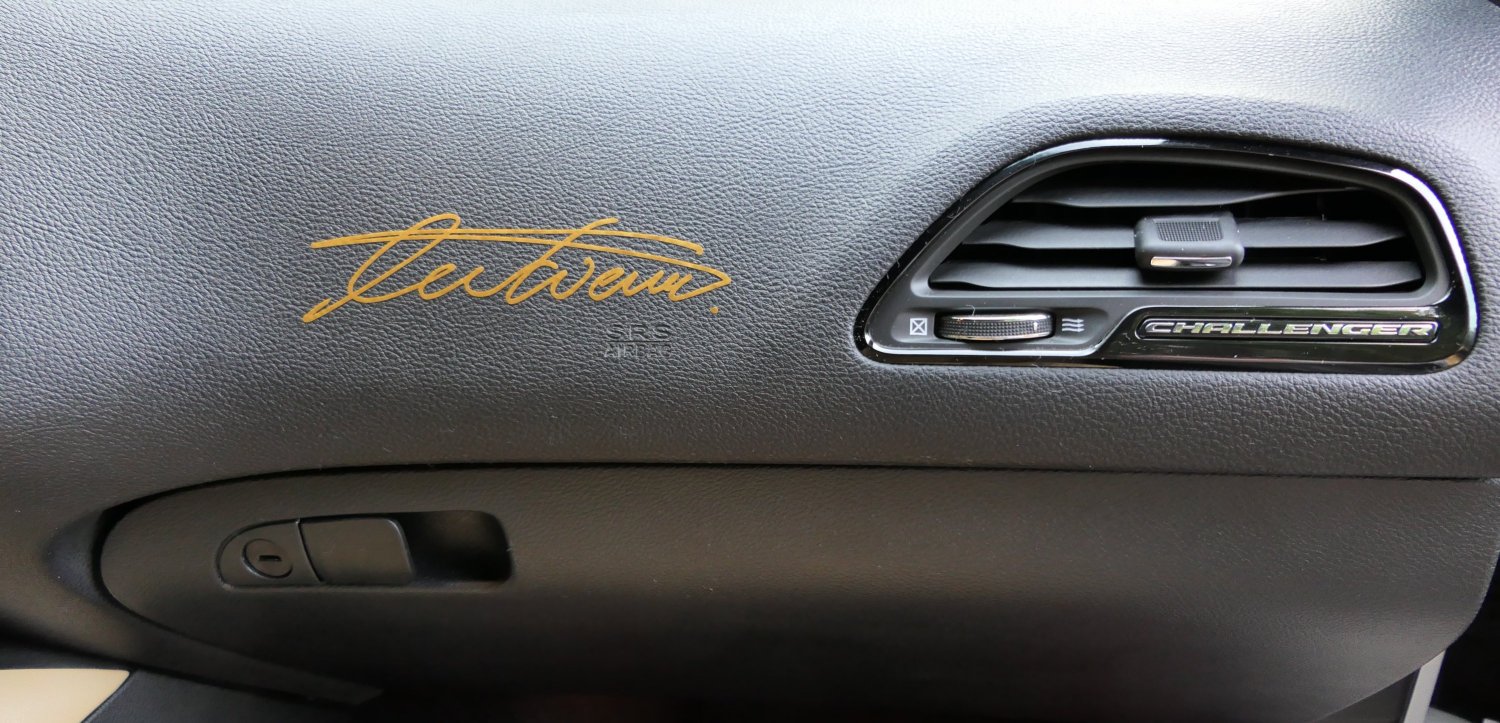
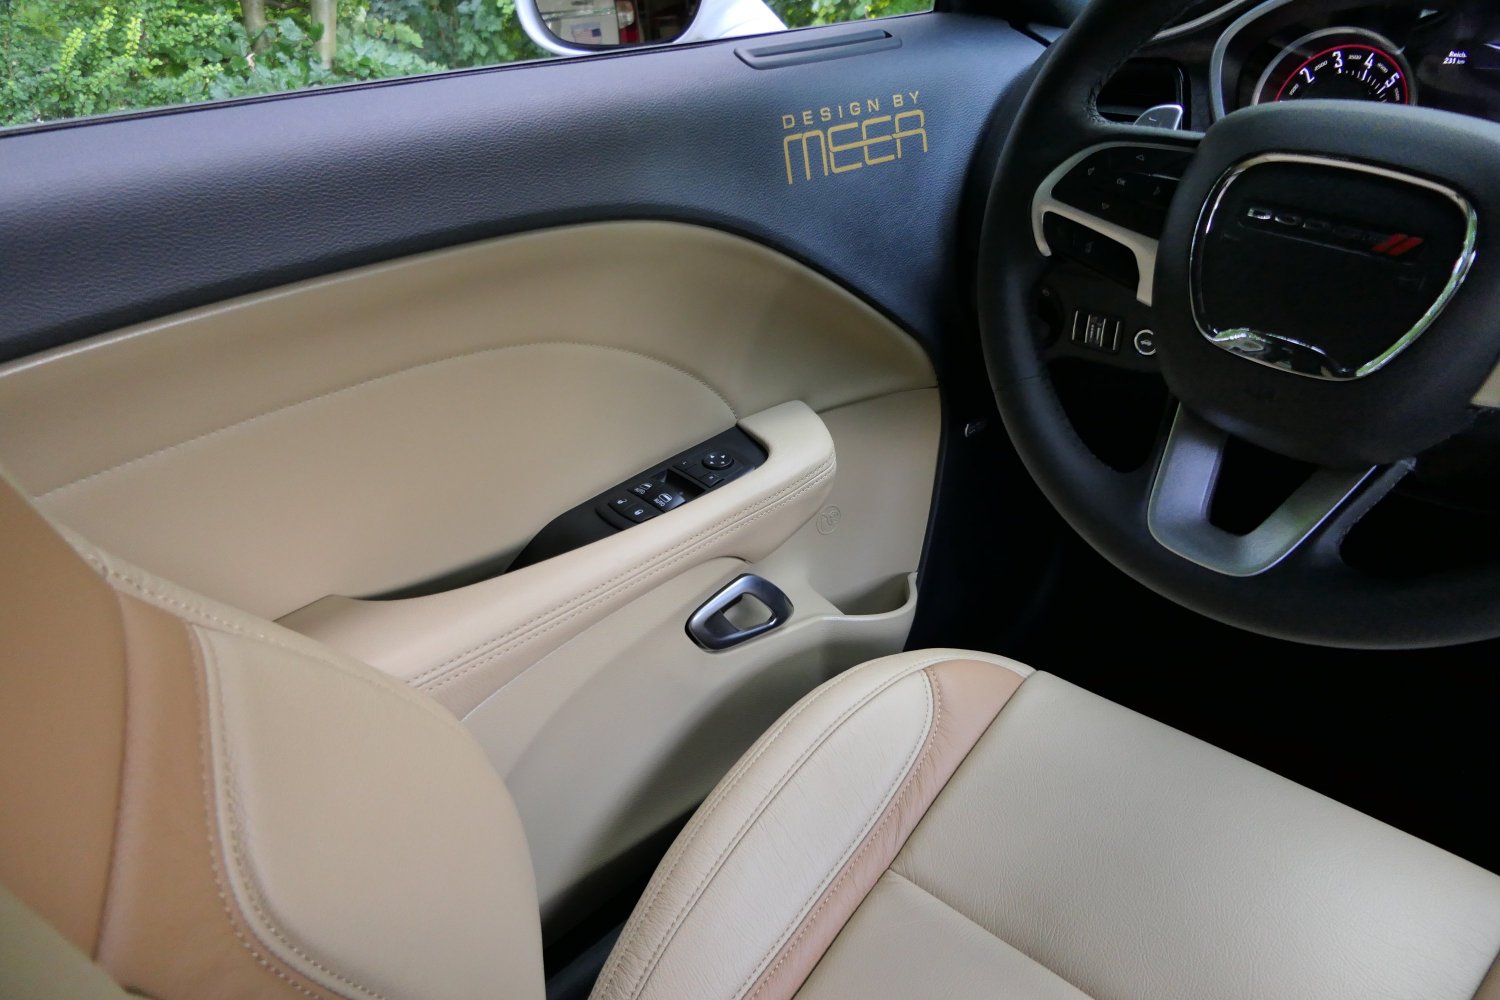
| the golden logos on both doors fit perfect - 243 | the signature is on the dash board - 244 |
 |
 |
| driver's side - 245 | passenger's side - 246 |
 |
 |
| too bad, the dash board is still black - 247 | even the designer's signiture is visible - 248 |
 |
 |
| passenger's side - 249 | driver's side - 250 |
 |
 |
| of course the designer's logo is a must - 251 | of course the designer's logo is a must - 252 |
 |
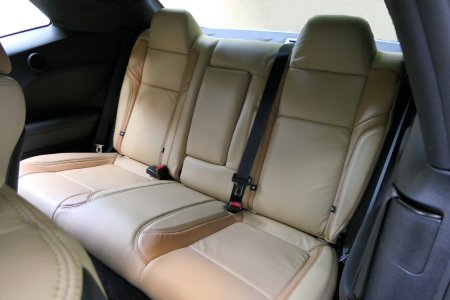 |
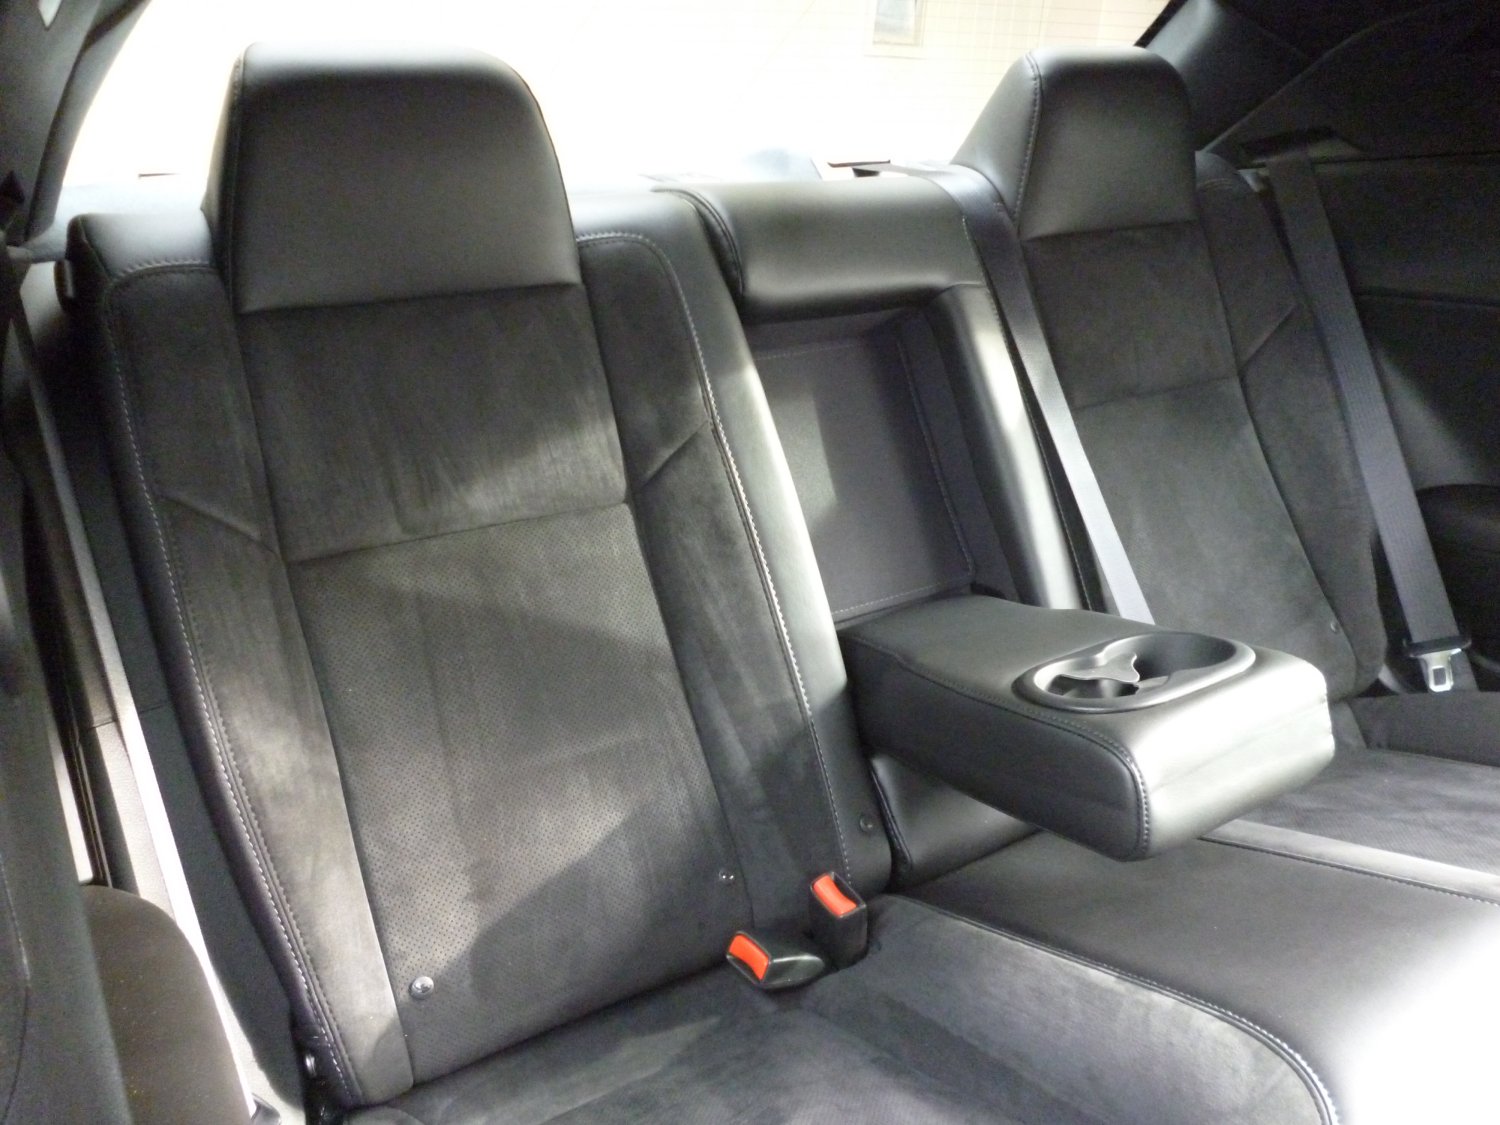
| rear seats before - 253 | rear seats after - 254 |
After all,
my special designed Challenger is finished and ready for the road.
To do all modifications it took all in all 6 months. But it was worth to wait
because the result is outstanding.
|
Thank you for browsing this Challenger photo page. Of
course, I am aware, not everybody likes this design. But for me, it is my personal customizing project I was always dreaming of. My inspiration to do this project was the one and only Chip Foose. I was able to meet Chip in person at his Huntington Beach "Foose Design" shop and during the 2015 SEMA show in Las Vegas: https://www.trainmaster.ch/XC-49-12.htm Werner Meer - August 30, 2020 |
|
 https://www.chipfoose.com/ |
 |
| Impostor (Ridler Award Winner 2015) design by Chip Foose - 2439 | Chip Foose and Werner Meer at 2015 SEMA - 1896 |
| The final frame - How to create a modern Hot Rod |
 |
|
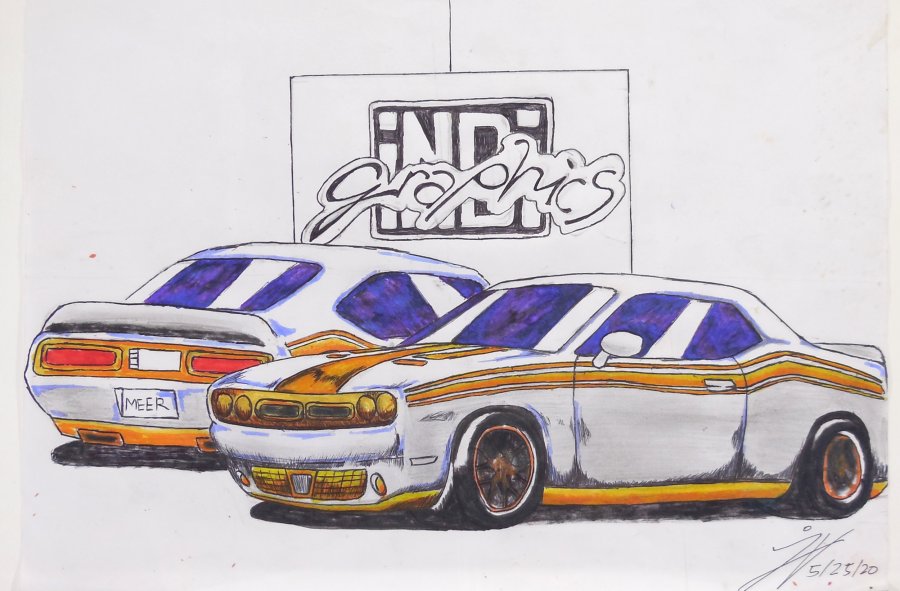
Free hand painted drawing of my Challenger from a 16
years old youngster. The artist "JV" (John Vincent) is the nephew of my wife Melinda and living in Zamboanga City, Philippines. |
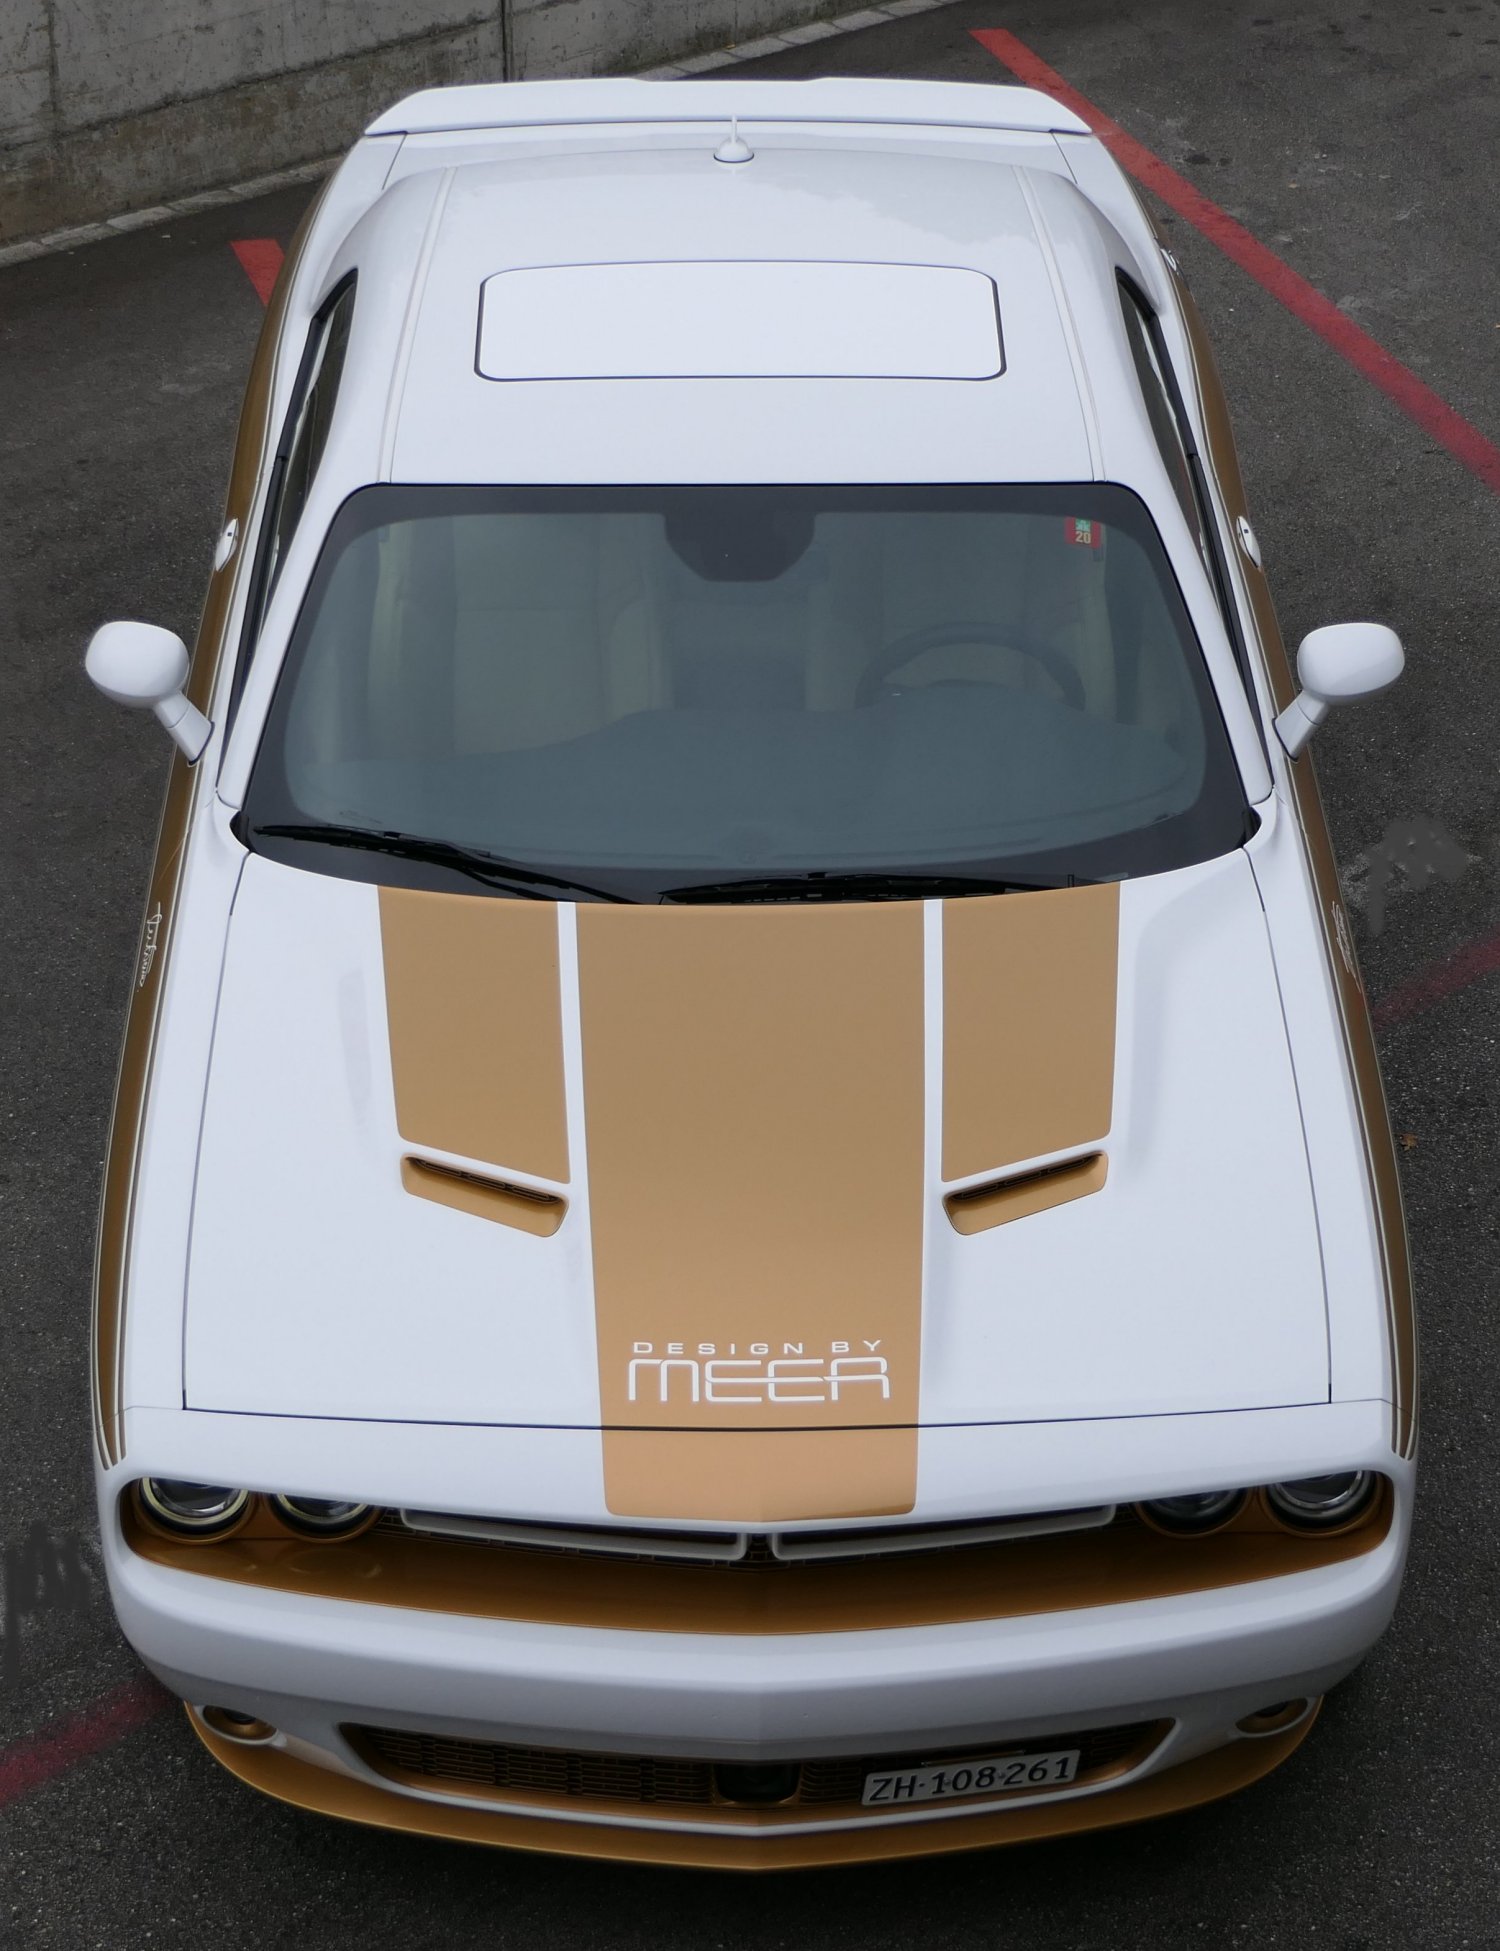
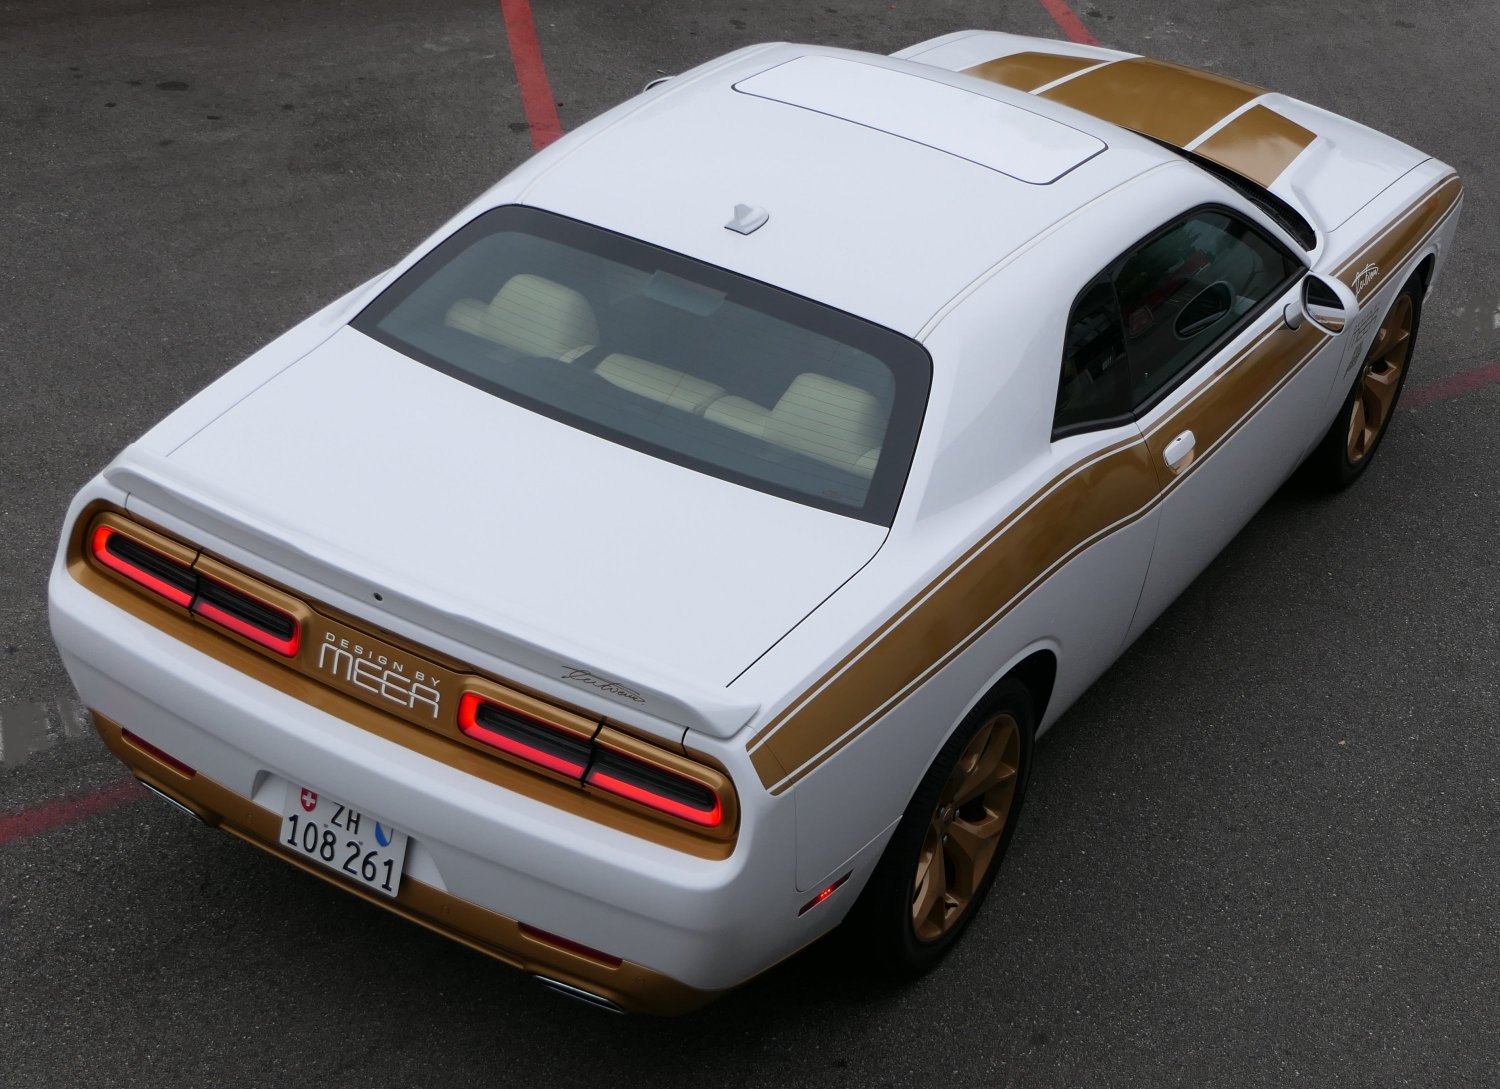
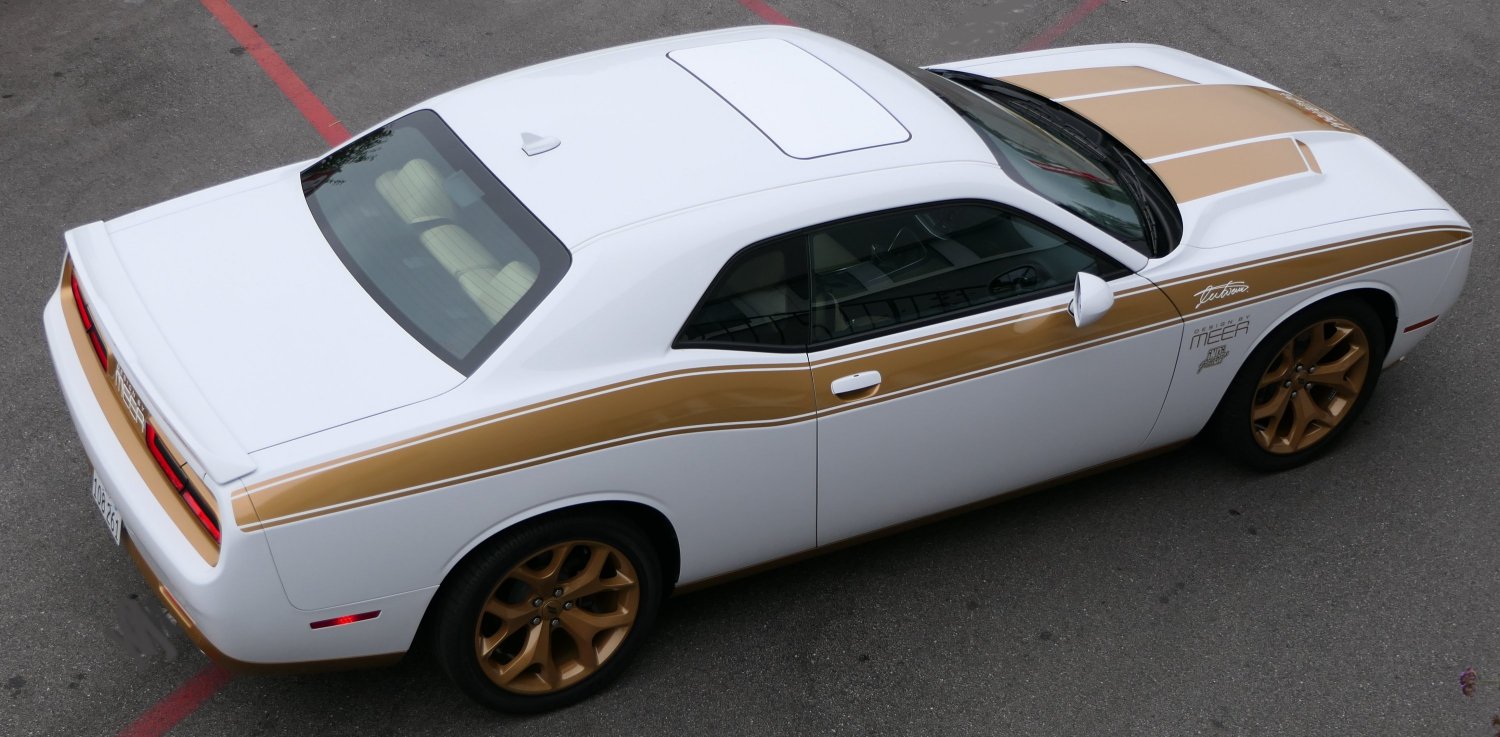
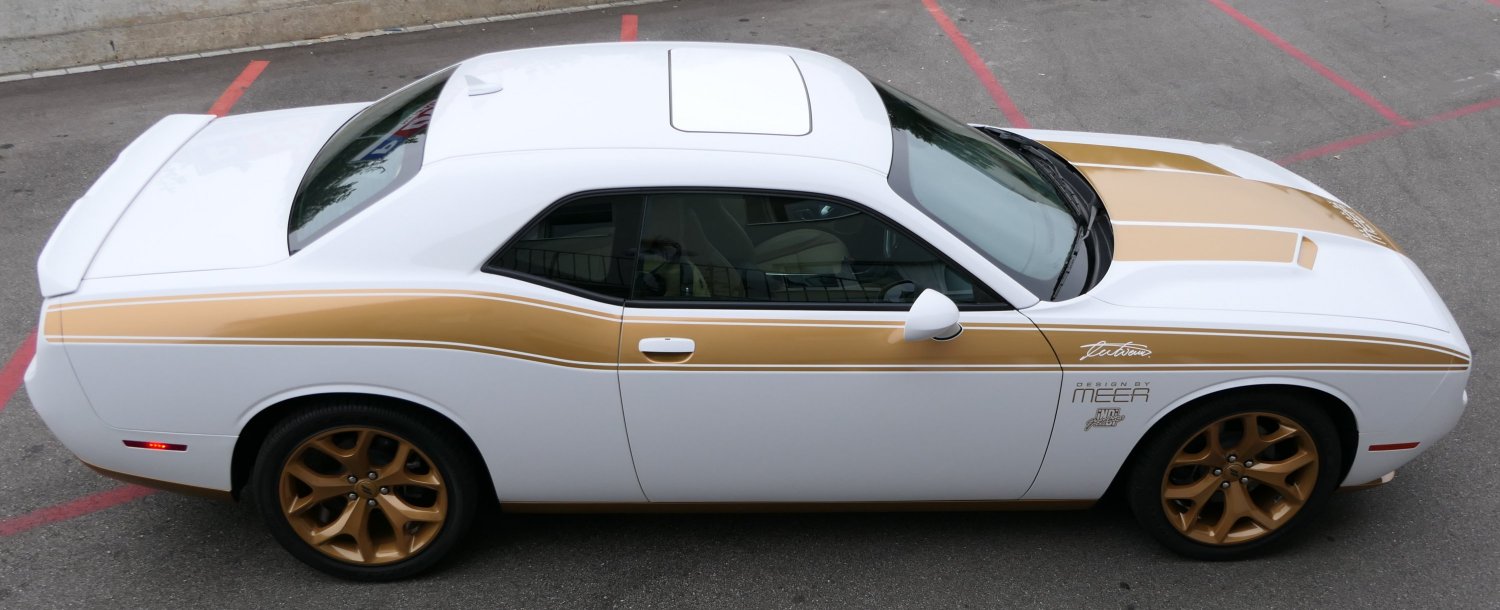
Part 7: New
Exterior photos taken from above (September 21, 2020)
to see large photos just click on
the 3-digit number under each photo
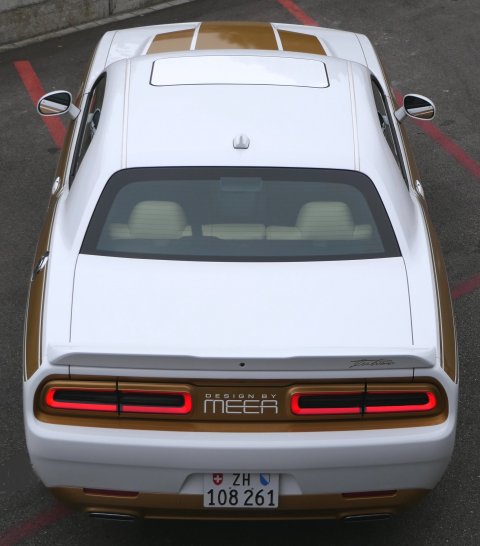
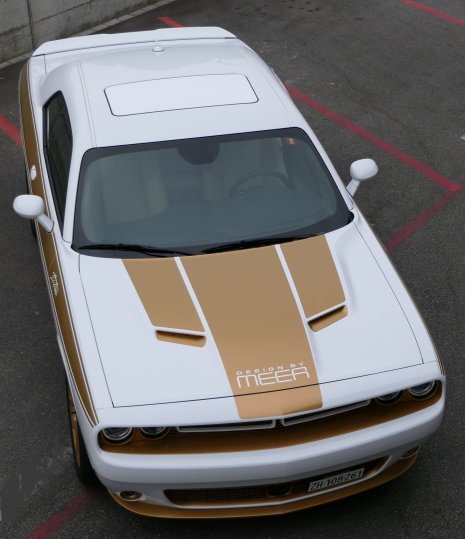
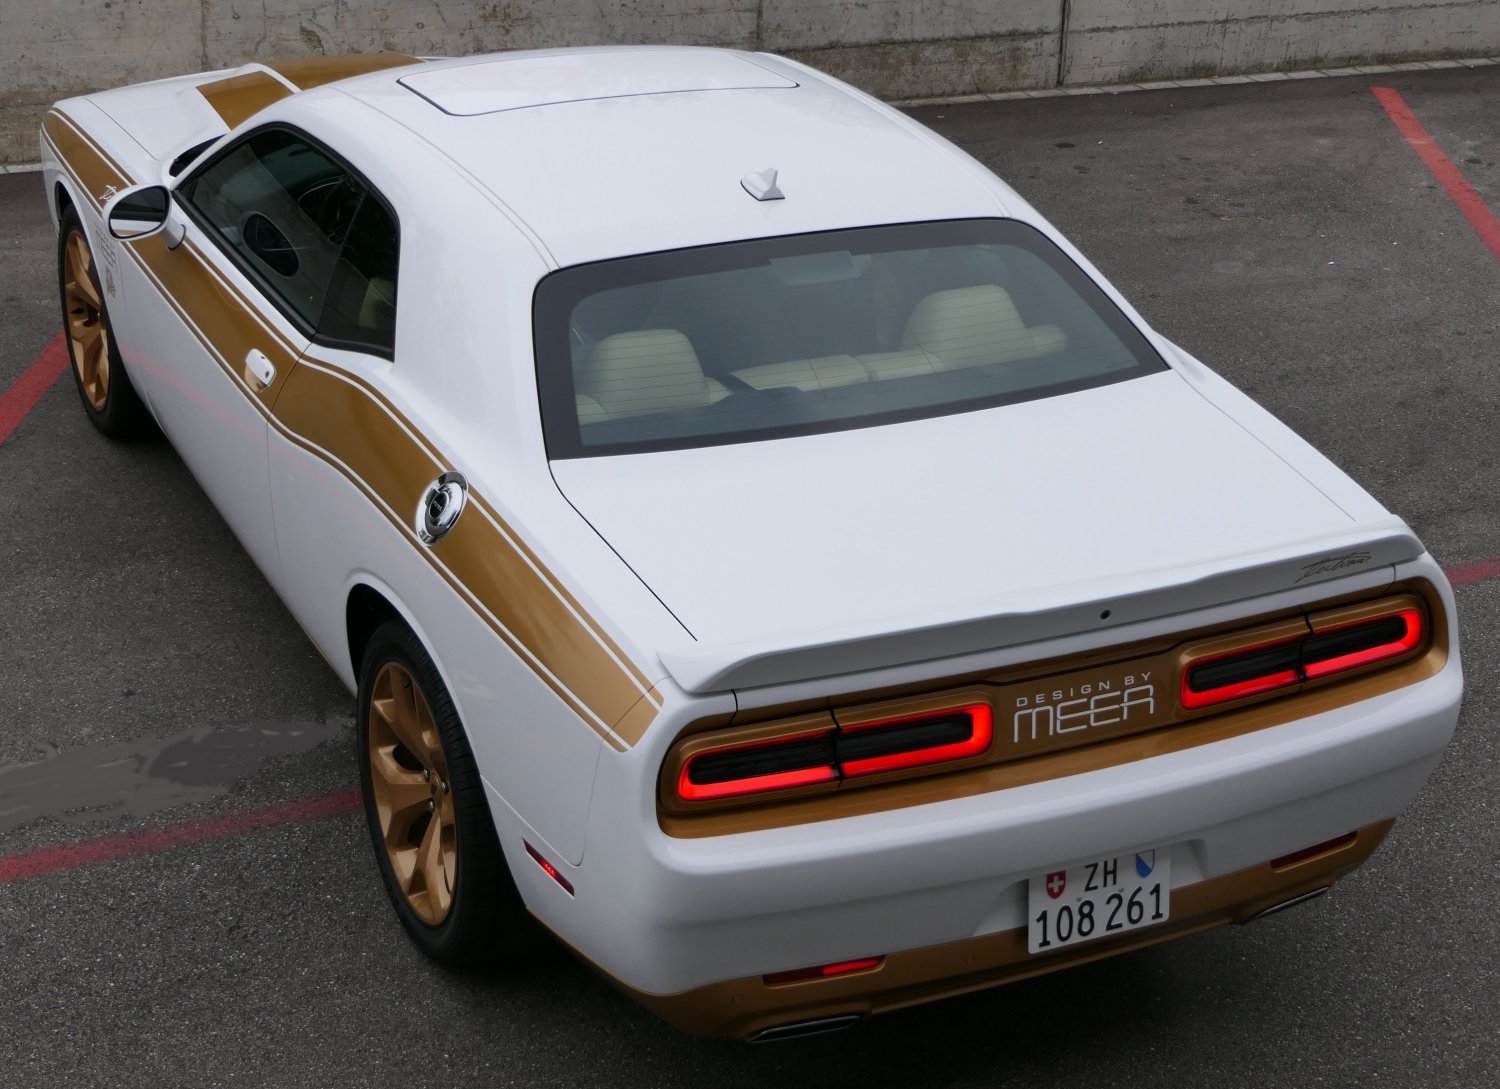
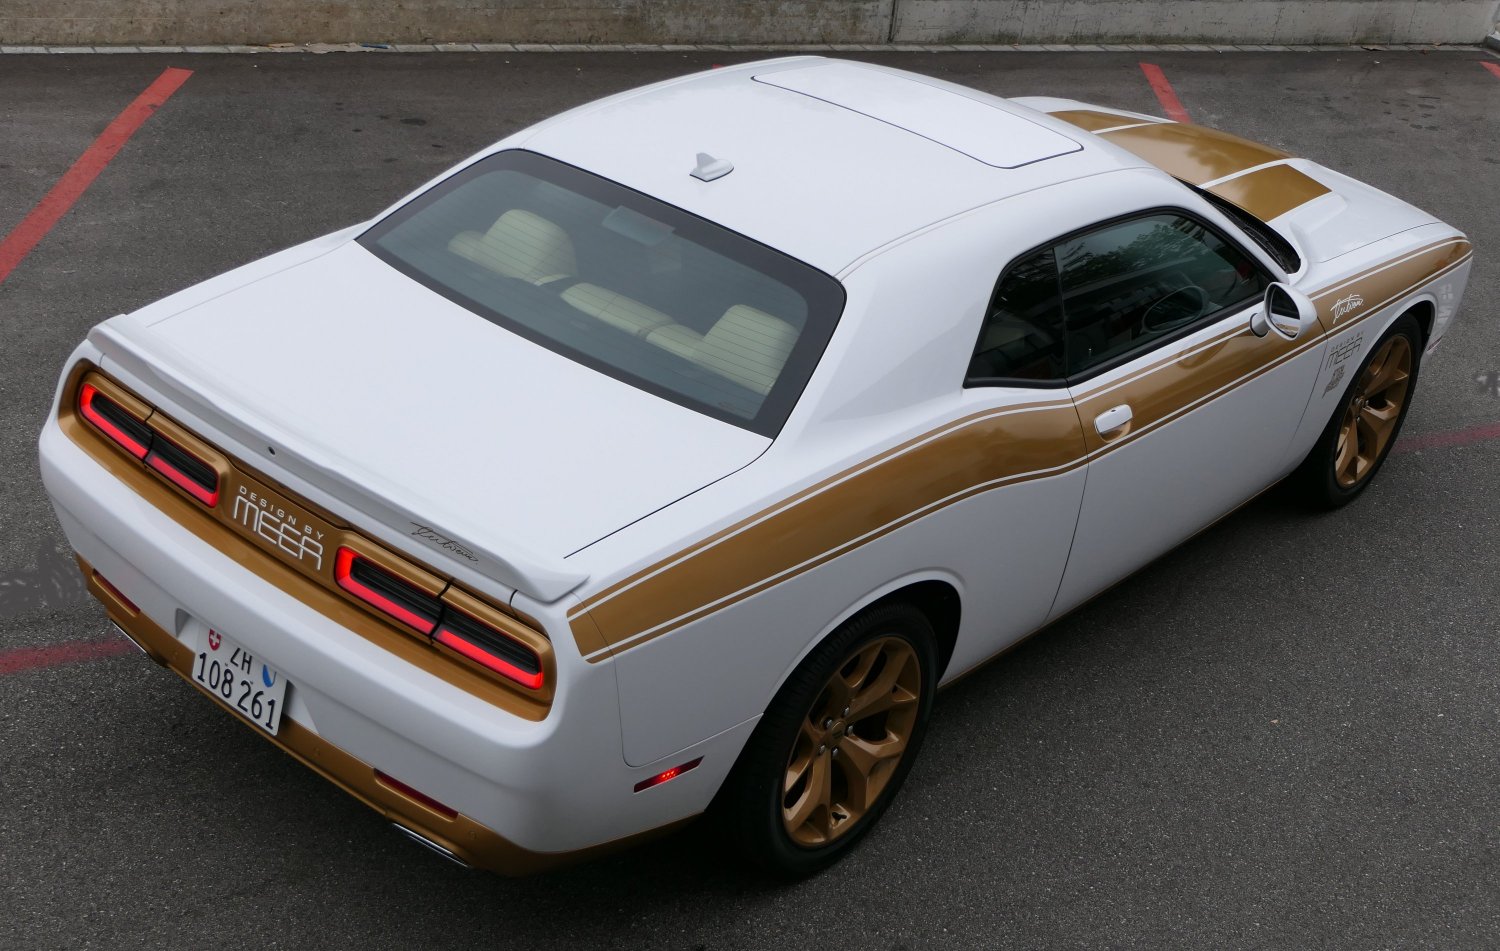
| The time has come to get a differnt view of my Challenger | |
| On part 6, I was concentrating on the interior. So I wanted to get a different view from my car and therefore, I made another shooting from above. Well, to be honest, car freaks are never getting enough because it is a lot of fun. | |

 |
|
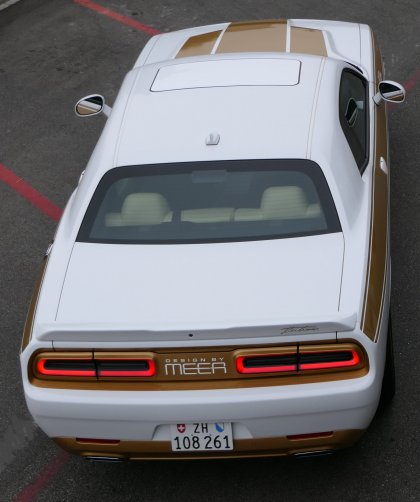
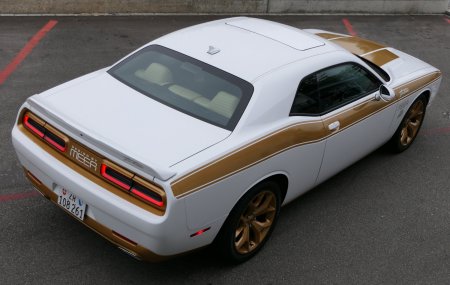
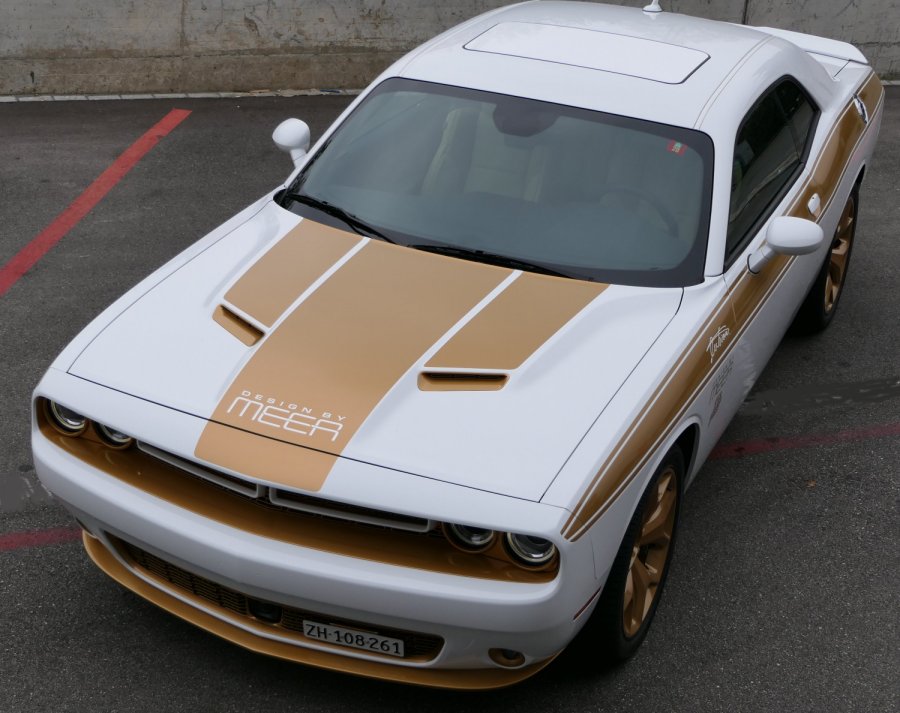
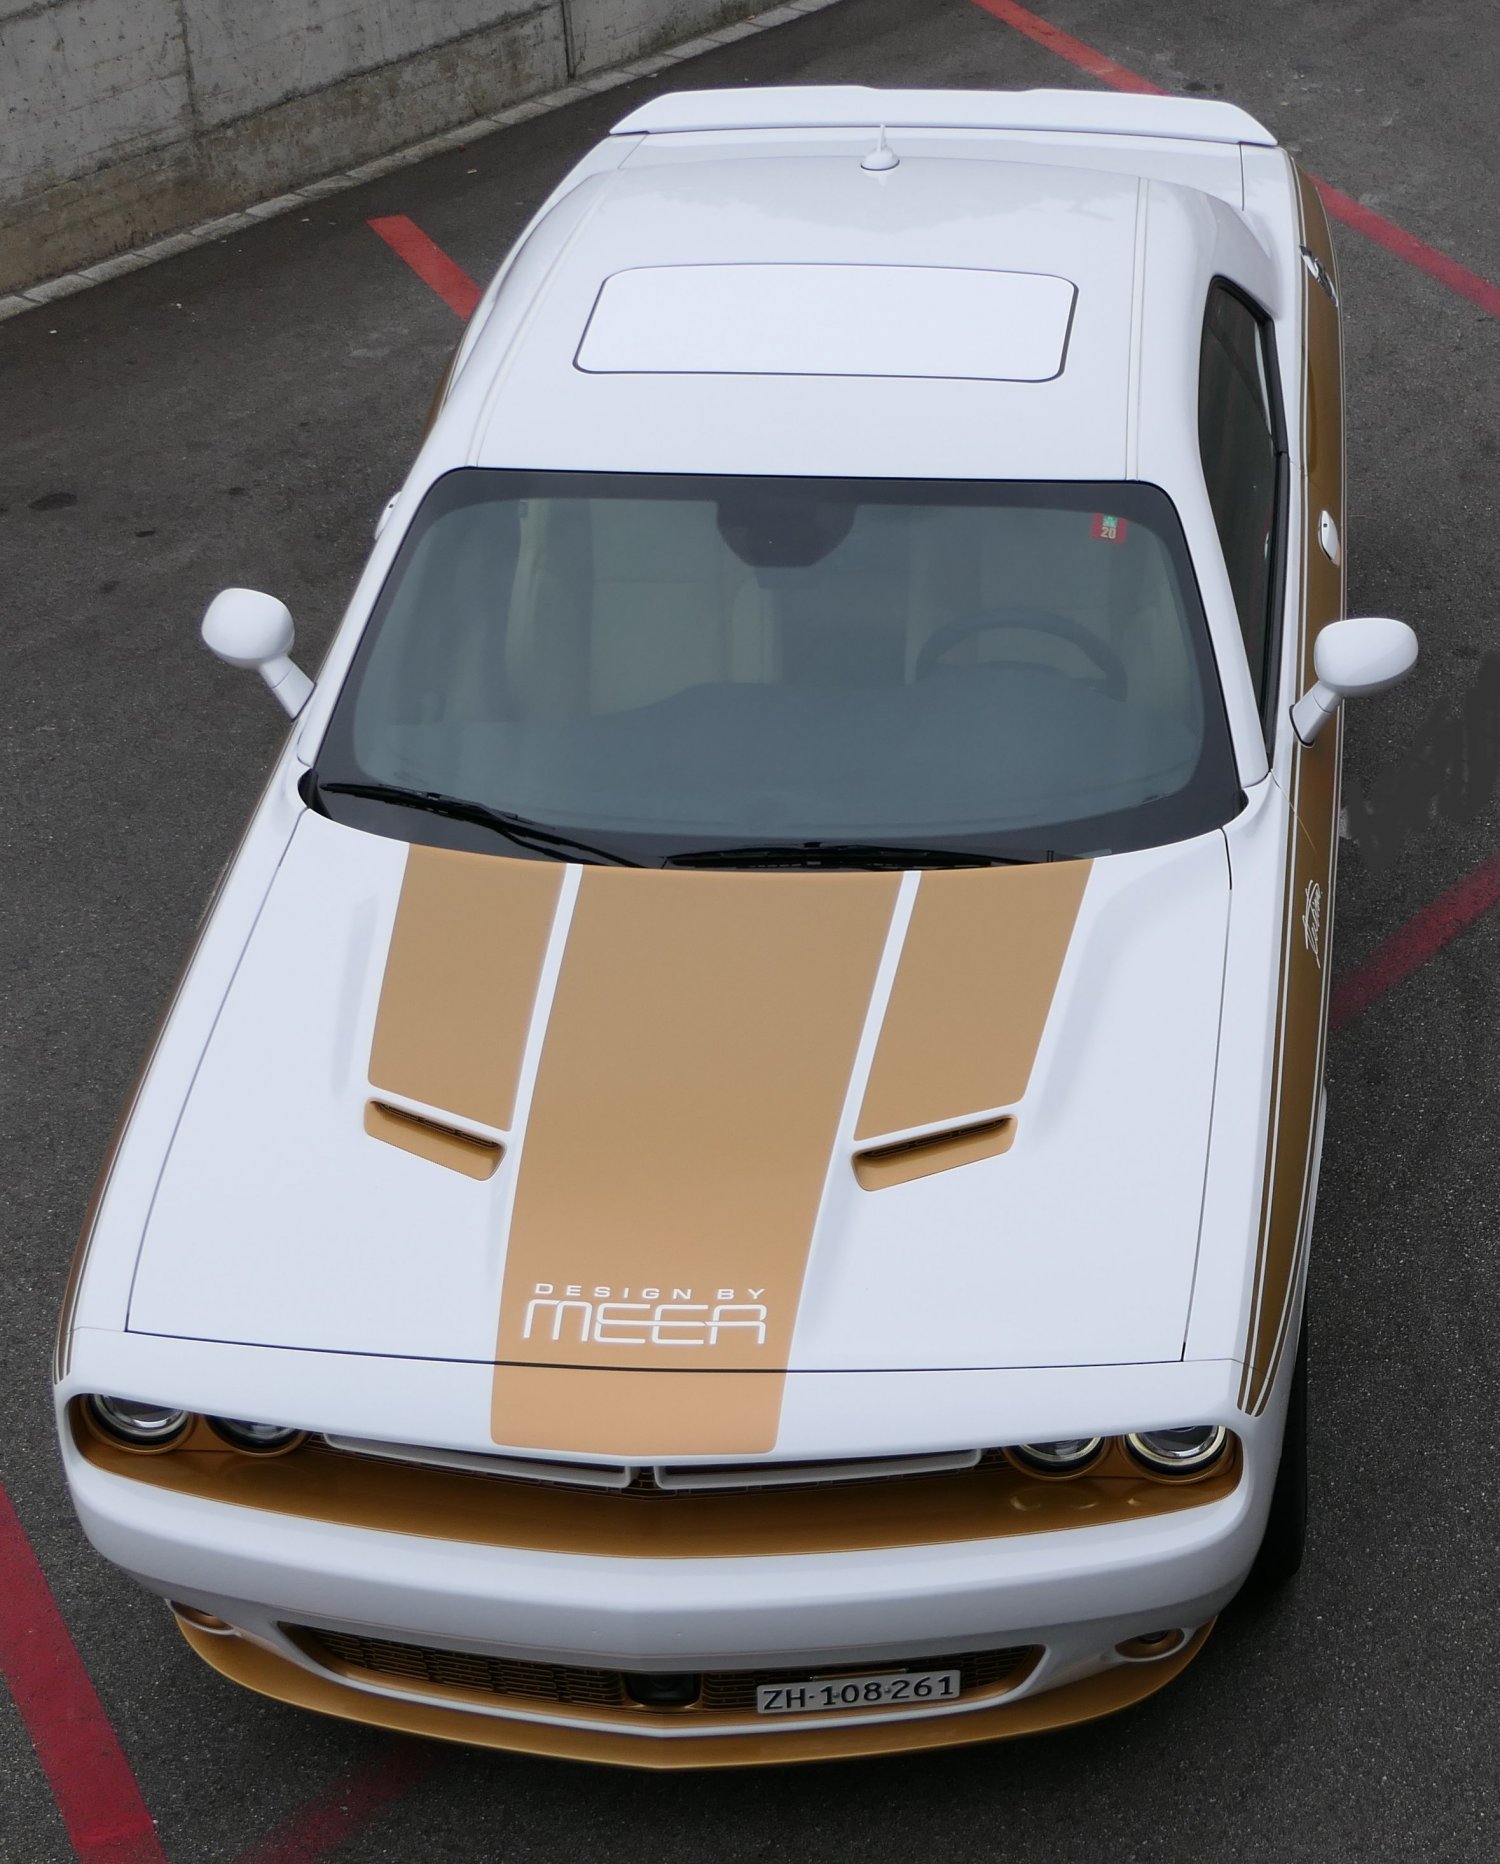
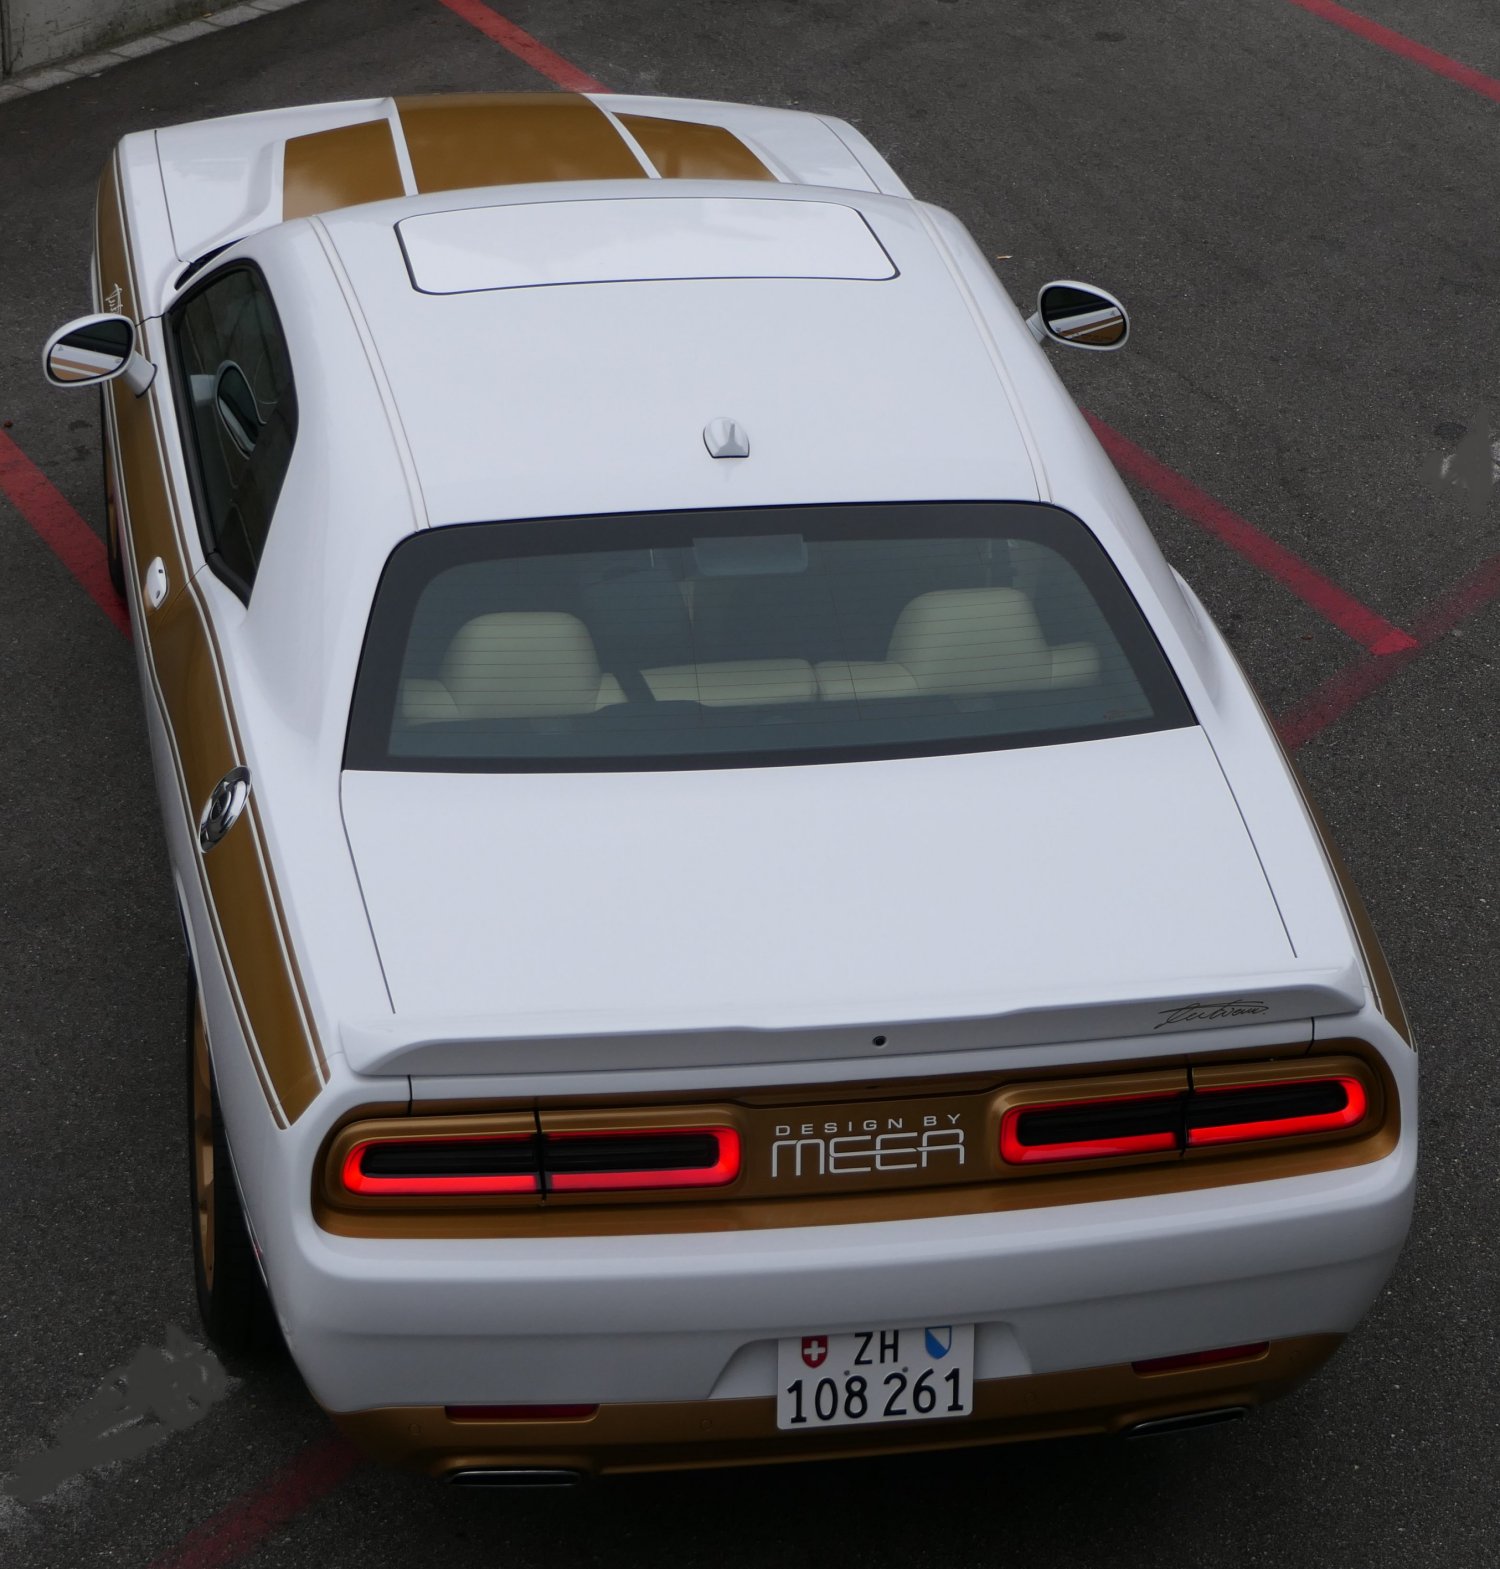
| the design of the hood looks great - 278 | the trunck is clean (no stripes) - 279 |

 |
|
| great job of car wrapping on the hood - 280 | did you see? even the sunroof was wrapped in white - 281 |
 |
|
| - 282 | - 283 |
 |
 |
| - 284 | - 285 |
 |
 |
| - 286 | - 287 |
 |
|
| - 288 | |
 |
|
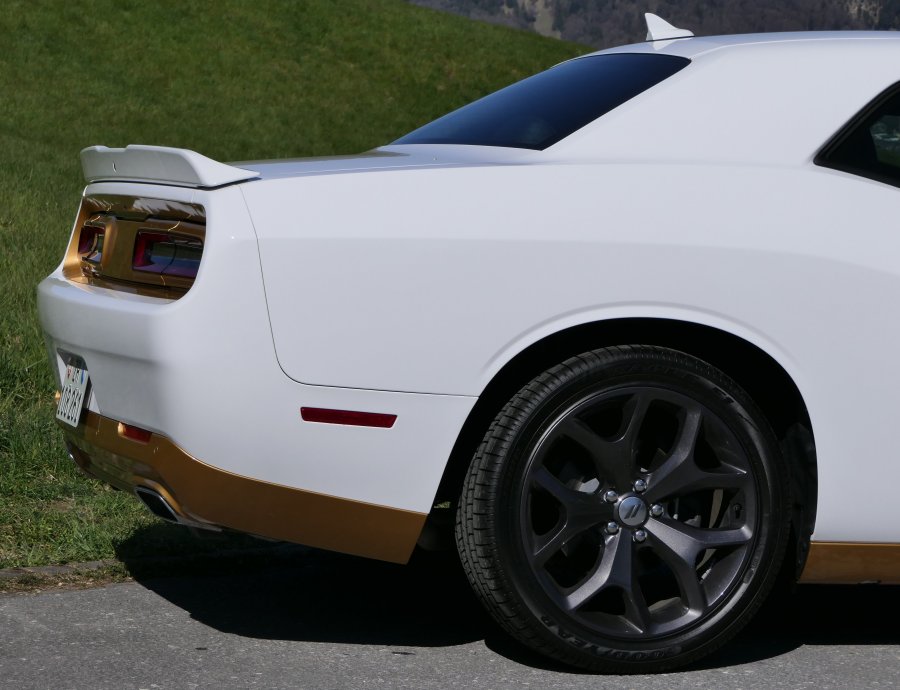
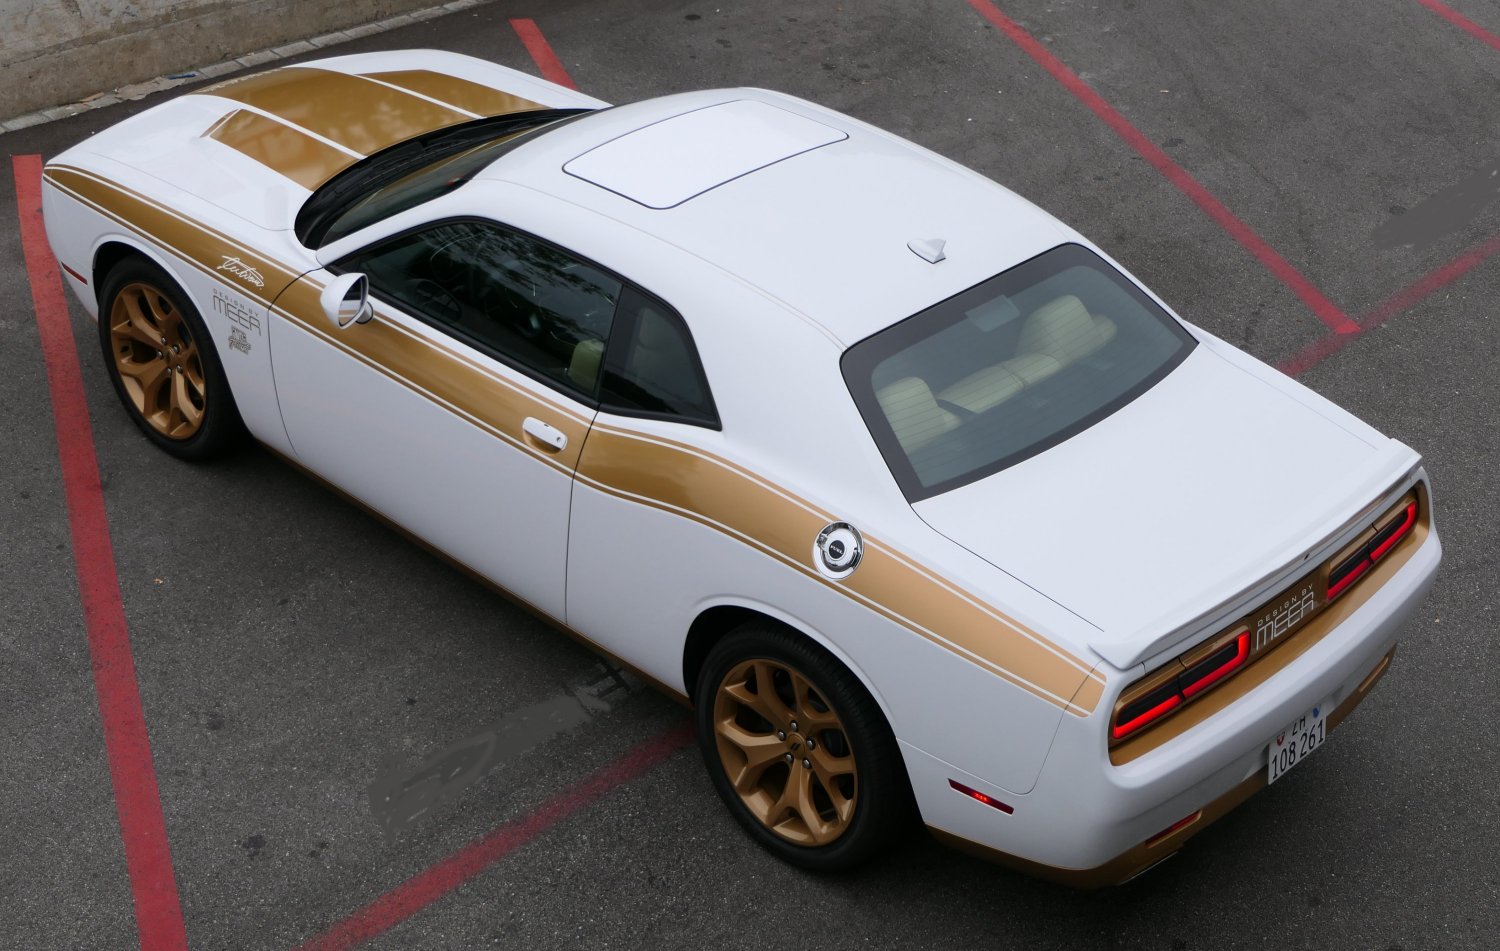
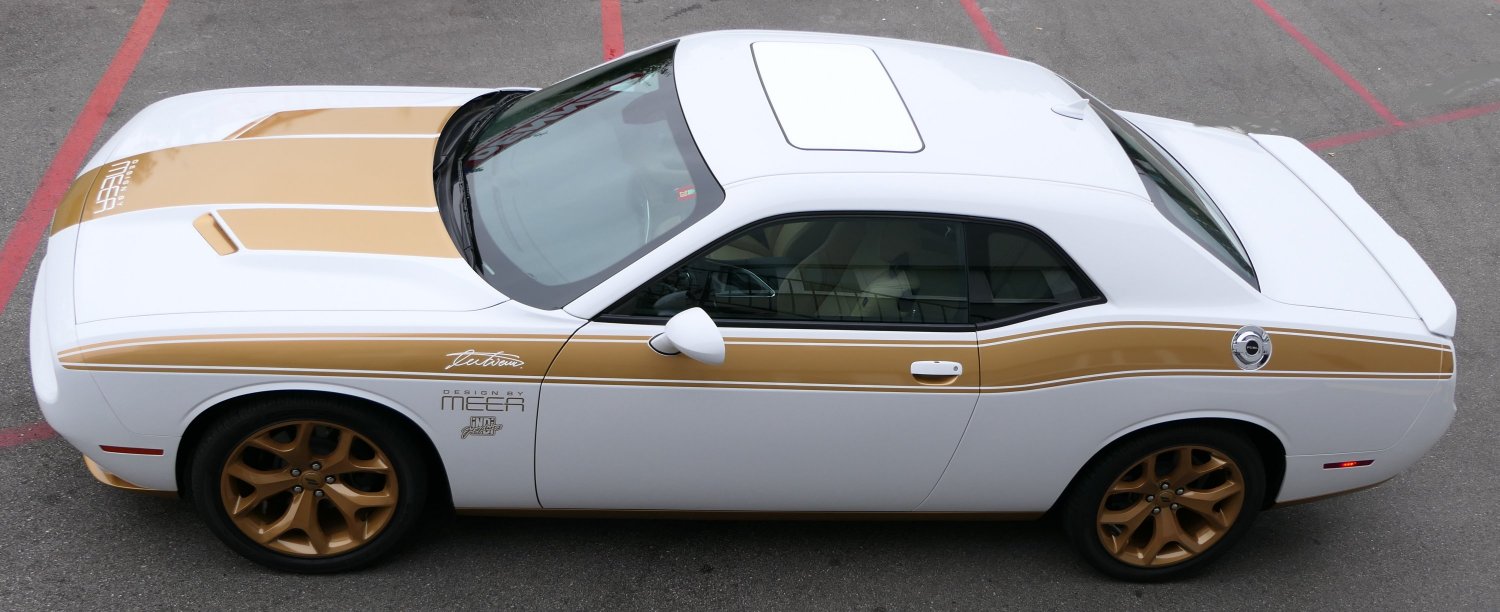
| the wheels have been powder coated - 289 | |
 |
|
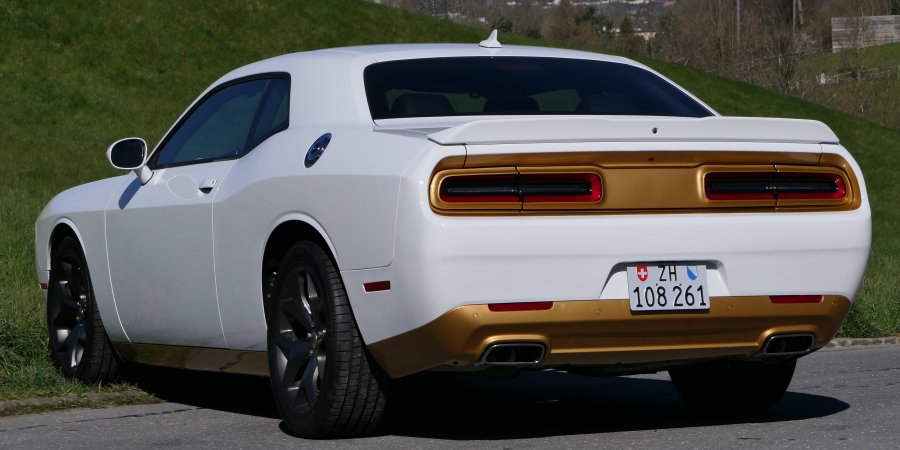
| stripes on hood and both sides are done with car wrapping - 290 | |
 |
|
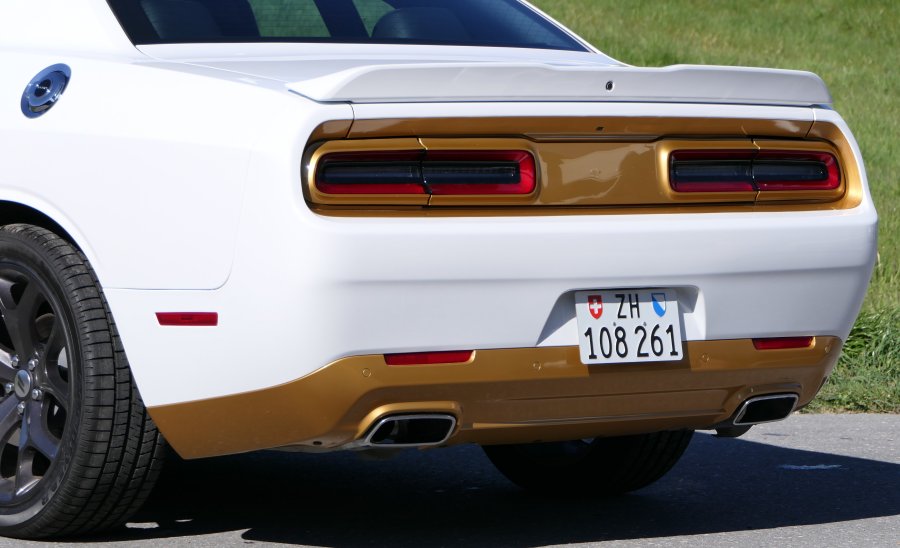
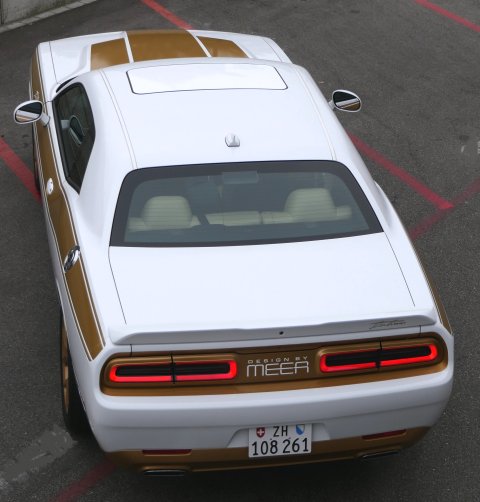
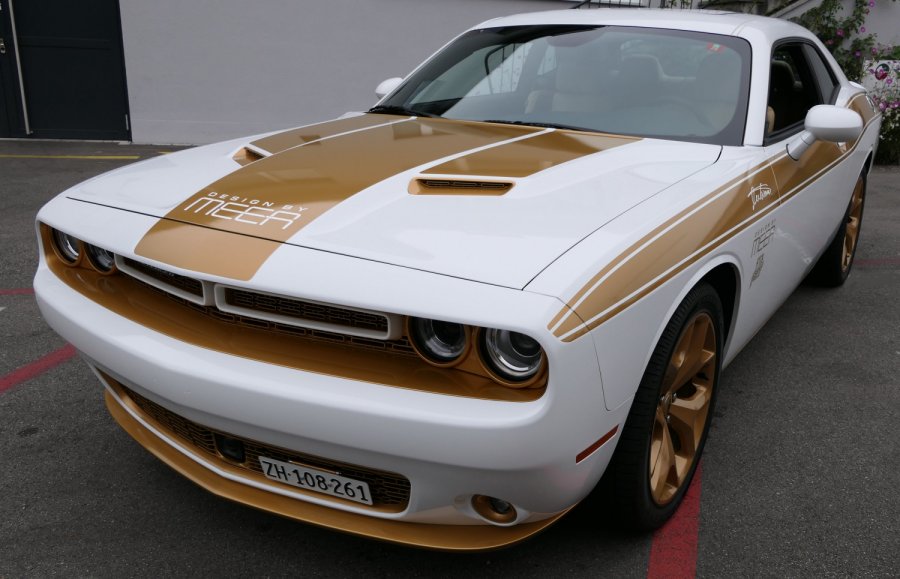
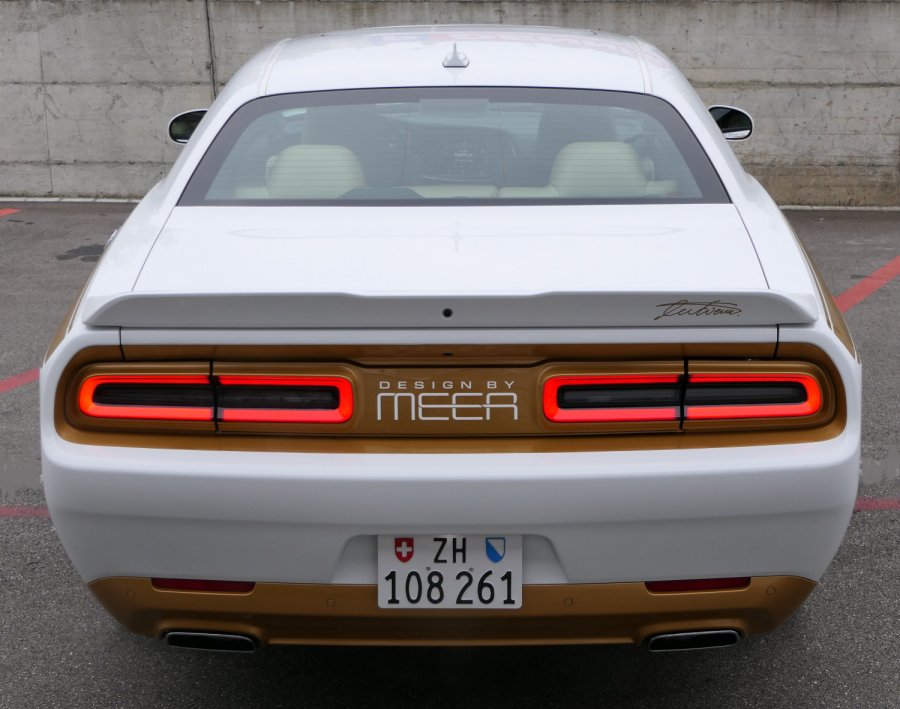
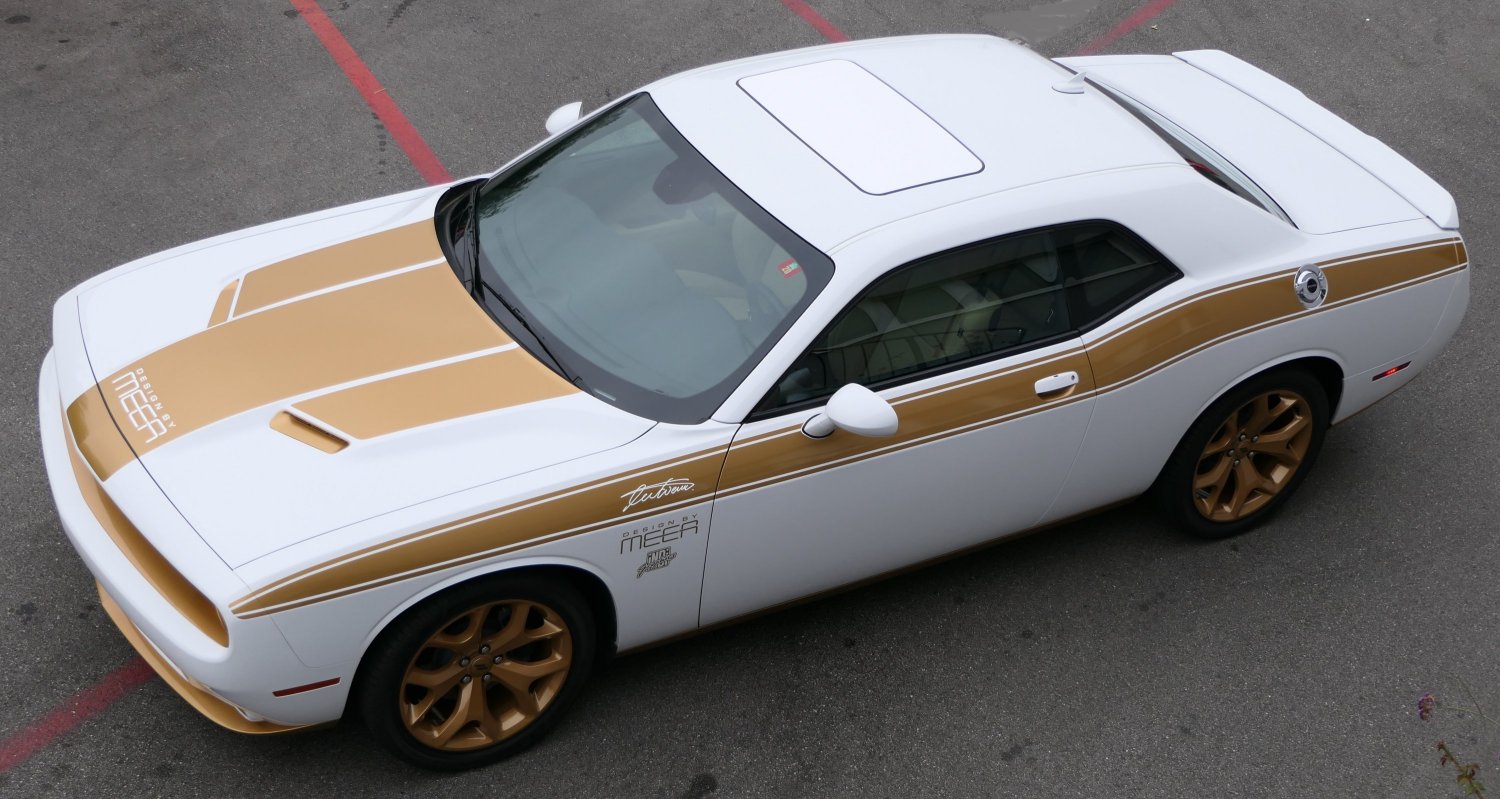
| front end, rear end and below was done with air brush painting - 291 | |
 |
|
| last picture from above - 292 | |
 |
|
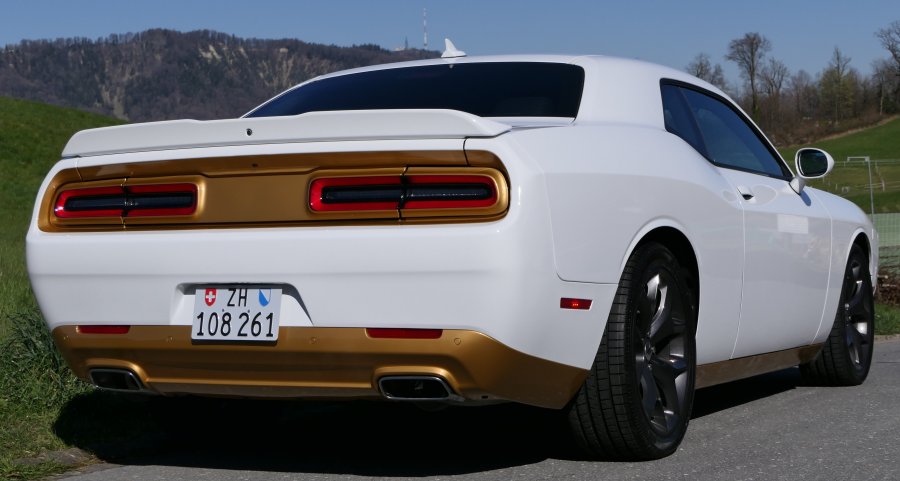
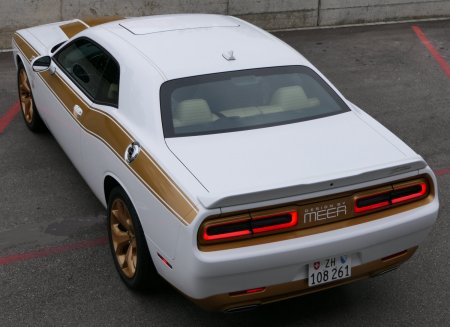
| finally, we are back on street level - 293 | |
 |
|
| the view is different on street level - 294 | |
 |
|
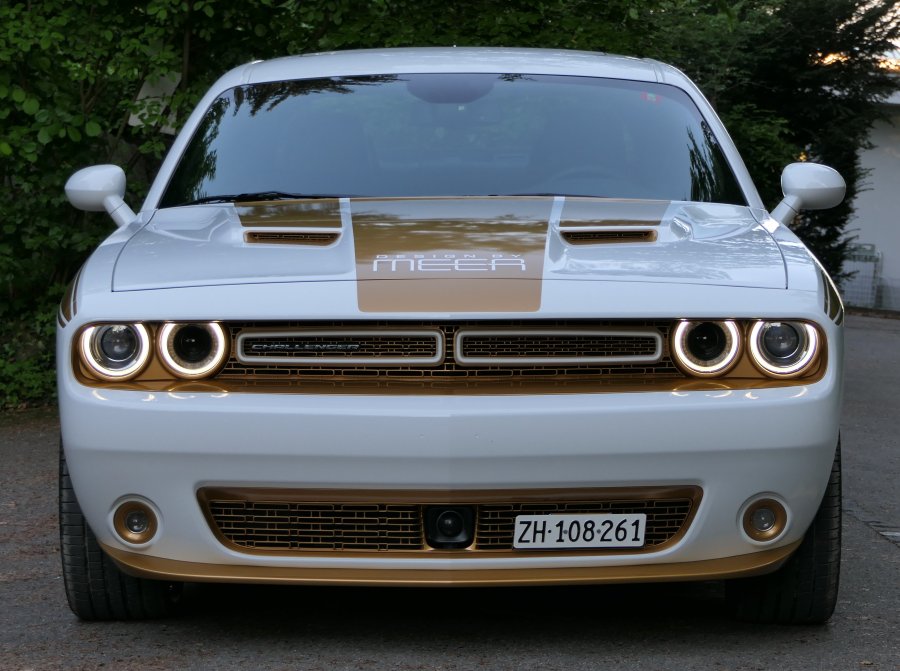
| now we are on eye level with the headlights - 295 | |
 |
|
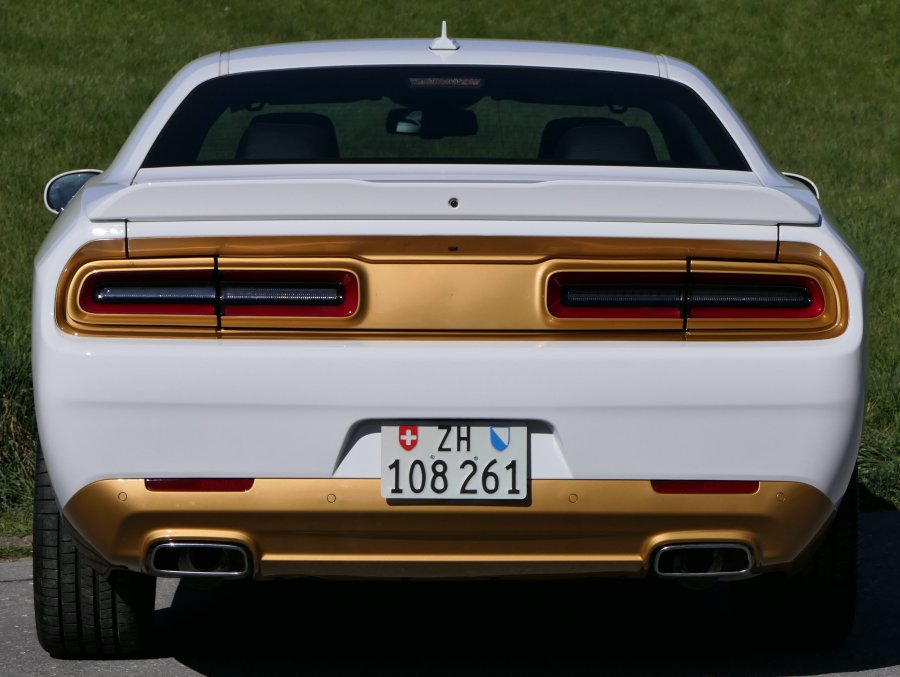
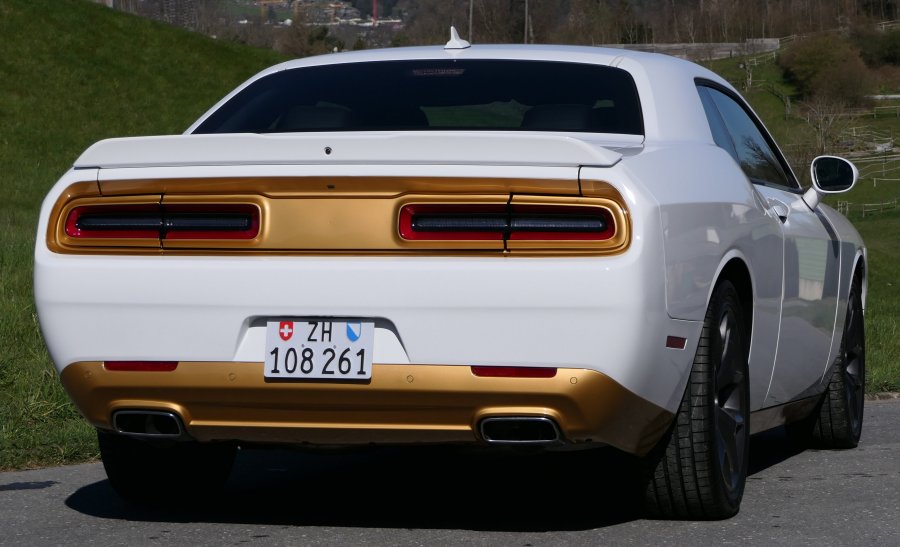
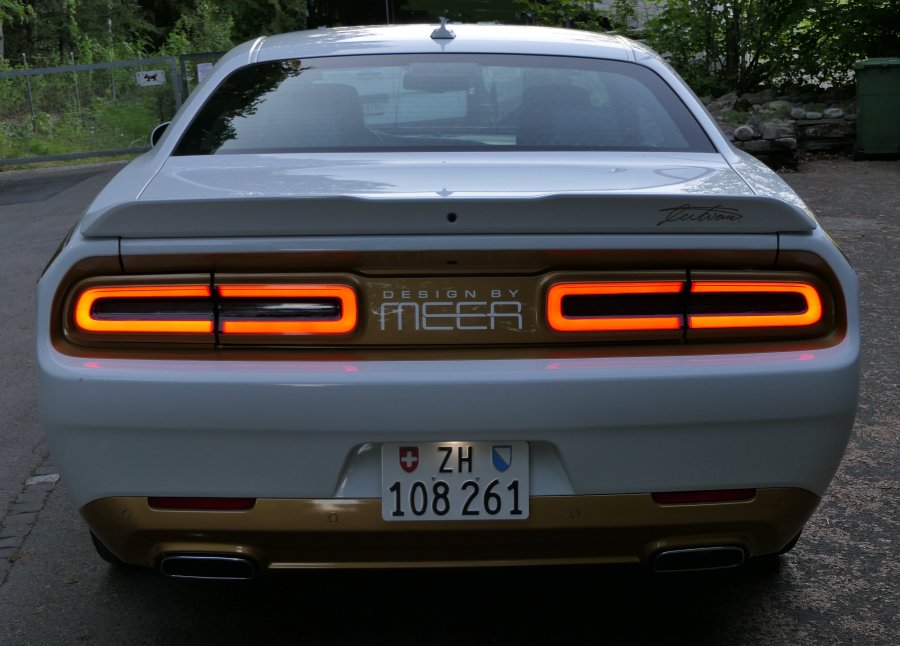
| and on eye level with the taillights - 296 | |
 |
|
| this is the final picture of this set (Part 7) - 297 | |
| Did anyone note: There is no more black outside except the tires !! | |
New Vehicle as
delivered from the factory (untouched) with design ideas:
new vehicle
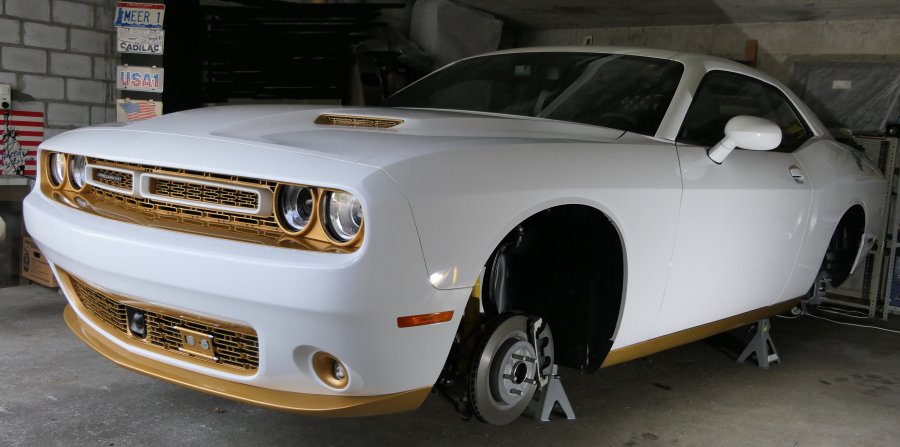
here we show some photos of the
"before and after" look to a custom design by meer vehicle:
before and after
| Summary of all companies involved in my Challenger project. |
| A) Seller of this vehicle: PRO CARS AG Garage (Sport Cars), 4800 Zofingen - www.procars.ch |
| B) disassembling and mounting (front and rear end) by Zimmerberg Garage, 8800 Thalwil - www.zimmerberg-garage.ch |
| C) Gold painting by Autospritzwerk De Filippis, 8802 Kilchberg - https://www.autospritzwerkdefilippis.com/ |
| D) Powder coating in gold of the wheels by Panthera Shop - Felgenprofi, 8181 Höri - www.felgenprofi.ch |
| E) Car wrapping and lettering by iNDi Graphics, 8404 Winterthur - www.indi-graphics.ch |
| F) Katzkin Leather (California, USA) did produce and deliver the seat covers and more - https://katzkin.com/ |
| G) Hof Sattlerei, 8903 Birmensdorf took care of mounting the Katzkin Leather and even more - https://hof-sattlerei.ch/ |
| H) Service and maintenance by Garage Dutli US-Cars, 8055 Zürich - http://www.dutli.ch/ |
| I) Inspiration by Chip Foose of Foose Design, Huntington Beach, (California USA) - https://www.chipfoose.com/ |
Please note:
The copyright of every photo belongs to the original photographer
go back to American Cars main page - click here
overall copyright by Werner Meer, Switzerland 2021