TRAINMASTER BY WERNER MEER  US-RAILROAD-SHOP KILCHBERG
HOCHWEIDSTRASSE 3  CH-8802 KILCHBERG (ZÜRICH) SWITZERLAND (founded 1977)
PHONE *41-44-715-3666, FAX *41-44-715-3660, E-MAIL trainmaster@bluewin.ch
Go back to our Website - click here

updated: January 4, 2016

Tehachapi Loop from the Air
Photo Collection

May 27, 2009
by Manfred Luft, Germany

I am very pleased to show some exclusive photos of Manfred Luft (ML).

A big thank you for sharing these excellent pictures with us.
Note: The copyright belongs to this gentleman. Do not use any photos without written permission.

Abbreviations found on this page: EB = East Bound, NB = North Bound, SB = South Bound, WB = West Bound, MP = Mile Post,
DPU = Distributed Power Unit (Helpers), EOT = End of Train, DBS = Double Stack Train, TOFC = Trailer on Flat Car (Piggy Back),

For bigger size photos - please click on the 4-digit number below each photo. Just scroll down for bonus photos.

Tehachapi Loop Aerial Photos
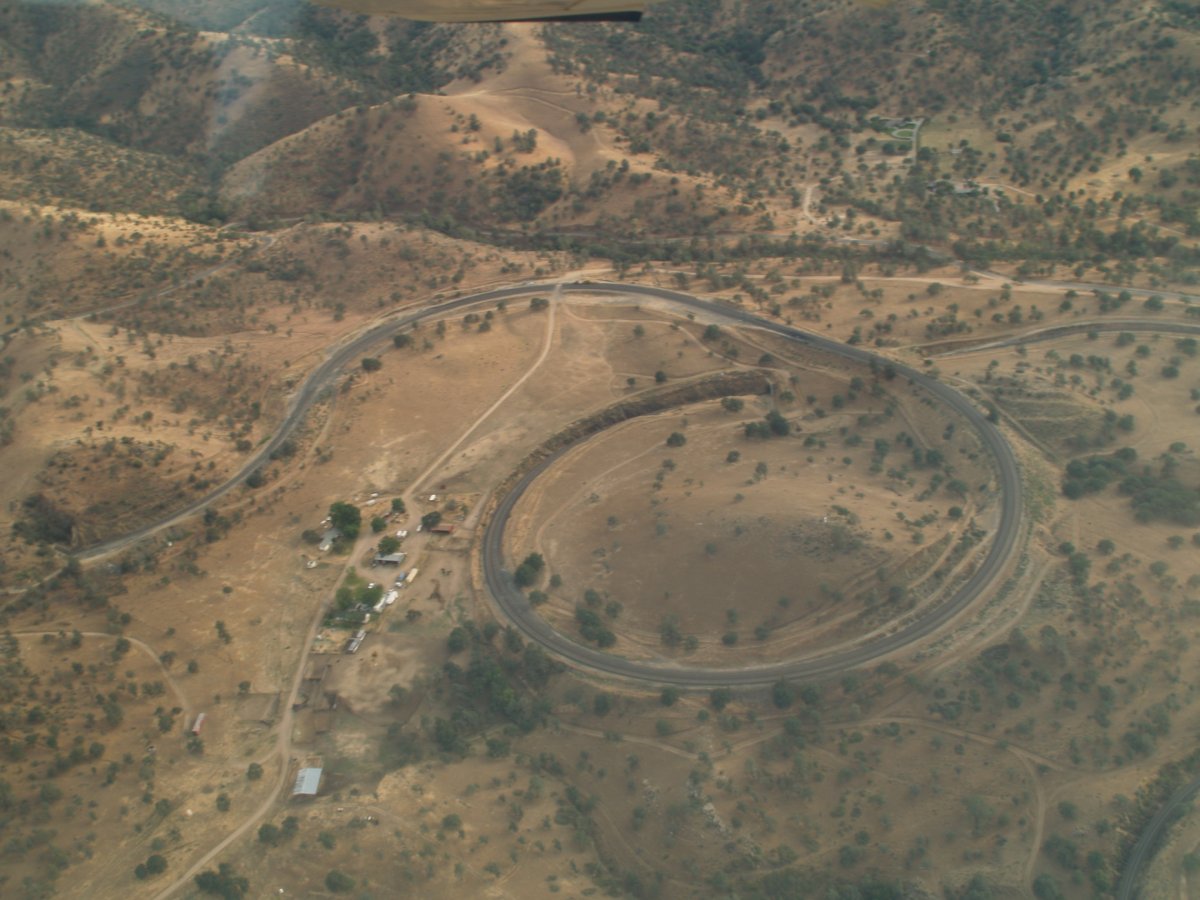
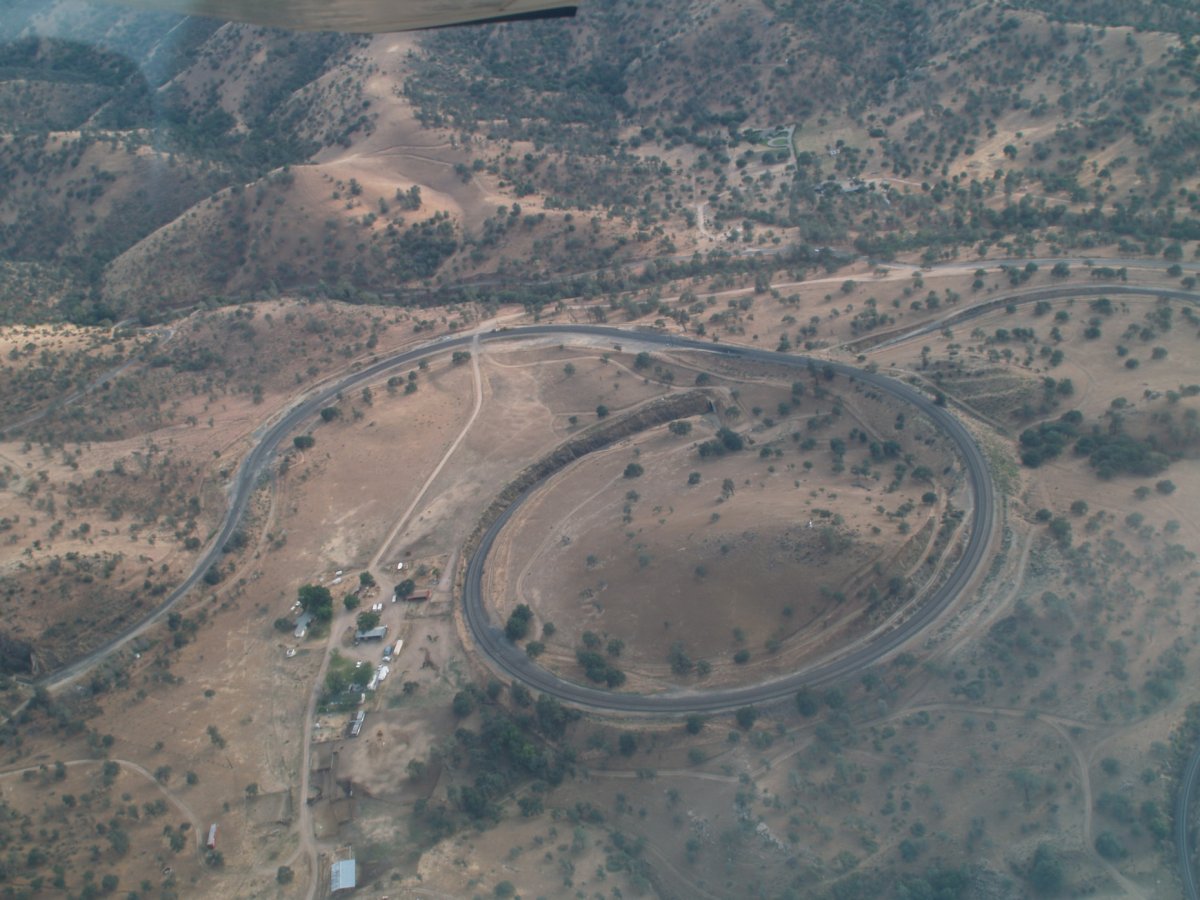
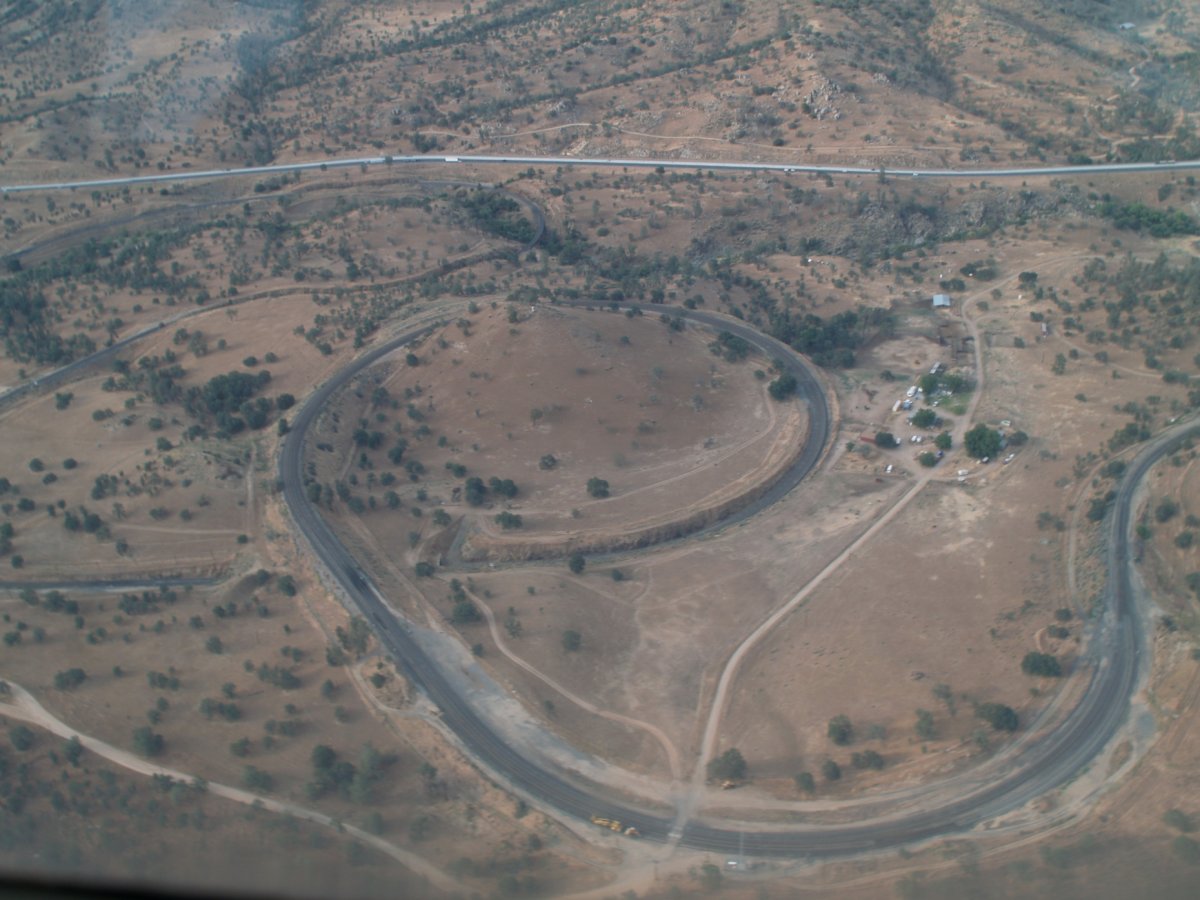
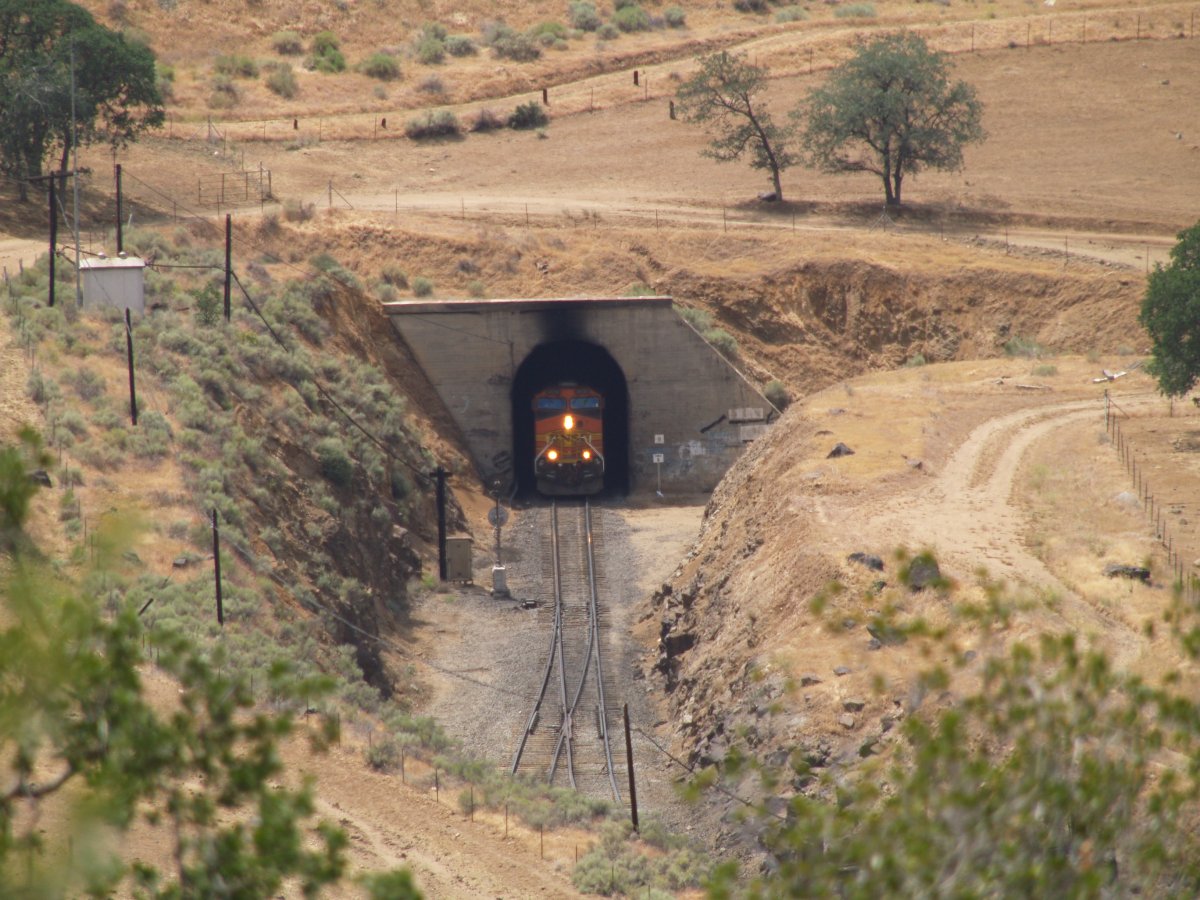
The last name of the photographer is "Luft" (in English = Air).
In other words, it was a must for Mr. Luft to take photos "aus der Luft" (from the air).
ML-01 ML-02
ML-03 ML-04
ML-05 ML-06
ML-07 ML-08
ML-09 ML-10
ML-11 ML-12


around the Loop
Of course, Mr Luft took also some great photos from ground level.
ML-4979 BNSF EB w/Hwy 58 in the background ML-5037
BNSF EB manifest climbing ML-5040 Locos are rolling over the bridge ML-5042
Finally, the first loco is emerging Tunnel 9 ML-5050 Loop range horses at left ML-5052
climbing the Loop - ML-5066 same train passing Marcel ML-5104
UP NB intermodal at Marcel ML-5145 UP 5075 = EMD SD70M w/flared radiators ML-5227

Bonus photos

a short visit to Barstow
On May 22, 2014 Mr. Luft went to Barstow. There are photos taken from the Yucca Ave. bridge (East departure tracks).
We can see an interesting consist on this EB manifest leaving Barstow, today.
BNSF EB leaving Barstow ML-0036 all 4 axle power on this manifest ML-3109
faded Warbonnet red, but still lettered for SF ML-3110 ex. Santa Fe, now BNSF 528 = GE B40-8W ML-3111
BNSF 525 = GE B40-8W ML-3112 BNSF 139 = EMD GP60M ML-3113
the locos are just rolling under Yucca Ave. ML-3114 ML-3115
ML-3116 ML-3117
ML-3118 nice to see a Warbonnet loco ML-3119
In addition, we can see some switching with a Slug around Riverside Drive, just East of the Depot.
Riverside crossing ML-0029 BNSF 1908 = EMD SD40-2 w/Slug ML-3108

All photos copyright by Manfred Luft (Over all copyright by Werner Meer)

Tehachapi Pass
Aerial Photos


by Dave Crammer (USA)

Updated: March 7, 2010
Between Bealville + Cliff, incl. Tunnel 3 + 5 - DC-83 See all 54 photos - click here The famous Tehachapi Loop - DC-67


Great movie (4 1/2 min.) of the Tehachapi Loop taken by a quadcopter:  http://www.youtube.com/watch?v=bLb_99f_JSE


Tehachapi Pass
Daggett - Barstow
Photo Collection
2003

by Werner Meer

Updated: February 28, 2010
Between Ilmon & Caliente 2 Auto trains - 30533 See all 87 photos - click here BNSF EB will enter Tunnel 9 and the Loop - 30621


Southern California

Tehachapi
July 3, 2008

by Werner Meer
Switzerland

Updated: 6/23/14
See all 135 photos - just click below
http://photos.trainmaster.ch/v/Tehachapi/


Tehachapi Pass
and Barstow
April/May, 2013


Photos by Eugen Haenseler

Updated: 6/26/13
5/01/13 Caliente Curve from above - 248 See all 156 photos - click here 5/04/13 SF GP60M in Warbonnet colors - 357


Tehachapi Derailment
May 20, 2013


Photos by Robert Westover (USA)
and Ryan Slaton (USA)
Gerold Eckl (Austria)

Updated: 6/27/14
5/20/13 Tunnel No. 10 above the loop - 1283 See all 45 photos - click here 5/20/13 Derailed Auto Carriers MP 353 - 1289


Tehachapi Two Tracking
Project
2015 - 2016


Photos by Robert Westover (USA)


Updated: 12/20/15
RW: Shoo-fly goes around Tunnel No. 10 - 3404 See first 102 photos - click here RW: Close up of Tunnel No. 10 - 3407


Tehachapi Pass
2013 - 2014 - 2015


Photos by Ryan Slaton (USA)

Updated: 9/01/15
RS 6/21/14 Cliff - 4071 See all 123 photos - click here RS 6/22/14 Warren - 4073

Go back to Photo Gallery Main Page - click here

Go back to Cajon Pass Main Page - click here

Home Cajon Pass Photo Gallery HO Layout